Dragon Quest VI (ドラゴンクエストVI 幻の大地), released 12/9/1995, developed by Heartbeat, published by Enix
It’s been quite a long time, but we’re back to Dragon Quest. DQ5 was one of the earliest games I played for the blog and it’s still one of the best. 3 years was the longest gap between DQ games (although the space between 6 and 7 would be longer).
The basic gameplay is familiar; as usual DQ continues with the same general feel, familiar sound effects, Toriyama’s monster designs, and such. There are a number of interface improvements (like the Bag that stores extra items), but the big gameplay change is the new class system. DQ3 had a class system that was fairly rudimentary — you chose a class at the beginning of the game for each character (except the Hero) and could change that class at Dharma Temple upon reaching level 20. There was a hidden Sage class that could only be accessed by a “Goof-off” or with a hidden item.
In DQ6, about a third of the way through the game you revive Dharma Temple and can then choose classes for characters. Each class has 8 levels, and the levelling is based on fighting a certain number of battles. There are second-tier classes that you unlock by mastering two basic classes, and there is a Hero class that can be accessed by mastering one second-tier class for the main character, or all four second-tier classes by anyone else. Finally there are two hidden classes that can only be accessed by using items, one of which can only be found in the post-game content. (This system would be repeated in DQ7 with some modifications).
This brings a large number of new skills and abilities to the game. In battle there are many more options that do not cost MP, leading to something of an imbalance (the classes are inherently imbalanced at any rate).
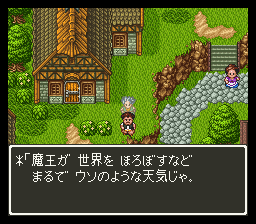
The game begins with a dream sequence where the main character (Kurisu) and some companions are taking on the demon lord Mudo. But, it turns out this is a dream sequence, and Kurisu wakes up in his home village Lifecod.
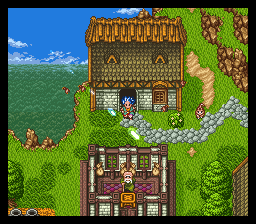
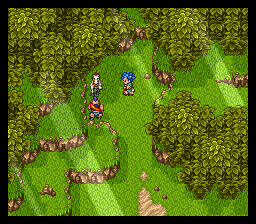
The graphics are much improved from 5 and another good example of late-SFC era pixel art. Kurisu has been chosen to go down the mountain to sell some town goods and buy a tiara for his sister, who will be the priestess of this year’s spirit festival.
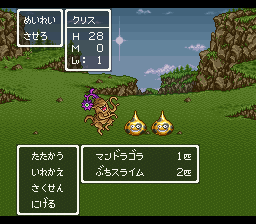
Rather than the usual blue slime to start off, they give us mottled slimes. This mountain path is actually one of the harder dungeons in the game because it’s just weak Kurisu and you have no Return/Escape spell. It takes some grinding or just exploring before you can make it down. However, I appreciate as always that if you die, DQ sends you back to the previous place you saved with any items/XP intact but half your gold. This game adds a bank you can store money in that will not be affected if you die.
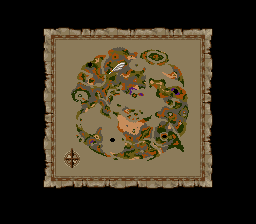
Anyway, Kurisu makes it to Sienna at a beefed up level 4. This town has a bunch of bazaars and other things. You can buy a world map and a thief’s key (I think the World Map is not so useful despite what walkthroughs way; you do want it eventually but you can come back here later and buy it). I spent all my money on those things rather than equipment.
Turns out the tiara maker left down to the west and hasn’t come back, so Kurisu hunts him down hanging by a thread on the edge of a huge hole. Kurisu saves him but falls down the hole instead, and finds himself in some kind of parallel world where nobody can see him.
Apparently this world is having trouble with Mudo as well. In any case there’s not much to do here except take the well back to the surface and head back to Sienna — the tiara maker is so grateful that we saved his life that he gives the tiara for free. Kurisu heads back to Lifecod to do the spirit ceremony.
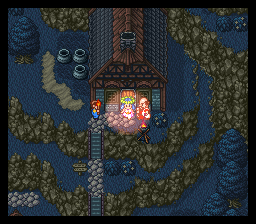
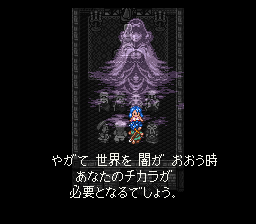
During the ceremony, the spirits come and tell Kurisu that it’s his destiny to go beyond the village and fight the darkness that’s threatening to world. So Kurisu gets a letter from the elder so that he can pass the barrier gate, and heads to Reidock Castle where the king is looking for warriors to fight against Mudo.
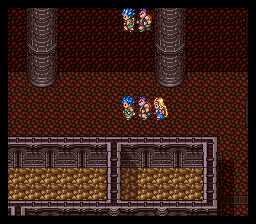
In Reidock, Kurisu meets Hassan and goes out to compete against other people to recover an item from the Trial Tower.
This is one of the few dungeons in the game that has a good construction — one of my biggest disappointments about this game compared to 5 is the dungeons. 5’s dungeons had a lot of individuality and were more than just tunnels and treasures. I always appreciate games that do this (Breath of Fire 1 was another good one for this). DQ6 trends much more towards the “tunnels and treasures” style that is a staple of lower budget games and old NES-era stuff.
Now that Kurisu passes the test, he’s given the mission to find the Mirror of Ra so that they can expose what’s going on with Mudo. Hassan wants to go to, but they decide first to tame a wild horse that will give us the cart (enabling us to have a bigger party).
Nobody really knows where the Mirror of Ra is so we set out without much of a goal, only to happen on yet another one of those holes to the other world.

We do find someone here in San Marino that can see us — Mireyu, who along with Hassan was the party in Kurisu’s dream at the beginning of the game. Apparently she was also transparent at one point but an old woman helped her. Said old woman can make us visible if we bring her a Dream-seeing drop (the name here seems to be a clue to later revelations). This does in fact work, and now that we’re visible we can take a ship to the Reidock Castle in this world.

In Reidock, it seems that the King and Queen have been sick for a year, and that Kurisu is mistaken for the prince of the kingdom (if you buy the Noble Clothes at the store). Although they quickly figure out that Kurisu isn’t actually the prince and ban him from the castle.
At this point we do a little story that switches between the two worlds, and starts to hint at what’s really going on — we switch to the starting world after sleeping and recover a ring for an old woman who says she dreamed of us. But then we get the key for the Mirror Tower and it’s time to get the Ra Mirror.
The tower gives us our fourth party member, Barbara, another ghostly person (who we can turn solid with another Dream Drop) — she had come to the tower hoping that the Ra Mirror could tell her what was wrong. In any case, we recover the Mirror and it’s time to go back to Reidock Castle (in our world, since they still won’t let us into the castle in the other world).
But the mirror reveals a strange truth — the “King” is actually the Queen, who says that the real King is apparently Mudo somehow. So we need to go Mudo and reveal his true form with the mirror. Mudo’s castle is far to the SE and requires going through a pretty long and involved cave — fortunately once you get through there you can use Rura (the town warp spell) to get back to the castle.
Mudo himself is somewhat challenging but I was able to beat him at level 16. The Mirror of Ra reveals him to be the King of Reidock…the King from the alternate world. Although this is where the truth of the worlds is revealed: the world you begin the game in is the Dream World, and the “alternate world” is the real world. And back in the real world, we have to deal with the real Mudo.
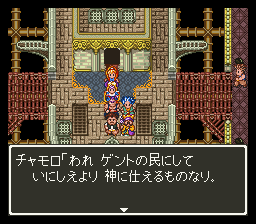
This requires getting the God Ship from the Gent people; you also get the 5th party member Chamoro here, as well as the Gent Staff which is very very useful (casts Behoimi when used as an item). Now it’s off to Mudo, which requires another long cave and castle. In the castle, Hassan comes across a statue that he merges with to become his true form (presumably the statue is the stone figure from the opening).
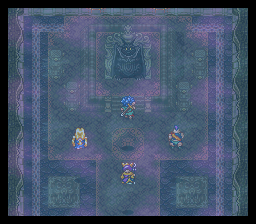
When the party reaches Mudo, the same thing happens at the very beginning of the game — he turns them all to stone and Kurisu wakes up in his bed in Lifecod. I think the suggestion here is that what happened in the opening was not actually a dream, but was (perhaps?) the Prince of Reidock taking on Mudo for real. But I’m not sure. In any case the Ra Mirror reveals the truth and Mudo himself fights us.
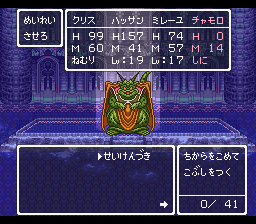
This is a very difficult fight. Mudo has two forms, the first one he appears with two other monsters (who he’ll summon again if you beat) and the second can attack twice. It helps a lot to have Skult (the party def up spell) for Mireyu, and Zaoral (the revive spell) with Chamoro. I was at level 18 when I beat him.
Afterwards, the Queen of Reidock tells Kurisu that he is actually the Prince but needs to find his true form (presumably the statue, just like Hassan did) and sends us out with the Gent ship. Darma Temple has also revived (in the dream world) so we can use classes. This is what I chose:
- Kurisu: Goof-off (I should have done Martial Artist 2 levels first to get the spin kick move, I did this after mastering Goof-off)
- Hassan: Martial Artist
- Mireyu: Priest
- Chamoro: Magician
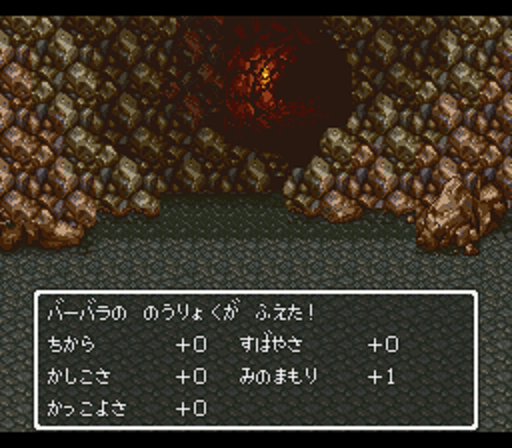
- Barbara: Monster user
I’m not sure that monsters are especially useful but I decided to make one anyway.
This is how far I got when I played this game many years ago when the English patch first came out. At this point the game opens up a lot and there’s more freedom, but this is a good place to end this post.
Aside from the job system, the plot of this game is kind of reminiscent of DQ3 in that both of them have a fakeout final boss.
DQ6 is such an odd little outlier. For such a beautiful SFC game, it seems to have fallen by the cultural wayside compared to the impact DQ5 made. I wonder what the retrospective view of it is in Japan?
Been following the blog for a long time but never posted before – you’re an inspiration, keep it up!