SFC Game 125 – G.O.D. Mezame yo to yobu koe wo kikoe

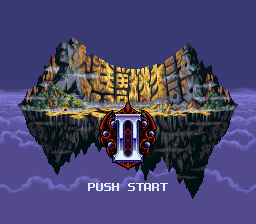
G.O.D. (G.O.D~目覚めよと呼ぶ声が聴こえ~), released 12/20/1996, developed by Infinity, released by Imagineer

This is the final game of 1996. The strange sounding title seems to be a Japanese translation of the German chorale Wachet auf, ruft uns die Stimme (“Sleepers wake, a voice astounds us” in the usual translation sung nowadays), which was the basis for one of Bach’s best-known cantatas BWV 140.

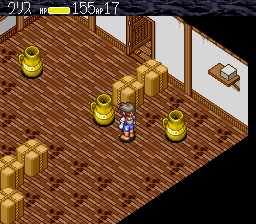
The game begins with you choosing your name and the title you call your mother by (I picked “okaa-chan”).

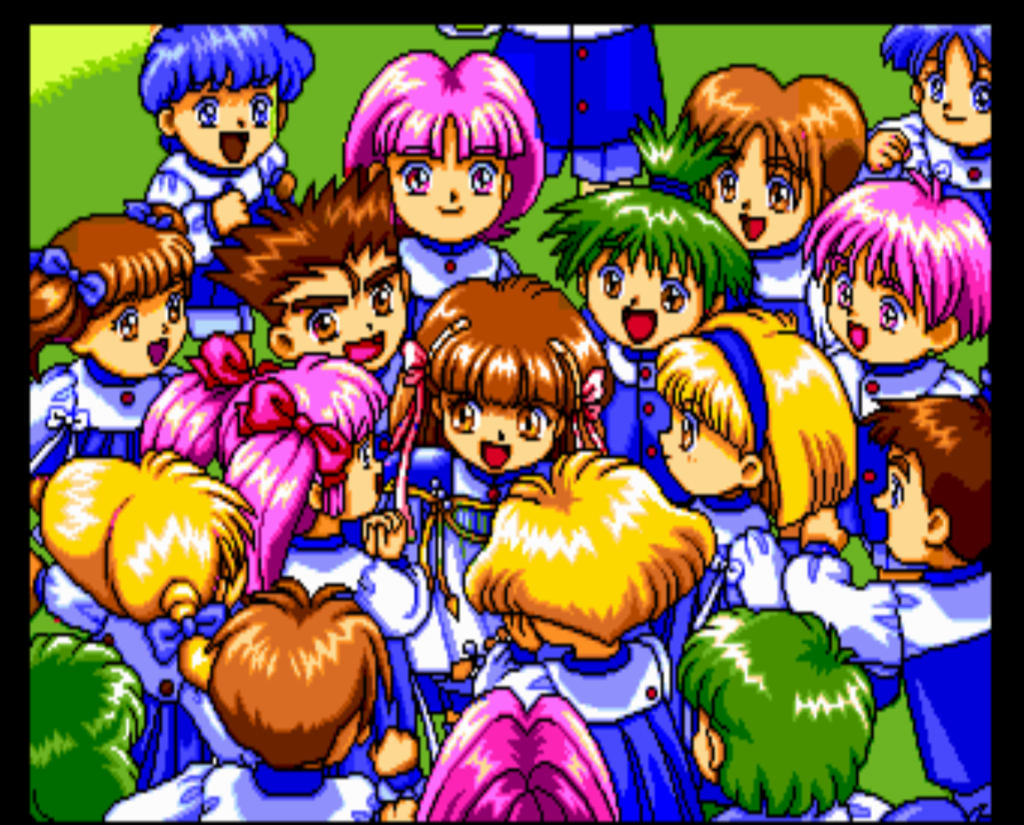
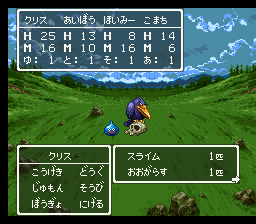
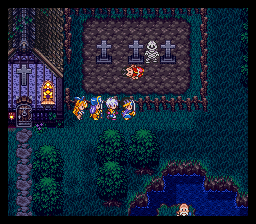
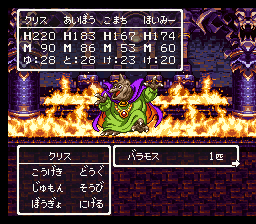
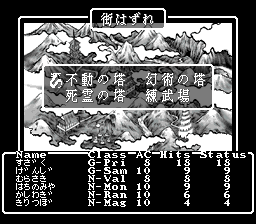
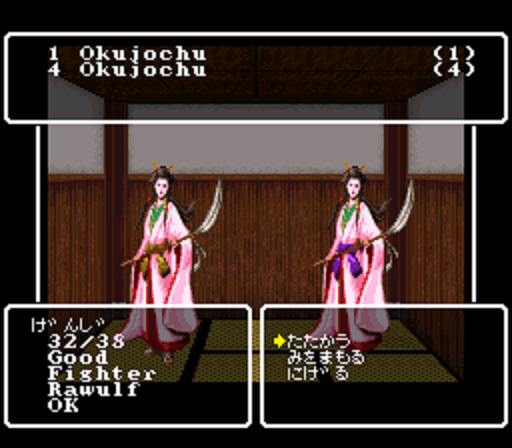
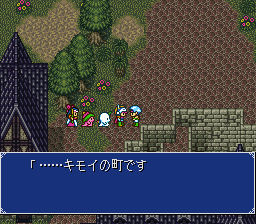
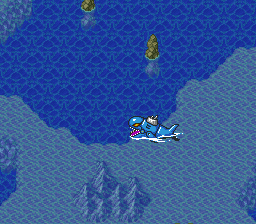
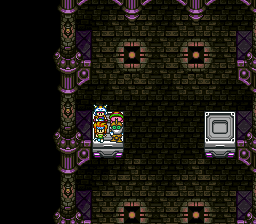
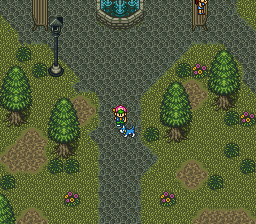
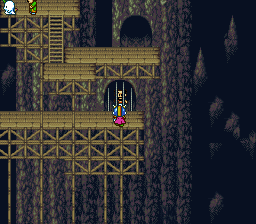
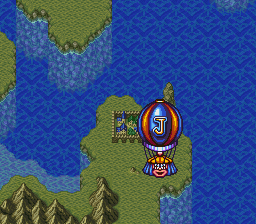
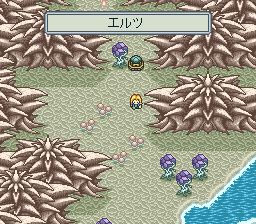
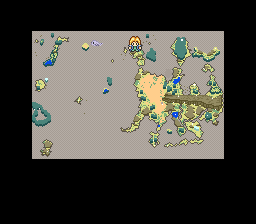
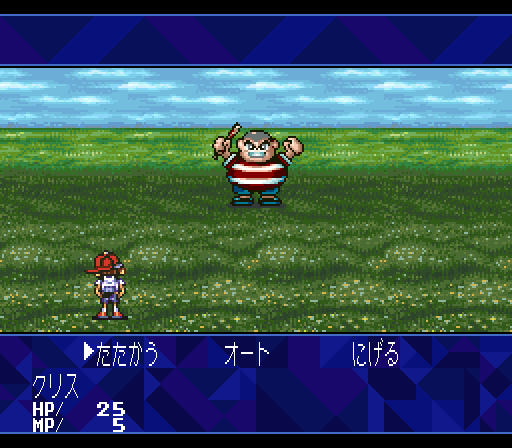
Kurisu is riding his bike to Hokkaido by himself for some reason. You can talk to various people in the town and then it’s off through the fields. Eventually Kurisu reaches Tsubane village (I’m not sure if this is a real place), where some bullies challenge him and it’s time to learn the battle system. At the moment all we can do is attack, though.

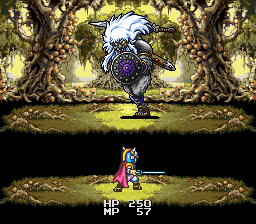
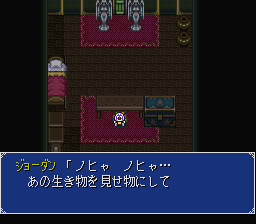
This game uses the hi-res text system that is found in other games of the period. After beating the bully Kurisu goes to investigate a ghost on Tsubane mountain, where he finds a boss bat that becomes a recurring comic character throughout the game.

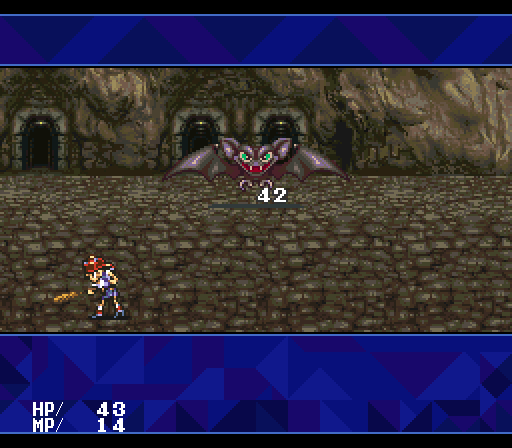
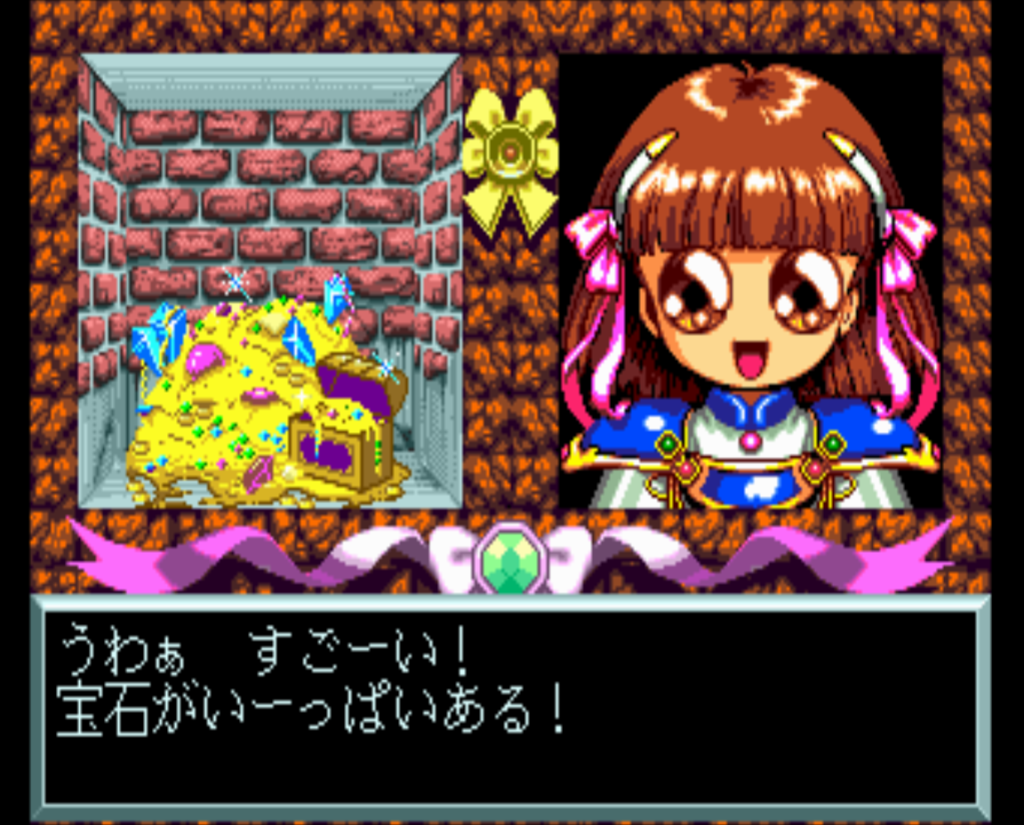
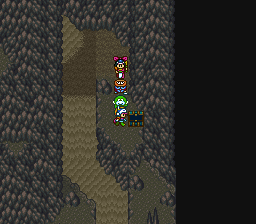
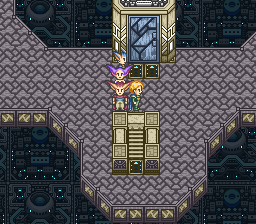
After beating the bat, Kurisu comes across a “god stone” inside the cave.

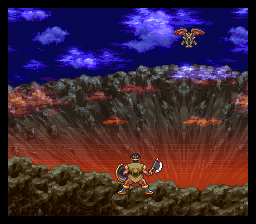
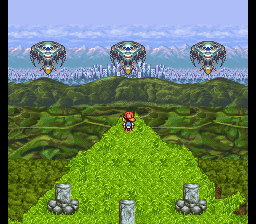
He hears a shaking and then goes out to see alien ships invading the Earth.

The scene then suddenly shifts to 10 years later (2006) where Kurisu is working for an organization called BLESS that is dedicated to fighting the aliens. It seems that Kurisu was an amnesiac but now has recovered his memory (the first part of the game). Kurisu immediately goes back to Tsubane Mountain to find the god stone again, which awakens an unused part of his brain.

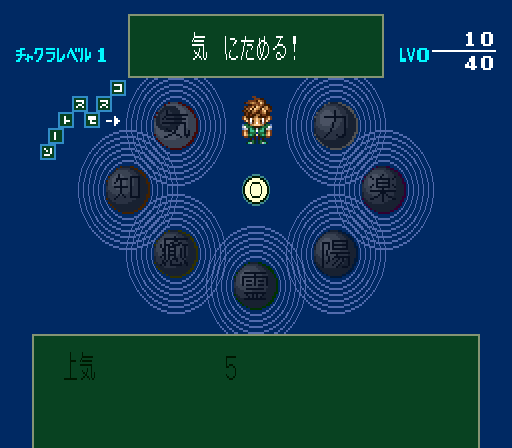
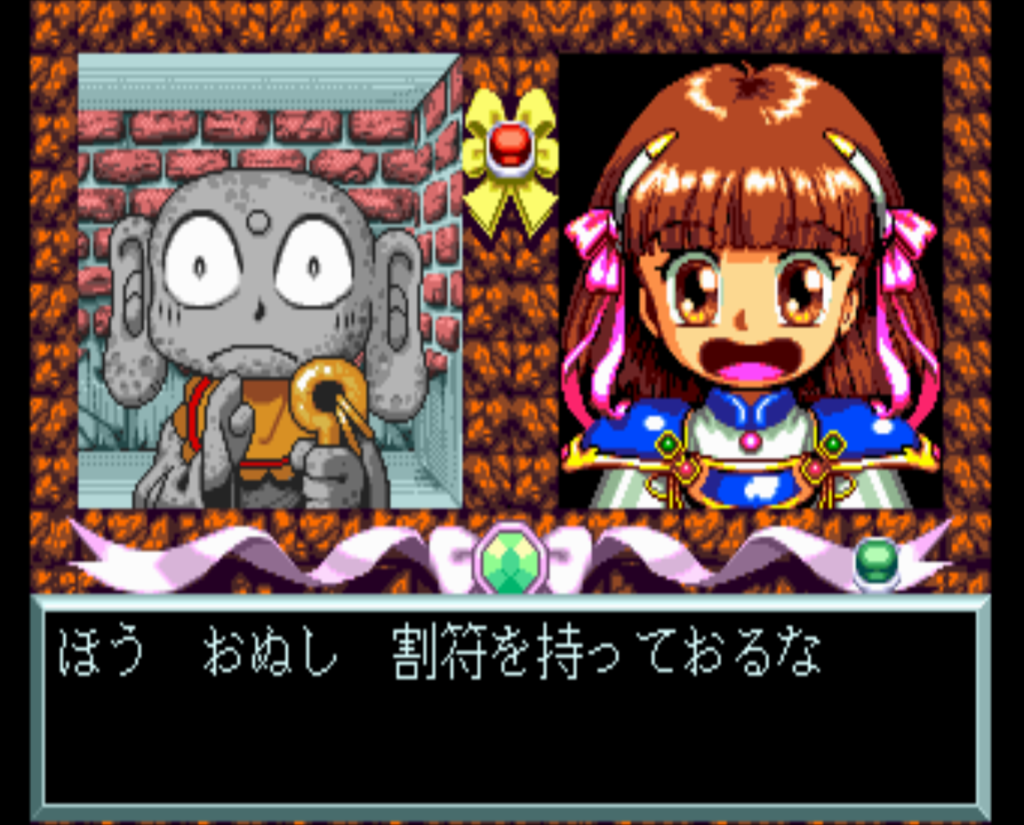
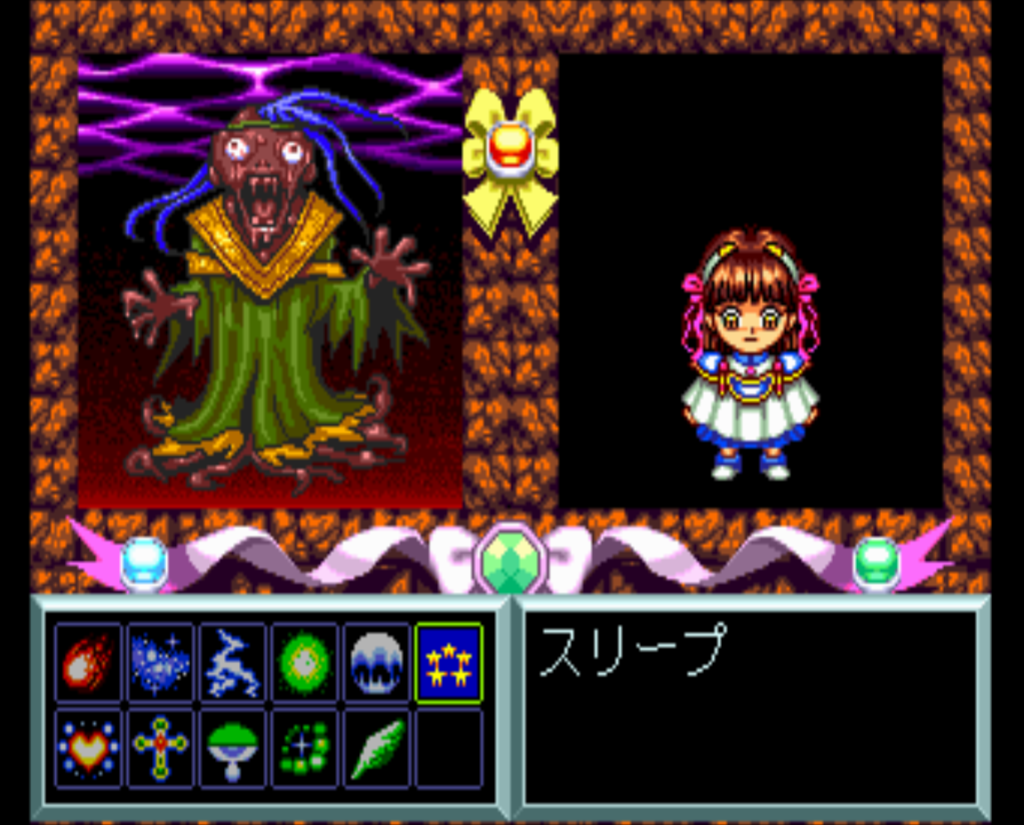
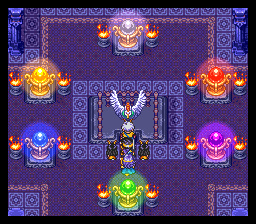
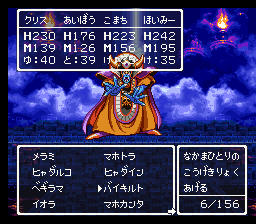
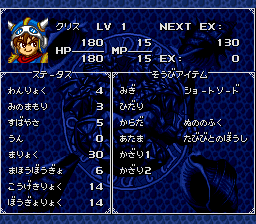
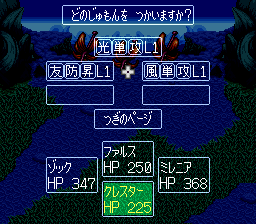
Each time you find one of the seven God Stones, you can unlock an additional level of Chakra power. To actually learn the Chakra abilities, you have to get Cosmo Stones from beating the monsters, which will add points to the ability you have selected. You can earn points in a different ability from the one you have equipped to use the powers from. Once you reach Level 4, you can pair two abilities (if they are at least level 4) and then you’ll get to use both of them, plus get an additional passive ability. At level 7, all of the Chakra powers for that command will get a big upgrade.

Personally I found that prior to reaching the level 4 combos, the Chakra commands were not very useful (with the exception of the Hundred Fist attack technique). However some of the L4 commands are quite powerful — particularly the ones that absorb HP/MP from the enemy, recover HP/MP, and let you attack twice.

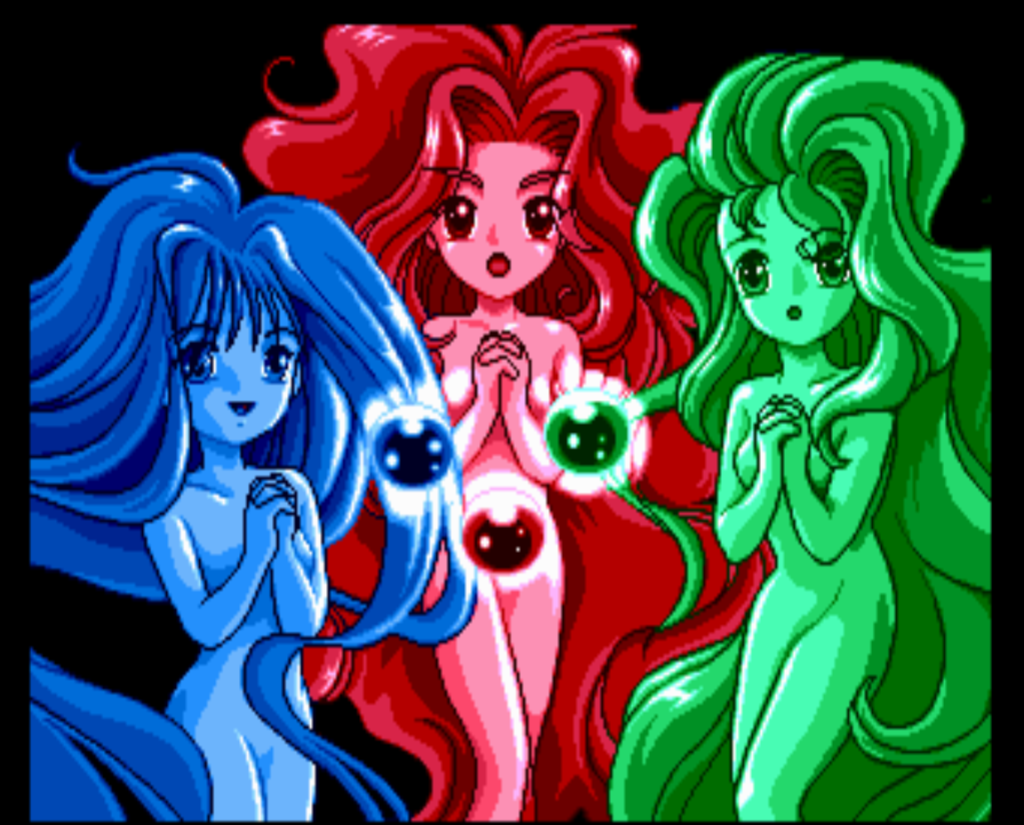
In addition to the Chakras you also have Psycho powers which are basically spells.

However by this point the biggest issue with the game becomes clear — how slow and sluggish everything is. The key/button response is slow, there is loading time, and battles take a long time just because everything seems to be moving through molasses. Although I thought that overall this game was pretty good, this sluggishness really keeps it from being in the top tier of games. It was remade for Playstation in 1998 and from what I can tell from videos, the PS version runs much more smoothly.

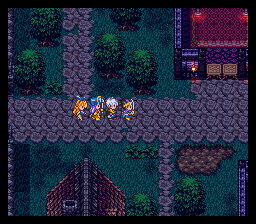
The first 2/3 of the game or so involve travelling around the world, finding the God Stones, and gathering the game’s three companions:

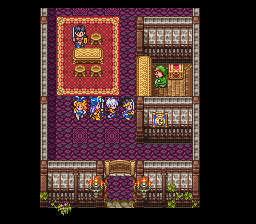
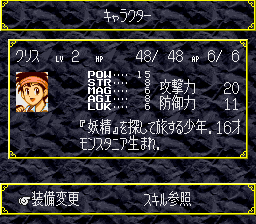
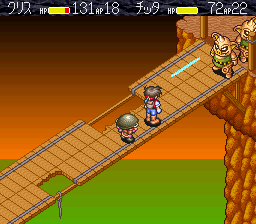
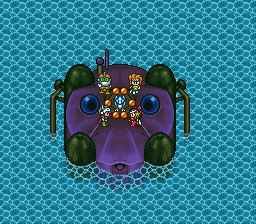
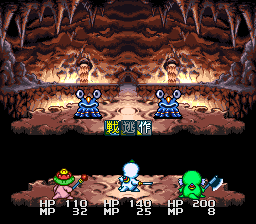
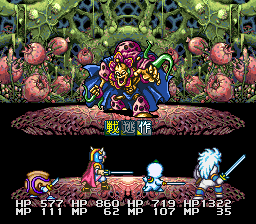
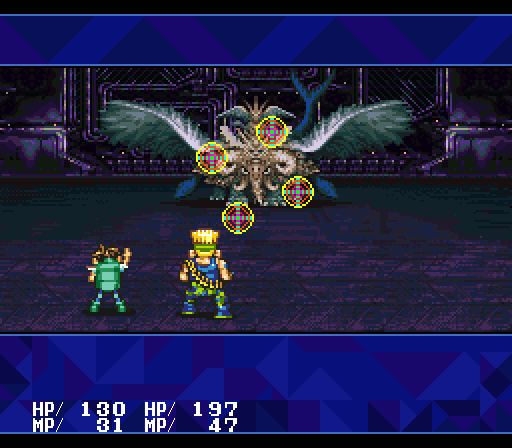
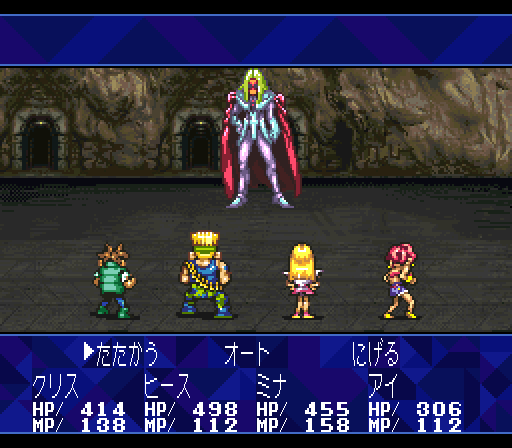
  • Heath (the dude in the above picture), who works at the Neo Kobe bless group and fights with guns. He’s powerful but his defense against spells is so low he often dies, and his speed is low as well. Later on with a x2 attack effect he’s quite good.
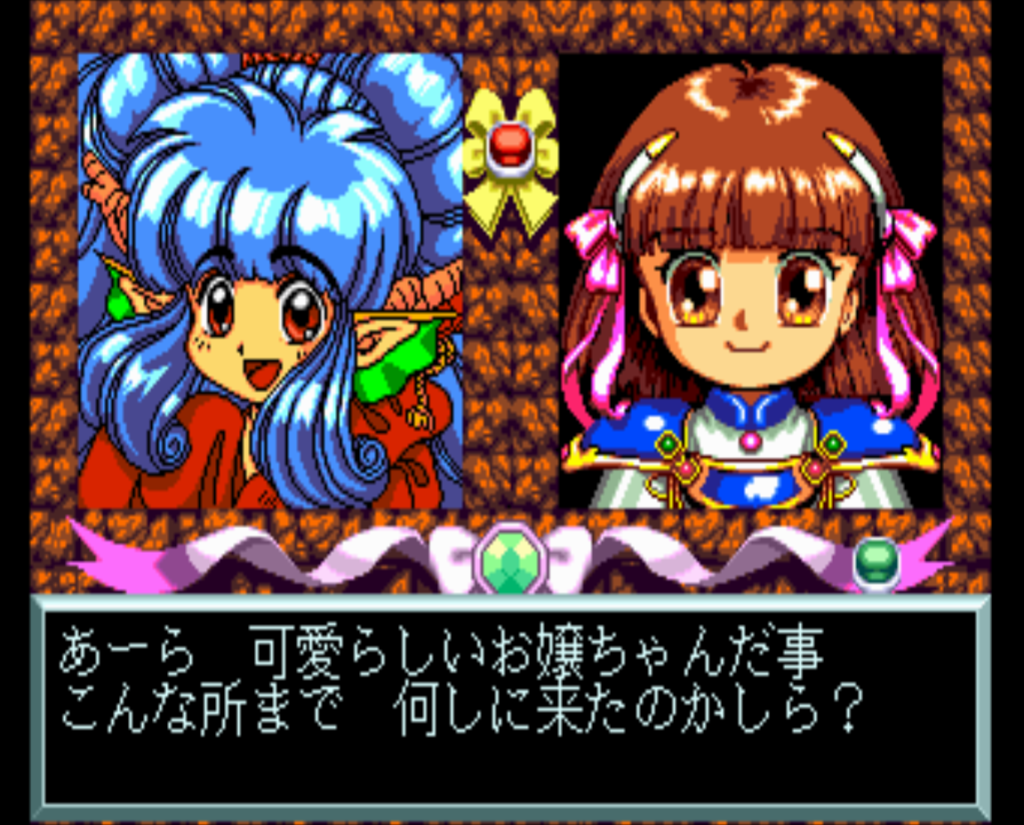
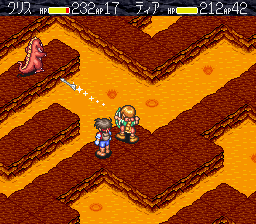
  • Mina, a girl with psychic powers who can read people’s feelings and intentions. She is the primary healer although she can cast some damage spells as well. I mostly used the absorb HP/MP ability although later I switched that to the “recover MP” ability.
  • Basil (I guess?), some kind of Tibetan monk who used to be a thief. He has a lot of powerful attack spells; I didn’t find him as useful as Mina but he can offer some support.

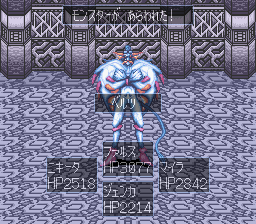
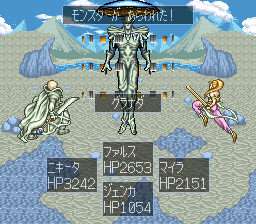
The healing spells and items never seem adequate to keep up until the very end of the game. There’s no point to the “Miss You Turbo” item which raises dead with 250 hp, because that’s functionally the same as the “Miss You”‘s effect of 25 hp, based on the damage the enemies do. Too many of the mid to later game bosses seemed to depend a lot on luck of hoping they didn’t spam their powerful abilities.

Along the way, they keep getting opposed by Michael, who tells them to turn back but gives no explanation for why. He just reduces everyone’s HP and MP to 1 and then leaves.

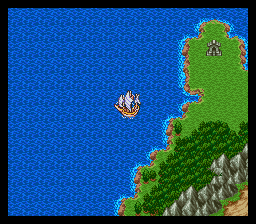
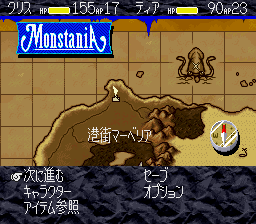
Meanwhile we go through the usual process of getting a ship and then later an airship.

Before Basil joins, we have a 4th party member Ai, who Heath has a romantic night with and then she later becomes pregnant. She stays behind at one point while we do some jobs, but then on the way back the aliens have attacked the place she was staying.

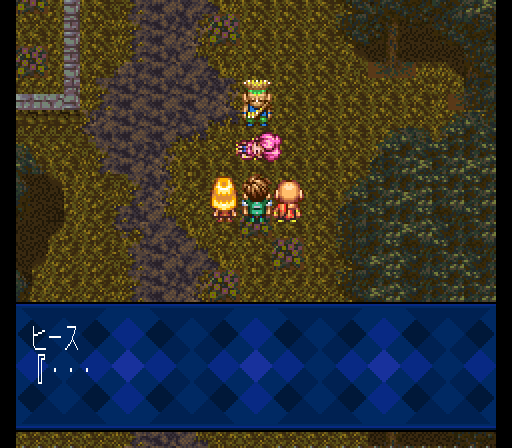
Ai and her unborn child are both killed. There are a few pretty dark story elements like this throughout the game.

The story doesn’t really develop beyond the fetch-quest travel nature until the last third or fourth of the game.

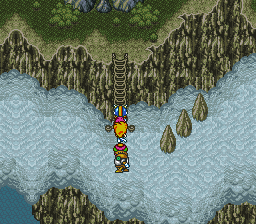
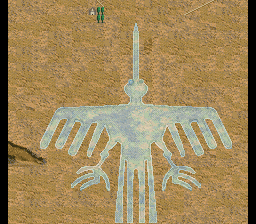
Eventually the party learns that the aliens are actually from Earth; they existed before humans but after everything was destroyed by God in the great flood, they took off into space on Noah’s Ark. But now they are reclaiming the planet that was once theirs. The final destinations are the three lost continents — Lemuria, Muu, and Atlantis, as well as the Lunar City where the aliens currently are (mostly in cold sleep). Atlantis of course comes from Greek sources, where as Lemuria and Muu were 19th century hypothetical lost islands that were theorized to explain certain issues of biological origins before plate tectonics and continental drift were understood.

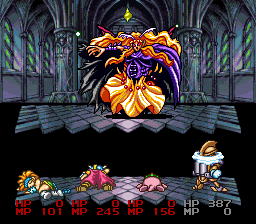
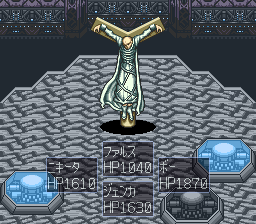
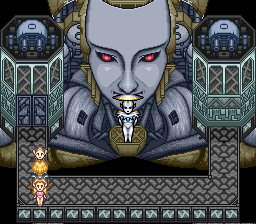
In Atlantis, Kurisu encounters his mother again, who has been turned into some kind of alien-human hybrid that is giving birth to all the aliens and monsters on the Earth.

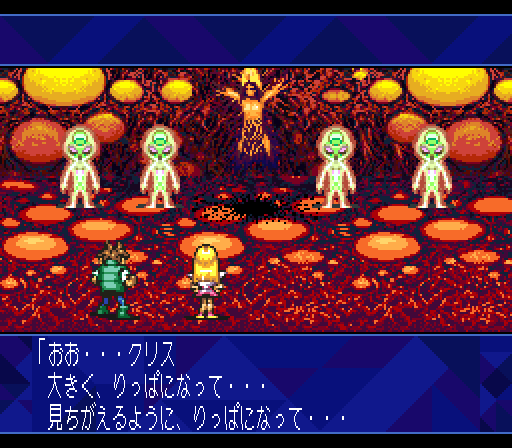
Partway through the battle she starts to heal us, and eventually begs us to kill her so that the aliens will stop appearing….and Kurisu complies.

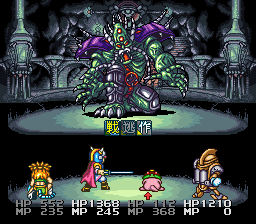
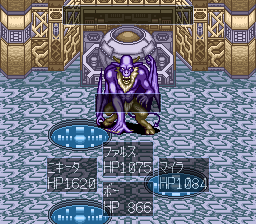
The final showdown is in Muu, where Ra Mu the leader of the aliens is. Following richie’s recommendation in his GF walkthrough I got to level 54 and then took him on — this might have been a bit too much because the boss was pretty easy despite the 7 different faces in three phases.

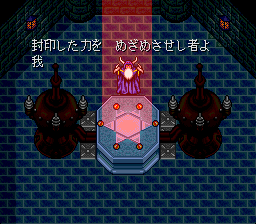
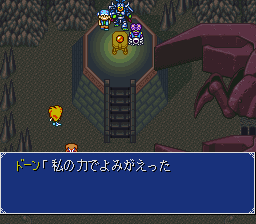
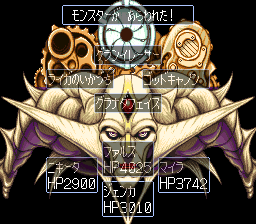
However, it’s still not over. The final boss is God himself, who wants to absorb all humans back into himself to make the perfect being, and he destroys the Lunar Base with the cold sleep aliens to prove his power. We decide to fight him (I forgot to get a screen shot, but it’s just depicted as light with no body) and eventually defeat him.

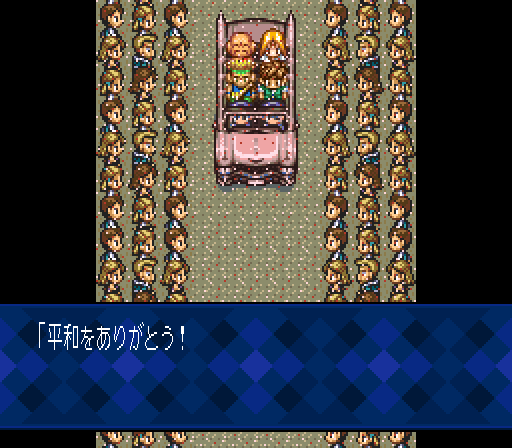
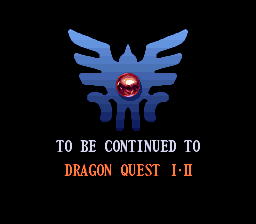
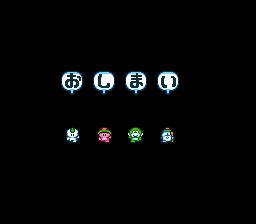
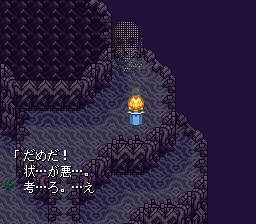
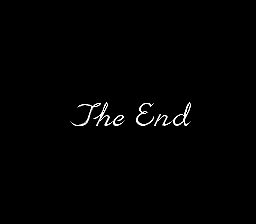
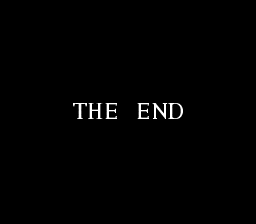
But the game is still not over. We get a big parade and a feast, but a little boy is scared of us — if we beat God, does that mean that we are now God? After the credits roll and you get the End screen, it says “Will you continue?” If you pick no, you get this:

You became God. GAME OVER

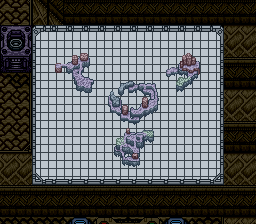
If you pick yes, the party wakes up uneasy about what the boy said and they go to the south pole to an Earth Shrine. There, they take on manifestations of their sorrow, fear, and anger. You have to use healing spells to win the fights or remove all your equipment. It’s not entirely clear to me what this is supposed to mean; after the fights it shows everyone’s life afterwards and you get an ending but the “are you now God” question doesn’t really seem to be answered or even addressed.

Overall this is a decent game. As I said above, the sluggishness of everything is a huge problem, and I would probably recommend the PS version if you can read Japanese (otherwise you will have to do this one since it has a patch).

We’re done with 1996! All that is left are four 1997 games. The next post on SFC games will be January 13, although I will have at least one other post next Saturday.

PCE Game 49 – Madou Monogatari I

Madou Monogatari I – Kindergarten Graduate of Fire (魔導物語I 炎の卒園児), released 12/13/1996, developed and released by NEC Avenue

Exactly 6 years ago to the day, I posted the first PC Engine game post after making the (perhaps foolish) decision to do those in addition to Super Famicom. 49 games later I am doing the last one — I didn’t finish many of the PC Engine games but it was interesting to see them all.

This was nearly the last game released for the system — two more PC Engine games came out in 1997 and one even in 1999 (a port/remake of the adventure games Dead of the Brain 1 and 2). It is yet another port or remake of the Madou Monogatari trilogy which had first been released for MSX computers in 1990. This covers only the first game, and thus draws from the same source as the Hanamaru Preschoolers SFC game I played recently. However, whereas that was a standard RPG that greatly expanded on the source material, this preserves the original dungeon-maze crawling. On the other hand, from what I can tell, almost everything was redone — it has different maps, (some) different items and spells, and (some) different monsters.

It’s hard to know why this game was re-released and ported so many times. Maybe after Puyo Puyo became popular they wanted to milk the original source material for all it was worth?

The starting story is the same — Arle Nanja is the only student in the magic kindergarten who has the right to try the tower to graduate. She needs to find the three orbs inside the tower.

The game takes place over about 14 dungeon levels. The maps are fairly small (I think 8×8? Somehow I didn’t get a screenshot of the automap).

As in the previous games, there are no numeric stats at all in the game — you have to gauge your HP by Arle’s expression on the right, and her MP by what she says after she casts a spell. XP fills up the pink ribbons there until you level.

In battles you choose a spell to cast. Enemies seem to have spell weaknesses, and there are the usual “dia cute” (to increase power), sleep, heal, and other things like that. Sometimes the monsters will want to speak to Arle instead and she’ll make friends with them. You can choose not to, but since you have to do a certain amount of friendship to win the game I don’t know why you wouldn’t say yes.

There are items in the game as well, but I could never find a way to see what the items did — I had to track down a kouryaku site which was not easy. There doesn’t seem to be a site specifically for the PC Engine game (or else it was lost in the geocities shutdown) but I was able to cobble together enough info to figure out what most of the items did.

On the third floor you slide around and run into the walls; to get past you have to buy a “wall creator” that you use to put up temporary walls you can stop at. Eventually Arle finds a treasure pile guarded by a lady that initially wants to fight…but then just sends her on a fetch quest which nets the first of the three jewels she needs to graduate.

I don’t remember who this is

The second one is at the top of the tower, held by a ninja who wants three scrolls from the 9th floor. Once Arle gets the second one, she is able to go into the basement of the tower.

Here she has to use a “floor creator” to build several paths to a center area where she uses four tablets gained throughout the tower to access the final jewel. However, there is one more challenge before leaving.

Her friends turn into a big zombie and attack! Fortunately she gets help from the spirits of the jewels.

The final boss is somewhat challenging but I was able to use all the full restore items I had gained throughout the tower. Lightning seemed to work the best.

After defeating the zombie, Arle proves her worth (how can they make a 5 year old do this on her own)

And she gains the admiration of her class.

This game is OK. It’s pretty short and shows itself as being basically one-third of a game that was released in 1990. There’s a translation patch so you can try it yourself, but I feel like they didn’t do enough upgrading of the interface to make it as fun as it could have been.

So that is it for the PC Engine CD! It’s such a weird console — a hybrid of essentially an 8-bit era console which limited the graphics, but with this grafted add-on that allowed CD-quality music and lots of voice work. It seems like most developers just took advantage of the fact that CDs are cheaper to manufacture than carts and made almost no effort to actually use the CD tech. Games like Tengai Makyo and Ys were definitely the exception.

I think my top 5 games (in no order) would be Ys I&II, the first Lodoss war, Seiya Monogatari, Princess Minerva, and the first Xanadu.

I’ll be taking a break over the Christmas and New Year holiday but I expect to finish one more game before then.

SFC Game 124 – Dragon Quest III

Dragon Quest III (ドラゴンクエストIII そして伝説へ…), released 12/6/1996, developed by Chunsoft, published by Enix

This is the last of the major studio games released for the Super Famicom; a remake of 1989’s Dragon Quest III for the Famicom. It basically picks up the style of Dragon Quest VI and adds a number of features to the original game — a few new classes, additional weapons and items, a “bag” to store items in, small medals, a board game miniquest, a world map, and a bonus dungeon. The graphics are some of the best looking RPG graphics on the Super Famicom, and the remastered music is great as well.

I have started this game many times. When I was a kid, I used to rent it from the local video store and play it over the weekend. My parents could never find it in stores, so I just kept renting it and playing the first part (and reading the manual with the complete hint guide in it so I could vicariously experience the rest of the game). When I first discovered emulators, this was one of the first games I played along with the Super Famicom remake but I never was able to keep myself engaged in it. I also bought the Game Boy Color version, but also didn’t finish it. In all these playthroughs I never got past the point where you get the ship (I’m not even sure I got it). So it’s nice to be able to come back and finally finish this game that I played for the first time probably 30 years ago.

After the opening cinematic showing your father Ortega hunting the demon lord Baramos, the first thing you have to do is answer a bunch of questions to determine the personality of your main character.

The personality determines your stat growths. You can change personalities throughout the game by using book items, or equipping certain pieces of equipment. After this, Kurisu wakes up on his 16th birthday, ready to go in search of his father Ortega and hopefully beat Baramos himself.

The first task is to create your party. When I played this game before I always went with the “boring” standard party of Soldier, Priest, and Wizard. This time I decided to go with a more unusual party. I went with a priest to make sure I had the healing, and then added a thief and a goof-off. The thief can use some helpful abilities like locating treasures and towns, and the goof-off can immediately switch class to Sage at level 20. The game on the whole is easier than the original because weapons like whips and boomerangs were added, but the game wasn’t really rebalanced to take account of that.

I still remembered exactly what to do on the first island you start out on, which is just an introductory section to help you get used to game. I didn’t find it necessary to do actual grinding except for one point in the game. Other than that I would just venture forth and do what I could, returning when necessary (when Hero learns the warp spell it’s much better).

As I went I made notes of where doors locked with keys were — you get the thief key on the first island so that solves the initial problem quickly, but there are also “magic” and “final” key doors that we’ll have to come back to later.

The second section is where my playthroughs usually stopped before. A lot of stuff in this section is technically optional but if you don’t do it you’ll have to do a bunch of grinding to survive the next area (actually in the remake they made the Shanpane Tower a requirement for later in the game). By going west from the castle you end up in here, you can see that your next major goal is to get to Portoga to get a ship, which will require the Magic Key.

At this point the first board game minigame comes up as well. You do it by using a ticket that you can find various places around the world, then roll a die and move the number of spaces indicated. The real goal is to reach the end of the track (on an exact roll) where you will get some good treasures. But even if you don’t manage that, there are some decent things in the chests on the board itself. I didn’t do much of the board gaming because it takes a long time and the rewards are hard to get since you need exact rolls.

The magic key is in the pyramid — I got here once or twice as a kid and I have a vague memory of a gold claw that you can carry out except that you get attacked every step you take. I didn’t find that this time.

With the magic key, you can reach Portoga, and then you have to do a fetch quest to bring the king pepper (which gets you in a nest of quests but eventually it ends). This is also the first time you can visit Dharma Tower.

At Dharma tower you can change classes of any companion who is at least level 20. They go back to level 1 and lose half their stats but retain any abilities (like magic spells). At this point nobody was at level 20 for me so I moved on.

After getting the ship the next part of the game is nonlinear. The goal is to get six gems which you will then use to revive a dragon so that you can reach Baramos’ castle. You also need to get the Final Key, and there are some other optional events and items you can find as well. Along the way I started doing class changes. As soon as the goof-off reached level 20 I switched her to a Sage. At first I was a bit worried because she came with very low MP due to her 20 goof-off levels, but in the end she gained enough MP to catch up. For the priest, I decided to hold off switching to Sage until he learned the revive spell. Initially I had planned to switch my thief to something else but in the end the thief was quite good on his own and so I kept him as a thief so that I could keep stealing items.

With the six gems, you can activate these flames and hatch the egg to get a dragon. With the dragon you can fly around and get to a few new places, the most notable of which is Baramos castle.

Baramos kicked my butt at the levels above. He can move twice in a round, do strong attacks, and use several damage-all moves. I lacked useful spells like Beoma (complete heal) and Fubaha (barrier that reduces fire/ice damage) and it seemed like it was time to level. Unfortunately Beoma is level 30 and Fubaha is level 34 so that would be a lot of time….

Enter the Hagure Metals (metal babbles), souped up versions of the Metal Slimes that give lots of XP. I cheated a bit here and did a save state every time I encountered one, loading the state until I beat at least one. With this technique it only took an hour or two to level up to 30 for Beoma, at which point I decided to try again despite the lack of Fubaha. In the end it worked out; with the extra levels, buff spells, and Beoma I was able to outlast him. I read that you can use Matohon on him to take away his spellcasting ability but this never worked for me.

Kurisu is hailed as a hero! But just then, a mysterious voice Zoma comes in and declares he is the true evil boss. Mwahaha. We then have to go down into the dark world…which turns out to be Alefgard from DQ1. This would have been a cool twist for people at the time although it’s given away in the hint guide so I already knew about it.

Here you have to repeat in some sense the stuff in DQ1, making a rainbow bridge to Zoma’s castle by using the sun stone and rain staff.

Zoma was much easier than Baramos. You can use the Sphere of Light to reduce his power a lot and then the normal buff/debuff spells work pretty well.

Once Zoma is defeated, access to the upper world is closed off, but then you get the final twist of the game, that your hero is Loto (Erdrick) of DQ1 so this is a prequel to that game. Neat way to wrap up the initial trilogy.

In the SFC version they added a bonus dungeon; I didn’t do it but by defeating the boss there you can revive your father which is a nice addition. The game Boy Color version added a second bonus dungeon but it requires a pretty ridiculous set of criteria to enter (finding lots of monster medals from defeating monsters around the world).

I’m finally glad to finish this game that I played so much as a kid. It’s a pretty good DQ and really shows how even an old game can be done much more competently than a lot of the RPGs coming out in the early 1990s. The story is thin to nonexistent but there’s a lot to explore, side events, a bonus dungeon, minigames, and more. You can also try experimenting with different parties.

Next up we have the final PCE RPG.

Comment setting changes

I disabled the plugin that requires cookies for commenting; it seems like people were getting errors (I think the plugin is incompatible with newer versions of PHP). So if you have been unable to comment in the past, please try again.

I also disabled the setting that requires approval for new comments; it’s supposed to only require approval for each person one time, but it seemed like about half the comments I was approving were from prior posters.

I think both of these are anti-spam settings so I may have to re-enable them or seek other solutions if I start getting spam messages.

SFC Game 123 – Monstania

Monstania (モンスタニア), released 9/27/1996, developed by Bits Laboratory, published by Pack-In Video

My heart sunk a bit when I saw Pack-In Video pop up as I started the game, but actually I had a lot of fun with Monstania. The genre is hard to pin down — many places consider it an SRPG but to me it’s almost more like a puzzle or adventure game. From what I can tell, the level ups and the equipment upgrades are pre-determined after each battle and there is no opportunity for grinding, buying equipment, finding anything optional, etc. That disqualifies it from being an SRPG for me, and it’s almost not really much of an RPG either.

It’s also extremely short; I finished the game in around 3h 30m. But that also makes it a good play in an era where we’re not paying full price for a cart.

The main character is Fron (or whatever you name him), a 16 year old boy born on the island of Monstania. His obsession is finding fairies, who were supposed to exist on the island in the past but no longer do. He is present in most of the battles, and will be accompanied by at most one of the other characters. You can never choose which character will be in the battle (there are a couple of branching paths though).

The battles are on an isometric grid. You can take a turn with one of your characters, then the enemies will get a turn (some enemies only get 1 turn for every 2 of yours, some get 2 turns for every 1 of yours). Each action you take depletes your AP, although moving doesn’t. You can recover AP by either skipping a turn, or by taking an action with your other character. You can either join the two characters together and have them move around together, or separate them. Either way the enemies will be acting when one (not both) of your characters take actions.

Characters can attack, but also use a wide variety of special abilities that they get from levelling up. There are also some abilities that everyone can use (self-heal, defend, item). I believe there are about 8 characters in the game although a number of them only appear for one or two maps. Tia and Chitta are the only two characters that you will be repeatedly using. They can help out a lot with their ranged attacks and Chitta has some good AoE powers.

A common strategy in the maps is just to move forward slowly and deal with the monsters as they come to you, then heal up and recover AP before continuing. This works on many (though not all) of the levels. It helps if you have someone like Tia who can shoot a bow to get the monsters across the map.

Not all of the maps are battles. There are puzzles like the one above where you have to clean up all the dirty areas without moving over the same square twice. Another one involves avoiding a rolling boulder. Other ones you have to pick up objects and place them in the proper area, and so on.

The story is not especially deep or involved; they encounter Chitta (who is in that picture), a mysterious child who is being pursued by soldiers. In the course of protecting Chitta they stumble upon a plot that could threaten the safety of the entire Monstania island.

The game is not especially hard, although I did have to restart some missions a few times. The final boss is a challenge but I hadn’t used any of my items so by just repeatedly using the restore items I was able to win fairly easily. Many of the bosses are rather poorly designed because if you just run away from them they will start wandering aimlessly which gives you time to recover your AP and HP before re-engaging with the boss.

I had a lot of fun with the game and it’s definitely worth playing (It has a translation patch) since it’s so short. However, I would like to see how the game would have played if they had expanded it into a true RPG/SRPG that wasn’t just fixed level ups and equipment gains; where you could choose your party more freely and that maybe was a bit longer and more involved. I think the system is interesting and shouldn’t depend on such a rigid style of gameplay, but I guess neither Bits nor Pack-In Video ever tried this style of game again.

SFC Game 122 – Wizardry Gaiden IV

Wizardry Gaiden IV: Throb of the Demon’s Heart (ウィザードリィ・外伝IV~胎魔の鼓動~), released 9/20/1996, developed and published by ASCII

Wizardry is of course one of the ancestors of CRPGs, with 8 main games centered around so-called “blobber” dungeon exploring. At the time this game was released, the first seven main Wizardry titles were available in Japan both on computers and in a variety of console ports. In addition, three “gaiden” games had been released exclusively in Japan for the Game Boy. These followed faithfully in the pattern of the early Wizardry games. CRPGAddict played half of the first one, and his post is interesting for his view of this game coming from a fan of the western computer games (and someone who is decidedly not a fan of JRPGs). CRPGAddict also has a guest post covering the Japanese wizardry games in more detail.

Back in the day I finished the original Wizardry and I have played 5 and 6, though I never finished either of them. Gaiden IV is basically in the style of the first five games, although it borrows some of the races and classes (and magic types) from 6 with a few new things.

When you start you are immediately dropped into the town with no explanation; as you may be able to see this game uses a Japanese flavor rather than the usual medieval European fantasy of the Wizardry games. The game manual gives the backstory — basically there are three legendary objects that the new king hopes to use, to gain the power to put down a rebellion and bring peace to the kingdom. We are an adventuring party sent out to get the three objects.

You can use pre-generated characters but I took all their gear and sold it for money and deleted them, and made my own party. All of the classes from the original Wizardry are there — the Priest, Thief, Fighter, and Mage for basic classes, and the Lord (fighter + priest), Bishop (mage + priest), Samurai, and Ninja for prestige classes. They also added psionic and alchemy spells and new hybrid classes to take advantage of them. The races are the W6 races (so the classic ones plus Rawulf, Mook, Faerie, etc).

As in the classic games you roll a random value for points to add to your base stats. Normally you get 10 or less, but rarely you will get above that (up to 30 max). In the original games it was beneficial to spend a long time rerolling so that you could start with better stats and also be able to access the prestige/hybrid classes early. It’s not necessary to do that in this game because if you get 10 or fewer points, you start at level 4. This not only gives you 3 levels of stat boosts but also lets you start with more HP, which is a big help surviving at the beginning.

My party (which I named after Tale of Genji characters) was two fighters, two priests, a ranger (who can do Thief stuff), and a mage. My intention was to class up later to a Lord, Valkyrie, and Monk, and I wasn’t sure what to do with the extra priest and mage. (In the end, I ended up leaving the priest as is, and turning the Mage into a Valkyrie after she learned her last level of spells.) Everyone starts with a basic set of equipment but I bought some additional things with my money.

The interface is a big problem, I think. It’s based on the computer games, which are marginally better because you can use the keyboard to directly select items and people. Even there it can be frustrating, but when you have to use a controller to select everything, it’s really annoying to have individual gold, for instance. Also the fact that every item you find in the dungeon needs to be identified is troublesome because you either need to transfer all the items to a bishop, or pay quite a bit of money to have it done in town. Then a big failing of the game is that there is no way to see what the stats of equipment is; I found a list of weapons/armor by googling but it was still frustrating to figure out if the new equipment I had gotten was any good.

The healing is also done via the classic method where you either pay a bunch of money to rest in the inn, or use priest spells, going in and out of the dungeon until everyone is at full.

This was a different party I tried to use at the beginning

Each of the three objects you need is in one of three dungeons. I’m not sure why they set it up the way they did — once you recover one of the objects, the other two dungeons have almost all their NPCs and puzzles removed, but you still have to go through them to get the objects. I think maybe the reason they did this is that the monsters are of similar difficulty in each dungeon, so perhaps they didn’t want you to have to spend a lot of time with easy monsters once you had cleared one place? Even so you have to explore the other dungeons so I’m not sure what the point was. The fourth choice there is a “training dungeon” where you can go just to fight things; there’s also an opaque sidequest involving that dungeon that can unlock the strongest monster in the game.

At this point you just make excursions into the dungeon. As in classic Wizardry games, the majority of the dungeon is empty and so you’re mostly just mapping things out looking for the few events you need to do to progress. Your resources are quite limited and you have no “warp back to town” spell so you need to be quite careful in your excursions — this provided most of the tension and I suppose enjoyment of classic Wizardry.

This game is easier in two ways than the original. First, there is an automap, although you can only see the 3×3 square around you unless you cast the Dumapic spell. The second is that unless you play it on “mania mode”, you can reset your game during a fight and you will start before the fight. In classic Wizardry, you never “save” your game; if your party dies, their corpses remain in the dungeon and you have to get another party to go in and find them. You also are not guaranteed to be able to raise dead characters and can lose them permanently. I think a lot of players (myself included) made disk backups to lessen the sting — it was too time consuming to do the backups constantly, but it was better than losing your whole party.

The battle system is classic Wizardry, although weapons have a range — I’m not sure when (if) this was added to the core Wizardry games. Your characters in 4-6 position can only attack if they have weapons with long enough range to reach the enemies. Otherwise they just have to defend or cast spells. Same is true for the enemies, of course.

In the first tower, you basically find a number of keys and other objects that open up doors and let you explore the entire tower. One part you have to get a dude to drop you into a pit so you can explore the lower levels.

There are multiple solutions to each dungeon — you can kill the NPCs to get their items, or you can take “peaceful” solutions, some of which require items from the other dungeons. As far as I can tell there is no gameplay benefit to the peaceful solutions and you actually lose XP for doing them.

Once you get the three items, the lord goes to defeat the rebels, but then an unnamed lord suddenly awakes a different evil and you have a new dungeon to explore.

The first 4 levels of this dungeon are copies of the Wizardry 1 (proving grounds) dungeons, but after that, the B5-7 dungeons have a complicated puzzle where you have to press buttons to get statues onto the bottom floor. I used a walkthrough to solve this.

Beyond this, you get the last dungeon level, which is an embryo-like place (the “taima” of the title is really “demon embryo” rather than “heart”). This is where I stopped playing — you have to beat 7 or 8 very difficult encounters to reach the final boss. I got ten game overs on the first encounter, did some grinding, and decided it was going to take way too long to finish it. There is a translation patch so anyone can try it themselves.

As I understand, after you beat the boss there are two additional post-game dungeons, in addition to the superboss in the training dungeon, so there’s quite a bit of content in the game. I think that if you like the classic Wizardry format and don’t mind the interface issues, you will enjoy this game a lot.

As a final note, the Wizardry wiki has the title misspelled as 大麻の鼓動 “Throb of the marijuana”.

Final game list (SFC)

I started playing Akazukin cha-cha, but I don’t think it really qualifies as an RPG. It’s more of an adventure game with a small number (around 7) of fixed RPG-style battles. There are no levels, instead you just gain stats at pre-determined points in the story. Apparently it’s considered a good game for fans of the manga or anime series, but I will leave it to others to cover the game.

So what this means is that we have come to the final list of games, the remaining 9 games I have to play. I will be taking a break around Christmas time, so I think I should probably finish this up around March or April of next year, although it depends on how long all the games are. Here’s the full list of games, with the bold ones being games I will actually play.

  • Wizardry Gaiden IV: Throb of the Demon’s Heart
  • Monstania – It was not clear to me whether this is an SRPG or not, so we’ll find out now.
  • Marvelous: Another Treasure Island – This is an adventure game, not an RPG.
  • Dragon Quest III – I could skip this as a remake but I believe I will play it.
  • Madou Monogatari I (PCE) – The final PCE game! This was released very late in the system’s life, and also came out for the Sega CD pretty late also.
  • G.O.D.: Listen to the voice telling you to awaken
  • Dragon Knight 4 – I played the Playstation version of this.
  • BUSHI Seiryuden: Two Heroes
  • Milandra
  • Gunman’s Proof – This is a zelda-style game that does not qualify as an ARPG for me.
  • Dark Law: Meaning of Death
  • Solid Runner – The last game I will play!
  • Mini shiku Let’s & Go!! POWER WGP2 – This is a racing game for the most part; it has some parts where you can talk to people and buy things but this is not enough to make it an RPG.
  • Wizardry I-II-III: Legacy of Llygamyn – Since this is a remake of Western games I will skip it.
  • Fire Emblem Trachia 776 – I will actually play this, but it will be once I reach 1999 in the strategy RPG playthrough, not now.

SFC Game 121 – Daikaiju Monogatari II (Finished)

At this point we have all the party members (the first four were my endgame party):

  • Kurisu, the hero of the fire shell and main character — you have to use him. He can cast fire spells and do sword techniques.
  • Shamuru, a catwoman thief. She can steal things which is nice, but can also use some helpful spells, particularly Powered (attack up). She is also important for one point where you can do some nice levelling.
  • Kupikupi, who has the best healing spells. By the end of the game he can cast a full party heal spell and a full party “restore conditions” spell for fairly cheap, and can contribute some attack spells as well if necessary.
  • Millie, the robot (who used to be your dog). Strong attacks, and also nice all-attack abilities that involve various elements.
  • Pot, who was also in the first game. Has a number of summon spells that you gain from various events — unfortunately a few of the best ones are only available with the real-time clock system (I had the same problem that I did in Tengai Makyo Zero where the clock never synced or advanced when I wasn’t playing).
  • Baboo, who uses boomerangs. I didn’t use him much.
  • Baltes, the warrior. I also didn’t use him much.
  • Poyon, who learns spells from enemies like Blue Magic. I barely used him.
  • Ruimella, who has decent healing and support spells. I used her some but I generally found Kupikupi to be more useful.
  • Gabro, who joins fairly late and as such I didn’t use him much. He seems like he could be useful with some elemental powers.

Next up is “kimoi” town, where the townpeople’s souls are being extracted by Jarama (who of course is being controlled by the evil Dark people). To clear this part we have to bring a certain kind of water to a holy spring, and the god then allows us to enter the realm of the dead as spirits so that we can clear out the monsters.

Beyond the mountain there is a creepy bone dungeon.

And finally we defeat the Phantom Queen (one of Dark’s underlings), and recover the 5th aura stone along with freeing Jarama. She can stop random encounters but only once, for a short time, recharged when you stay at an inn. So pretty much useless.

The final aura stone is in a mechanical fish in the sea.

This is an annoying dungeon because the visibility is very poor, and of course you are facing encounters every 4 steps. But in the end we recover the sixth aura stone, although then Dark tries to kill us in the sea monster. We rush to an escape capsule, but are now stranded in the sea.

Fortunately our small dragon comes to save us, and with the six aura stones he is able to power up into a full size dragon that can be flown around the world. At this point, you can go to the snowy islands at the top of the map where you encounter two sets of enemies that give huge amounts of XP and gold. In a fairly short time I was able to get as much money as I needed for the rest of the game, level up to the high 30s, and steal “Angel Medals” which offer a huge increase to attack and defense. This allowed me to keep the “no encounter” code on for the rest of the game and still manage to beat all the bosses. (However, this area is only available at this short window)

Now we have to fly up to the castle in the sky, where the heroes display their usual stupidity and give the aura stones to the queen, who turns out to be a clone made by Dr. Doan (Dark’s servant).

Now we rush to the temple in the sky land to stop Dark from using the aura stones, but of course we’re too late — once we arrive Dark destroys us with one hit and then activates the aura stones to capture power for himself.

Dark activates the stones, making the sky land crash to the ground and doing huge damage to the land. Many towns are displaced or destroyed. In this section of the game you are basically trying to recover your team members, find the 4 shells (which were lost during the crash), and also free the Dragon so that we can fly up to Dark’s lair.

Once this is done, it’s time for the final dungeon. You have to use two parties here, switching back and forth with the Y button to open up new areas until both of your parties arrive at the top. Then your B party stays back to fight Beauty (the last of Dark’s underlings) while the A party with Kurisu goes for Dark.

Beauty is the hardest fight in the game — she uses a move almost every turn that has a chance of confusing everyone, and then your party members kill each other. Even using the cure-all spell of Kupikupi it’s hard to avoid this. Fortunately if you lose with your B party, the A party takes her on instead. Even so I had to try 6 times before I could get enough luck to defeat her.

Dark’s three forms, by contrast, are a cakewalk. Kupikupi can just Sun Shower every turn to fully restore HP, Robot can exploit elemental weaknesses, Kurisu attacks, and Shamuru supports.

Afterwards, Kurisu has to go back to Earth (leaving Millie behind since she’s a robot now), and everyone else goes back to their lives.

Overall this game is OK. The random encounter rate is a serious problem — if someone could develop a code that halves the encounter rate that would improve this game immensely. The storyline is acceptable but relies on a lot of cliches (particularly the “haha, the heroes are too weak to deserve to fight me! Here is my underling to fight” and “there’s no way the heroes survived that, they must be dead.”)

We’re down to 10 games (9 sfc and 1 PC-engine)!

SFC Game 121 – Daikaiju Monogatari II (Part 1)

Daikaiju Monogatari II (大貝獣物語II), released 8/2/1996, developed by Birthday, released by Hudson

This is the sequel to the 1994 original — there are some of the same characters although I believe this is not a plot sequel, it’s just a new story with some of the same elements. As in the first game, the Fire Shell has to be used to summon someone from Earth to help fight off enemies.

The gameplay is mostly the same as in the first one as well. We still have the punishingly high random encounter rate, the “helpers”, the basic magic system, equipment, etc. This game added a clock-based feature like Tengai Mayko Zero, although it has very little effect on the game (and apparently drained the battery quite a bit). You no longer recover MP/HP on level up, which makes the game a bit more fraught in the dungeons. I made occasional use of a no encounter code, mostly when there were puzzles in the dungeons (I find it very annoying to try to do dungeon puzzles when a random encounter is breaking your concentration every few steps).

This time our big bad is “Dark”, who is trying to take over Shell Land.

Kurisu and his dog Millie are transported from Earth, but something goes wrong during the process and Kurisu ends up alone, and is immediately attacked. Fortunately Princess Rumiella from the nearby castle finds him and brings him back.

We are also introduced to Baltes who has a crush on Rumiella, and Baboo (who was in the first game, but as I said I don’t believe this is a plot sequel — I think it’s just reusing the same assets). The basic structure of the first 2/3 or so of the game is that Dark (the big baddie) is sending out his underlings to find the six Aura Stones, while we travel around and fight the underlings, recovering the stones.

The battle system (and even the graphics) are basically the same as the first game. You can still set up “strategies” to have people use certain moves automatically, although this game doesn’t have that extremely helpful move that puts the enemies to sleep with no MP cost. And since you no longer recover MP on level up, that means that more often than in the first game I was just doing attack with everyone.

The first location is north of the king’s castle, where Megaloking is using captured humans to dig up the aura stone.

This operation is a success; beating Megaloking and freeing all the villagers, and getting the aura stone. Unfortunately Dark, though his evil spying ways, has recognized that Baltes is in love with the princess, and decides to use nefarious tricks to turn Baltes to their side.

Baltes thinks that the hero kurisu has taken the princess from him and that they were making fun of him, which allows the next of Dark’s generals, Mushking, to use spells on him and turn him to evil. To reach Mushking we first have to recruit an ally who can cut the trees in our way (he can also remove boulders from other places to reveal hidden treasures).

Once Mushking is defeated, we find the second stone, although Baltes decides to go out on his own to train so he can overcome the weakness of his heart that allowed him to betray the party.

Next up is a strange sequence involving Jodan, a clown that captures people and turns them into pigs. He also likes to collect unusual animals, including a few people that should be in our party! Poyon, Kupikupi, and the main character’s dog (who I named Millie) are ale here. The game switches to Poyon and Kupikupi, who free the dog, beat Jodan, but only the dog escapes.

The dog and Kurisu are reunited then, and Millie tries to lead us to the others. This is an annoying desert section — this is an example of a dungeon where I turned on the no-encounters code because finding my way around in the place was annoying. There are sandstorms that carry you around, but the places are invisible and it’s hard to figure out how to get through it. This leads us back to Jodan’s circus again, where we finally free the others (plus a thief named Shamuru, who is another party member).

Next up we can find the third aura stone in the Antlion lair, another annoying dungeon that I used no encounters for.

Here we find the evil scientist Dorn, who has revived Megaloking to fight again. Fortunately Megaloking is a chivalrous dude who gives us the aura stone when we beat him!

Now the Sand Scorpion, a big machine controlled by Dorn, heads for the nearby city to explode. We try to stop it, but in the end Millie (the dog) pushes Kurisu off the Scorpion and sacrifices her own life to stop it.

Some kids bring Millie back to a scientist who is developing a robot (Dr. Spanner). Spanner tries to do what he can, but the next day he tells the kids that he couldn’t save the dog and buried him nearby. Now the robot activates (we’ll learn soon that the dog was put into the robot, so now Millie is the robot).

The next section is done with the robot alone. She’s easy to use because if you buy 99 bomb items she can use a powerful attack on all enemies to kill them in one attack. The job here is to go to the crystal castle, where Dorn is using Gabro, one of his underlings who is still basically a baby. The robot Sonia is taking care of him.

Gabro is kidnapping children to play with. Sonia isn’t quite sure that’s a good idea, and she eventually grows close to the robot (Millie) because they’re both automata. Eventually Dorn comes in and kills Sonia, which upsets Gabro. In this section you have to switch back and forth between Gabro and Millie in order to progress in the dungeon, until we eventually catch Dorn (who escapes). But we have the 4th aura stone.

After this whole sequence the game switches back to Kurisu, and you can immediately go back and get Millie robot in your party. Two more aura stones! That’s where I will stop for now; hopefully I will have the game done by next weekend.

SFC Game 120 – Lennus II

Lennus II: Apostles of the Seals (レナスII 封印の使徒), released 7/26/1996, published by Asmik Systems

This is the sequel to Lennus, which came out in late 1992 and was released in the US as “Paladin’s Quest” (a name that has nothing to do with the game itself). The sequel was apparently plagued by development delays and was intended to take 2 years rather than 4 to develop. The end product is one of the longer SFC RPGs; it does seem like they allowed this game to take the time it needed to take rather than artificially cutting off development like they seem to have done with some of the previous games.

I have not played the original Lennus, but I understand that this is a direct plot sequel, and a number of the characters from the first game re-appear, as does the word Lennus. The game system is also essentially a modified version of the first one.

The game begins with Pharus appearing and being hailed as the savior of the world — this temple has been built to await his coming, and he is now supposed to bring about the Grand Unification. Pharus has no idea what this is and none of the priests seem to know either, but we need to get 4 gems from this underground land of Undel and then put them back in these slots in the temple. The entire game runs on these fetch quest setups — 4 gems, then 8 seals, then the 8 seals again, the the final boss. There’s not a whole lot of plot development other than at the points between these quests.

Like the first game, you have 3 hireable characters in addition to Pharus. There are 8 different categories of spells, and each character has a different combination. For the main character, you start out being able to choose just one, but as you gain more elementals from temples around the world, you can equip more until you hit a maximum of 4. You can switch the elementals at specific places in town, and also using an item.

Each character has a level for each element from 1 to 8 that goes up by beating monsters — the monsters release elements when they die which can add XP to a person’s element level. Moving up the levels doesn’t seem to result in new spells, it just strengthens what you have.

As in the first game, you use HP rather than MP to use spells. But since the spells don’t cost that much, outside of the very beginning of the game you almost never have to pay any attention to how much the spells cost.

There are no healing spells; all healing is done through “bottles” that hold 9 uses each. How much the bottle heals is based on the type of bottle. You can refill them in town — for some reason there are refilling shops that charge 50 gold per bottle, but using an inn fills all bottles for free so I don’t know why you would ever use the refill shop.

The interface is kind of interesting; all the commands are entered through the directional pad. If it weren’t for needing to hold down a button to run fast (ugh) you could play the whole game with one hand.

Also like the first game you can attack with any piece of equipment you have on, although I never found this to be useful.

As Pharus collects the 4 gems, a shadowy figure keeps appearing with a distorted voice; it seems like he’s telling Pharus that he should not get the gems and that the unification will be bad, but he can’t communicate clearly enough (and there’s no way to advance the plot without doing it).

Once the gems are collected and restored to the temple, the four continents of Undel begin to merge — this is catastrophic and the priests beg Pharus to stop it, but there’s nothing he can do. He is carried away in a pillar of light to Eltz, another part of the world. Here, an underling of Granada tells him that he only did one part of the Grand Unification, and that Granada will carry the rest out. Everyone on Undel will die as a result, but that’s basically Pharus fault, isn’t it? Mwahaha

The enemy curses Pharus to turn everyone into stone, but Petro (who was the face talking to us in Undel) directs us to a nearby Purification Shrine that can remove this problem. The next part of the game takes place mostly in the large city of Niguren, with several different sections, a downtown, and outer areas. Basically you first have to reach Petro’s Castle.

Petro tells us that Granada revived Pharus specifically to initiate the first part of the Unification, since normal people would not have been able to do it. Grand Unification means the destruction of all life in the world, but it can still be stopped if Pharus can get seven seals.

This fairly lengthy section of the game involves getting the 7 seals from in and around Niguren. Each seal has its own small story but they don’t really contribute to the overall narrative in any way. I switched out most of the starting companions here for new ones (although you can use a “scent of alcohol” item to re-recruit them if you need to). There are people in Niguren with max level elements, as well as the Gubo’s Fist spell which is very useful if you can raise the caster’s heaven element. Max level heaven element users can do huge damage to all enemies.

Once Pharus gets the 7 seals, Petro tells him there’s an eighth seal, which is back in Undel. Returning there, Pharus finds that most of the inhabitants have died but that the survivors have moved to one city. The high priest of the Pharus temple is getting drunk in a bar, wishing he had killed you as soon as you were born. From there, Pharus descends into a fire cave to get the eighth seal.

Unfortunately as a consequence, the rest of Undel sinks into the lava, killing all the inhabitants (Pharus really did a lot of bad stuff to the poor Undel people!) But undeterred, Pharus continues on to fight 4 of Granada’s underlings together.

Unfortunately they have captured Petro, and as usual for dumb RPG heroes Pharus trades all 8 seals for Petro’s life….and the enemies don’t even free him, they just take the seals. Fortunately Petro has left us a message to seek out Media (from Lennus 1) in a floating fortress, who can help us out. Media tells us that we are descendants of gods who created the word, some of whom wanted to watch over the humans, others (like Granada) who want to destroy the world. Unification will put all the lands into one and make a new sun. We need to go to find someone else who can help us in the sea.

Finally you get a world map, although it’s missable if you’re not careful.

The purpose of this part is to gain access to the gravity tower and eventually go to Lennus, the continent from the original game. The underlings of Granada have set up shop here and we can recover the seals. This part of the game has a lot of locations and random NPCs from the first game; of course I wasn’t able to appreciate most of that connection.

Once we recover all the seals, it’s finally time to confront Granada. Unfortunately in the meantime, Lennus has merged with Eltz — Unification has almost occurred. Back in Petro Castle we can take a transport to reach the Throne of the Gods, where Granada awaits.

We have to beat Granada twice. The first time, Petro and Medea help out, and heal the party before the second fight. Unfortunately Granada escapes on a spaceship, but with Petro and Medea’s help we can follow (it is also revealed here that Petro is Chezni, the hero from the first game).

At the end, Granada tells Pharus that they are essentially the representatives of the two opinions of the gods, and that how things end up depends on who dies in this fight — if Pharus dies, his energy will be released, completing Unification. If Granada dies, Unification will be stopped. Time for the final battle.

After the fight, you can talk to a bunch of companions and NPCs, and then Pharus joins Chezni and Medea to travel back to Raiga, where they originated. They want to bring the hope to Raiga itself so that whatever caused all this trouble on Lennus and Eltz can be healed at the source.

Overall this is a decent game. The plot could be structured a little better and there is some grinding you have to do sometimes, but it’s generally a fun game. And would definitely be worth a play for anyone who did Paladin’s Quest, to see the connections between the games.