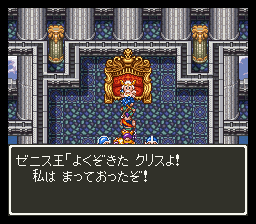
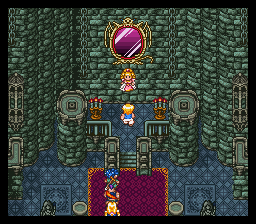
At the end of the last post I had restored the Hero’s memories as well as the Zenith Castle, so it’s time to visit the Zenethian King.
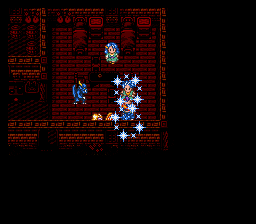
Here we learn that Deathtamoor is in the “hazama no sekai”, which means something like “In-between world” but is apparently “Dark World” in the official translations. To get there, though, we have to revive the Pegasus. The Pegasus is in a tower guarded by some of Deathtamoor’s monsters, but the boss fight was fairly easy — the spirit enemy here can use a multi-hit death spell that could be bad but I killed him before he used it.
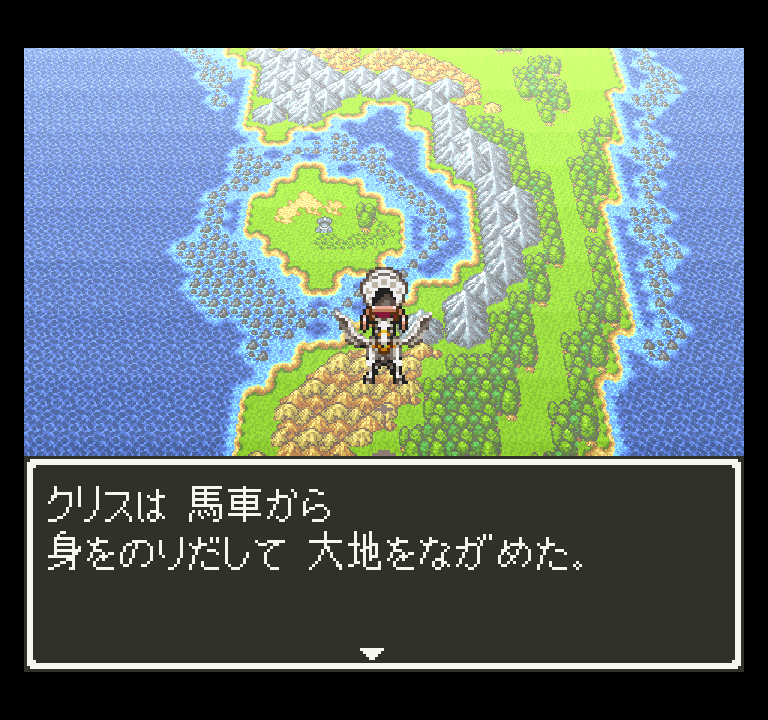
Now with the Pegasus, we can go anywhere in the world as well as to the Between World.
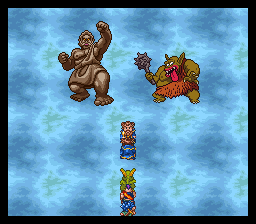
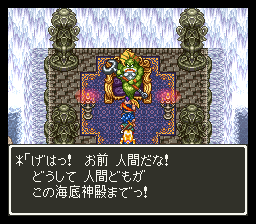
We get locked into the Between world, and everyone’s HP is set to 1 and MP to 0. This cannot be healed or cured by any means (even if you leave the between world). This is because you’ve fallen into the despair of Despair Town, the first destination. Everyone there just lies around doing nothing. There is a man Clarke Ende, who came from the town of Zaxon in the real world. He once forged good armor but he’s too depressed now — however, he gives us his pipe to show his wife and child if we ever find them.
We can return to the real world from a spring to the west of the town, and show the pipe; his wife gives us Ende’s tools. When we show Ende the tools he knows we can actually travel between the worlds and this perks him up enough to forge him some armor. This also restores the spirits of the other townspeople and allows us to heal our HP/MP.
Next up is Greed Town, where everyone tries to selfishly cheat, and they’re all obsessed with this treasure that’s supposedly in the mine. All we find in the mine is a note saying that a rich man in town knows where the treasure is — he tells us it’s in a nearby lake. A bunch of townspeople gather there and start fighting over the chest, but we open it and reveal that it’s empty, the townspeople realize they were fighting over nothing and the greed of the town vanishes. It also turns out that the rich man was serving Deathtamoor.
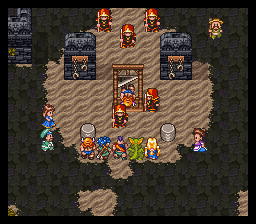
The last of the towns here is the Prison Town, where we have to do a lot of sneaking around in soldier costumes — eventually there’s a revolt from the prisoners and we manage to take out Akbar. Akbar himself is somewhat difficult, but Hustle Dance from the hero helps a lot in healing, as does Mireyu’s Bikilt spell.
Solving this area also releases Krimut and Masarl, two magicians who are able to open the way to Deathtamoor’s Castle, the final dungeon.
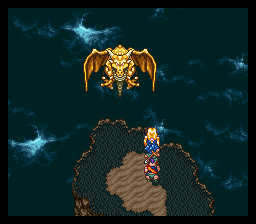
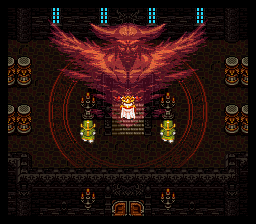
The castle itself has a lot of difficult enemies, but with Hustle Dance I was able to keep up my HP. When I reached Deathtamoor, the main character still was on level 7 Superstar so I had not even unlocked the Hero job yet. I was around level 30-31, and Deathtamoor kicked my butt.
I decided to master Battlemaster for Hassan and switch him to a Dragon, then try again (originally I was going to master Dragon but that takes way too many battles). Actually Hassan’s job didn’t help very much; it was the general levels and being able to get some Hero levels that really helped.
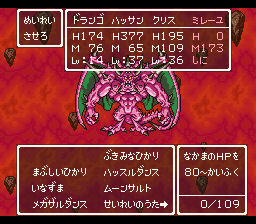
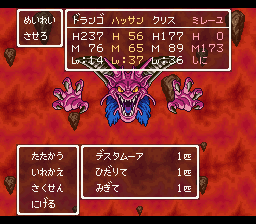
Deathtamoor has three forms. My basic strategy for all of them was the same — attack with Drango (dragon) and Hassan, use Hustle Dance or Gigaslash with Kurisu, and have Mireyu use Bikilt on Drango/Hassan if they need it (since Deathtamoor frequently eliminates our buffs), heal if necessary, and just guard if neither of those are needed. The second form uses def+ a lot so I used Kurisu’s hero ability that removes the buffs. Sometimes I used Drango’s breath attack but in general I found just attacking with both was more effective. I also had World Tree Leafs on each person in case someone needed to be revived.
For the third form, the Left Hand has to be taken out first since it can revive the others (in the DS version they made both hands revive). I swapped in Barbara here so that she could use Madante which did 650 damage to each part. From there the same basic technique as the other bosses worked, and he went down faster than I expected. I probably overlevelled.
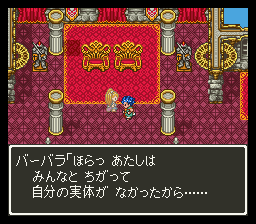
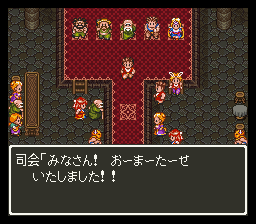
After Deathtamoor dies, the Between World vanishes, and there’s a long ending scene where everyone goes back to their lives. I was a little confused because I thought they said the Dream World was disappearing and Barbara does vanish, but then there’s a later scene where she’s still there. Maybe Kurisu’s ability to go to the Dream World was just removed.
If I load my clear save, I can go get the Hagure Metal job book and then fight about 150 battles to unlock the bonus dungeon but I’m not going to do that. If you can beat the boss in the bonus dungeon in 20 turns you can wish for something that will change the ending, but I wasn’t able to find any description of what it actually changes (perhaps Barbara doesn’t disappear)?
In the end this is definitely a strong game and one of the best I’ve played so far, but it’s not as good as DQ5. The job system is fun but I think the battle numbers are too high, and they had to create a lot of abilities to fill out the jobs, most of which seem fairly useless. I also never recruited a single monster even though I had a maxed Monster Tamer in my party for a good chunk of the game. The dungeon design is inferior to 5 and I really liked 5’s storytelling.
DQ will show up one more time near the end, with the SNES remake of DQ3.
This game is taking me a while; partly because it’s a long game, but also because I’m actually doing things like talking to all the villagers, and there’s more to explore in this game compared to others where it’s mostly linear.
At the end of the last post I had defeated Mudo; I think the first section is intentionally playing up the stereotypical “beat the demon king” part. This unlocks Dharma Temple where you can get jobs — I feel like they delayed the job part too much (I felt the same about DQ7). Also in comparison to FF5 or other similar games, it’s a hassle to have to go back to Dharma to change jobs because if you master a job while you’re in a dungeon, you don’t want the next battles to go to waste so you warp out.
This is the way my jobs have progressed by the end of this post:
Kurisu: Goof-off -> Martial Artist (lv 2) -> Dancer -> Superstar (will then go to Hero)
Hassan: Martial Artist -> Soldier -> Battlemaster
Mireyu: Priest -> Magician -> Sage
Chamoro: Magician -> Soldier -> Magic Fighter
Barbara: Monster Master -> Magician -> Priest (will go to Sage)
Amos: Thief -> Merchant -> Monster Master (will go to Ranger)
Amos is not a very good character with this setup; I’m not sure why I’m trying to cover all the jobs: there’s a bonus dungeon where you have to have all jobs at level 5 or 6 to unlock, but that includes a hidden job that you can’t get until after you beat the game. So to unlock the dungeon you have to fight around 100 battles after you beat the game (minimum). Even then the bonus boss is very difficult unless you either do a ton of grinding, or plan in advance for it by saving stat up items and getting the right summoned monsters and jobs; I don’t plan to do the bonus dungeon at all.
Despite having Barbara in my party as a Monster Master quite a bit I have yet to recruit any monsters. I’m not a big fan of systems like this which were also in Dragon Quest V and the Monster Maker games, where everything is so opaque and difficult to acquire. It looks like getting a Heal Slime is good, but I’ve fought tons of heal slimes and haven’t recruited any of them — maybe I don’t fully understand the way the system works.
After beating Mudo, the long middle section has very little direct or plot development. Most of the time you’re not given any explicit indication of where you can go next — at times there really is just one place you can go and you have to find it, other times you’ve opened up a bunch of different areas you can try to visit. The only real overall direction you have is that (a) the Queen of Reidock told Kurisu that he needs to find the other aspect of himself to reveal his true nature, and (b) It’s clear that despite Mudo’s defeat there’s still something going on behind the scenes with the monsters.
I think this game will not appeal to people who want a lot of strong character development and plot — I know that in the US this game has often been compared unfavorably with Final Fantasy VI. Someone asked in a previous post how DQ6 was viewed in Japan. Of course sales were through the roof (3.2 million, making it the top game of 1995), although some of this is that late 1995 was a bit of an uncertain time for game makers because many of them were abandoning the SFC, but the relatively new Saturn and Playstation were not yet established as big selling consoles. It seems like DQ6 was well reviewed at the time, but I’m not sure in retrospect where Japanese RPG fans place this in their memories.
We now have access to the ship in the real world, so we can explore the NE area of the map (shoals block the way to other areas). The first town is Monstro, where someone named Amos has been changing into a monster at night. If you tell him his true identity he leaves the village and you can’t get him to join — instead you have to get a seed from a nearby mountain to make a cure for him.
Next up is Arcbolt, where the King is looking for people to defeat a monster in the nearby tunnel. After proving our worth we set out to defeat the monster, but a guy named Terry beats us to it. Terry reoccurs throughout the game (I read somewhere he was initially intended to be the main character so they could have a different style of main from previous DQ games but in the end they went with the silent protagonist instead).
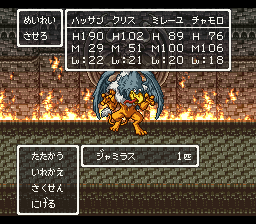
Next up is Calcado in the Dream World, where a monster named Jamiras is bewitching the people by supposedly leading them to paradise. We also take the floating island to “paradise” but instead we have to fight Jamiras to free everyone. He was tough at level 22 with still underdeveloped jobs; the strategy change that worked was to have Hassan be the main damage dealer and have everyone else focus on healing if needed. After Jaramis is beaten we get the island for ourselves to sail around in the dream world, and the Medal King’s Castle returns.
The Medal King is similar to DQ4 and 5, where you find Small Medals around the world and give them to the King for rewards. The big change here is that you no longer buy the prizes with medals, instead the prizes are just rewards for reaching certain numbers of medals. Also the Thief job has an ability that tells you how many treasures are in an area, which is a big help if you want to try to find them all without a walkthrough.
There are various small places you can visit with the island, but the next major destination is a stairway that takes you back to the real world to Holstock Castle.
The goal here is to help 15-year old Prince Holse undergo baptism in a nearby cave, but he’s too weak to fight the monsters on his own. He keeps running away and you have to track him down…I also had to leave a lot to switch people to their 2nd jobs. The reward for this part is the Magic Key, which lets us open red doors. One of them provides a way back to the dream world in a new area, where we visit the town of Clear Vale. We hear about a boy that came through on a flying bed, but he hasn’t been seen in a while. Switching to the real world we figure out it’s because the kid died. His parents tell us that a wanderer was going to give him a Badge of Courage carved from a Courage Rock nearby, but never came back.
So we head out there to give him a grave marker. This dungeon is more interesting than some of the others as you have to fall down in certain areas to advance. Once we get the rock fragment, his parents are thankful and allow us to sleep in his bed(!?) Of course we enter the dream world and it becomes the flying bed, allowing us to fly around the dream world (but we can’t pass forest, hills, or mountains).
That’s certainly a unique method of transport. In any case this once again allows a bunch of small places to visit for things like small medals or clues, but the next major destination is Foan Castle back in the real world.
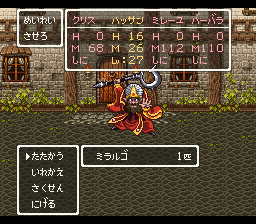
The prince here has fallen in love with a girl in a mirror, but she seems to be held captive by some unknown person. Even the Mirror of Ra doesn’t show what’s really going on, but we learn from the King that a magician called Miralgo in a tower may have something to do with it (the tower is actually back in the dream world)
He’s pretty challenging! The crucial hint to beating him I got from Ian Kelley’s very old walkthrough — Miralgo prioritizes keeping up an anti-magic shield which breaks after one spell, so if you keep casting a weak spell on him to break it, he’ll waste a lot of turns. I still had to try it several times to get some luck out of the AI (if he just keeps summoning monsters and casting Begirama it’s hard to win even with that tactic). Beating Miralgo frees the lady from the mirror to marry the prince, and he opens a watergate for us that allows us to sail into the south of the real world.
Next main destination is Pescani, where we encounter a man that is in love with a mermaid that got separated from her tribe.
We return her to her mermaid tribe and they give us the Mermaid Harp which allows us to go underwater. There are a number of things to find here — an Inn (I don’t understand how they make money), the goddess from the beginning of the game (who doesn’t really do anything), a sunken ship with the Final Key (allowing us to go back for treasures to previous areas), and Poseidon’s cave (he tells us to kill Glacos). We can also access the Slime Arena (a minigame with monster fighting) and the Style Contest.
The Style Contest is pretty annoying. Ever since the beginning of the game, you can see that every piece of equipment has a “coolness” rating associated with it. The main application of this is the style minigame, where you have to beat other contestants. You have to clear level 3 (220 style points) to get the flying carpet to win the game; this is not particularly easy. I eventually did it with several pieces of platinum equipment for the hero, a couple of Beauty Grasses, and some other accessories. But the contest takes forever to do even with speedup and I wish they had just kept it an entirely optional game. You can keep doing it up to level 8 if you want.
Anyway, Glacos’ lair requires you to push buttons to raise and lower water levels to advance. I had to leave many times here because everyone was reaching their 3rd jobs. Glacos is a relatively tough boss; I had been using Barbara because of her monster master skills but I switched in Chamoro because she had learned Bikilt (doubling damage). With this cast on Hassan, he could build power and use the Seikenzuki which would do about 400 damage. This allowed everyone else to focus on healing if necessary and just contribute damage if they could.
Glacos’ defeat restores the town of Calberona. It turns out this is where Barbara was from, and the people there teach her the Medante spell and also restore the flying carpet.
At this point there is no real indication of what you should do. Here and there we’ve been hearing about four pieces of “legendary equipment”, and now with the flying carpet we can get them all and bring this section of the game to a close.
The Sword of Ramias is on Mt. Snow. Terry actually beats us to it but when he sees it’s just a rusty piece of junk he lets us have it. Someone in the nearby town gives us a pass to enter the city of Longadeso to find a legendary smith who can repair it.
Next, the armor is in Castle Grace, which can be accessed with the flying carpet. The castle is in ruins, but a well takes us to the dream world where we see the last days of the castle — the king tried to summon Deathtamoor in the hope of controlling him, but of course Deathtamoor just killed everyone instead. While evacuating the people, the guards chief hid the armor. Back in the real world we can search the place where the armor was hidden and find it.
The shield is in a cave north of a place called Gandino; to find it you need the help of a number of clues that you may have collected up to now (only one of them is really necessary, the one you get from Gandino — the other ones just make it so you don’t have to wander around the dungeon as much).
Finally, to get the helm it’s time to go to Lifecod (the starting village) in the real world. There we meet the real world Kurisu, who came here recently without his memory. When the town is attacked, the real Kurisu reluctantly agrees to merge with the dream Kurisu, and we learn what actually happened. As was clear from early on in the game, Kurisu is the prince of Reidock who went out to fight Mudo to help his parents. In the opening scene, Mudo split Kurisu into two parts, with one going to each world.
Now that the Kurisus have merged into one, we can go back to Reidock to tell the king and queen. Kurisu still doesn’t have a complete memory of himself, but that night he goes around to various places in the castle to see flashbacks of his early life.
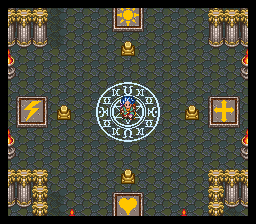
The King then gives Kurisu the legendary helm, and the smith has finished the Legendary Sword, so we have them all. Now we have to go to a shrine west of Gandino to use all of the equipment.
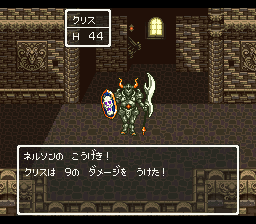
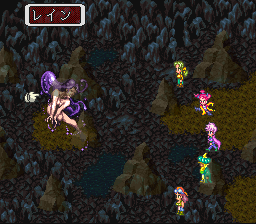
This causes the Cloud Castle (the Zenethian Castle from DQ4 and 5) to come down; unfortunately it has monsters in it, including Duran. He sends a number of his underlings at us, including Terry, and then fights us himself. At this point I had people with Bikilt — Kurisu’s Hustle Dance (restore HP to all) would have helped, but I learned it right after the battle. But Hassan with Bikilt can almost do the battle by himself, leaving everyone else to heal.
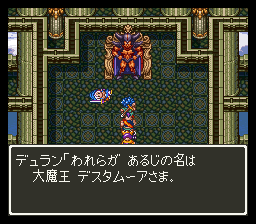
Afterwards, Duran says that Deathtamoor is still remaining, who is much greater than Mudo, Juramis, and himself. Terry also joins the party, and we now enter the final part of the game. Which hopefully I will have finished next week.
Dragon Quest VI (ドラゴンクエストVI 幻の大地), released 12/9/1995, developed by Heartbeat, published by Enix
It’s been quite a long time, but we’re back to Dragon Quest. DQ5 was one of the earliest games I played for the blog and it’s still one of the best. 3 years was the longest gap between DQ games (although the space between 6 and 7 would be longer).
The basic gameplay is familiar; as usual DQ continues with the same general feel, familiar sound effects, Toriyama’s monster designs, and such. There are a number of interface improvements (like the Bag that stores extra items), but the big gameplay change is the new class system. DQ3 had a class system that was fairly rudimentary — you chose a class at the beginning of the game for each character (except the Hero) and could change that class at Dharma Temple upon reaching level 20. There was a hidden Sage class that could only be accessed by a “Goof-off” or with a hidden item.
In DQ6, about a third of the way through the game you revive Dharma Temple and can then choose classes for characters. Each class has 8 levels, and the levelling is based on fighting a certain number of battles. There are second-tier classes that you unlock by mastering two basic classes, and there is a Hero class that can be accessed by mastering one second-tier class for the main character, or all four second-tier classes by anyone else. Finally there are two hidden classes that can only be accessed by using items, one of which can only be found in the post-game content. (This system would be repeated in DQ7 with some modifications).
This brings a large number of new skills and abilities to the game. In battle there are many more options that do not cost MP, leading to something of an imbalance (the classes are inherently imbalanced at any rate).
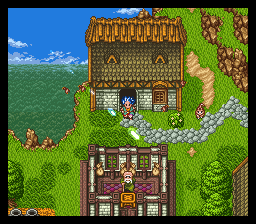
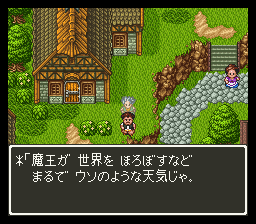
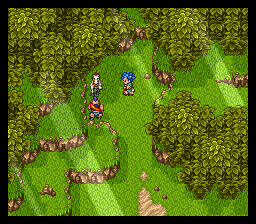
The game begins with a dream sequence where the main character (Kurisu) and some companions are taking on the demon lord Mudo. But, it turns out this is a dream sequence, and Kurisu wakes up in his home village Lifecod.
The graphics are much improved from 5 and another good example of late-SFC era pixel art. Kurisu has been chosen to go down the mountain to sell some town goods and buy a tiara for his sister, who will be the priestess of this year’s spirit festival.
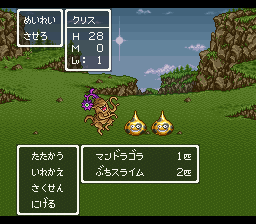
Rather than the usual blue slime to start off, they give us mottled slimes. This mountain path is actually one of the harder dungeons in the game because it’s just weak Kurisu and you have no Return/Escape spell. It takes some grinding or just exploring before you can make it down. However, I appreciate as always that if you die, DQ sends you back to the previous place you saved with any items/XP intact but half your gold. This game adds a bank you can store money in that will not be affected if you die.
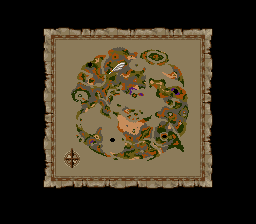
Anyway, Kurisu makes it to Sienna at a beefed up level 4. This town has a bunch of bazaars and other things. You can buy a world map and a thief’s key (I think the World Map is not so useful despite what walkthroughs way; you do want it eventually but you can come back here later and buy it). I spent all my money on those things rather than equipment.
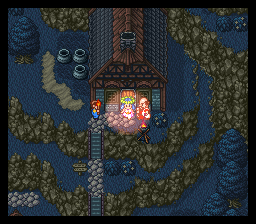
Turns out the tiara maker left down to the west and hasn’t come back, so Kurisu hunts him down hanging by a thread on the edge of a huge hole. Kurisu saves him but falls down the hole instead, and finds himself in some kind of parallel world where nobody can see him.
Apparently this world is having trouble with Mudo as well. In any case there’s not much to do here except take the well back to the surface and head back to Sienna — the tiara maker is so grateful that we saved his life that he gives the tiara for free. Kurisu heads back to Lifecod to do the spirit ceremony.
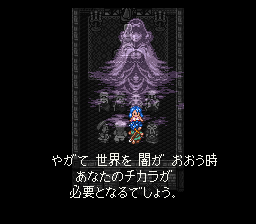
During the ceremony, the spirits come and tell Kurisu that it’s his destiny to go beyond the village and fight the darkness that’s threatening to world. So Kurisu gets a letter from the elder so that he can pass the barrier gate, and heads to Reidock Castle where the king is looking for warriors to fight against Mudo.
In Reidock, Kurisu meets Hassan and goes out to compete against other people to recover an item from the Trial Tower.
This is one of the few dungeons in the game that has a good construction — one of my biggest disappointments about this game compared to 5 is the dungeons. 5’s dungeons had a lot of individuality and were more than just tunnels and treasures. I always appreciate games that do this (Breath of Fire 1 was another good one for this). DQ6 trends much more towards the “tunnels and treasures” style that is a staple of lower budget games and old NES-era stuff.
Now that Kurisu passes the test, he’s given the mission to find the Mirror of Ra so that they can expose what’s going on with Mudo. Hassan wants to go to, but they decide first to tame a wild horse that will give us the cart (enabling us to have a bigger party).
Nobody really knows where the Mirror of Ra is so we set out without much of a goal, only to happen on yet another one of those holes to the other world.
We do find someone here in San Marino that can see us — Mireyu, who along with Hassan was the party in Kurisu’s dream at the beginning of the game. Apparently she was also transparent at one point but an old woman helped her. Said old woman can make us visible if we bring her a Dream-seeing drop (the name here seems to be a clue to later revelations). This does in fact work, and now that we’re visible we can take a ship to the Reidock Castle in this world.
In Reidock, it seems that the King and Queen have been sick for a year, and that Kurisu is mistaken for the prince of the kingdom (if you buy the Noble Clothes at the store). Although they quickly figure out that Kurisu isn’t actually the prince and ban him from the castle.
At this point we do a little story that switches between the two worlds, and starts to hint at what’s really going on — we switch to the starting world after sleeping and recover a ring for an old woman who says she dreamed of us. But then we get the key for the Mirror Tower and it’s time to get the Ra Mirror.
The tower gives us our fourth party member, Barbara, another ghostly person (who we can turn solid with another Dream Drop) — she had come to the tower hoping that the Ra Mirror could tell her what was wrong. In any case, we recover the Mirror and it’s time to go back to Reidock Castle (in our world, since they still won’t let us into the castle in the other world).
But the mirror reveals a strange truth — the “King” is actually the Queen, who says that the real King is apparently Mudo somehow. So we need to go Mudo and reveal his true form with the mirror. Mudo’s castle is far to the SE and requires going through a pretty long and involved cave — fortunately once you get through there you can use Rura (the town warp spell) to get back to the castle.
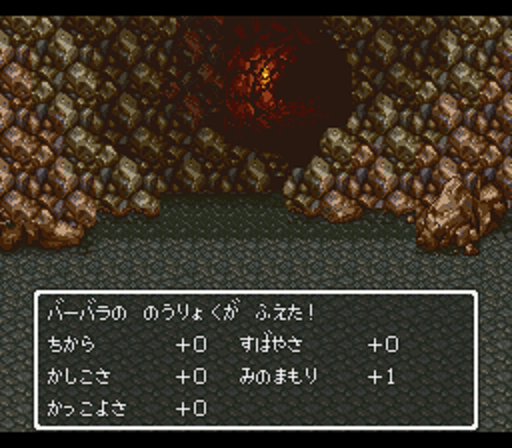
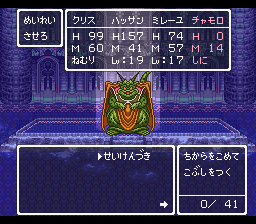
Barbara’s well known bad stat growths
Mudo himself is somewhat challenging but I was able to beat him at level 16. The Mirror of Ra reveals him to be the King of Reidock…the King from the alternate world. Although this is where the truth of the worlds is revealed: the world you begin the game in is the Dream World, and the “alternate world” is the real world. And back in the real world, we have to deal with the real Mudo.
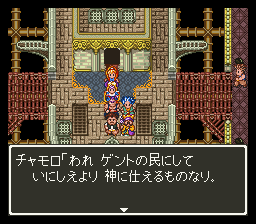
This requires getting the God Ship from the Gent people; you also get the 5th party member Chamoro here, as well as the Gent Staff which is very very useful (casts Behoimi when used as an item). Now it’s off to Mudo, which requires another long cave and castle. In the castle, Hassan comes across a statue that he merges with to become his true form (presumably the statue is the stone figure from the opening).
When the party reaches Mudo, the same thing happens at the very beginning of the game — he turns them all to stone and Kurisu wakes up in his bed in Lifecod. I think the suggestion here is that what happened in the opening was not actually a dream, but was (perhaps?) the Prince of Reidock taking on Mudo for real. But I’m not sure. In any case the Ra Mirror reveals the truth and Mudo himself fights us.
This is a very difficult fight. Mudo has two forms, the first one he appears with two other monsters (who he’ll summon again if you beat) and the second can attack twice. It helps a lot to have Skult (the party def up spell) for Mireyu, and Zaoral (the revive spell) with Chamoro. I was at level 18 when I beat him.
Afterwards, the Queen of Reidock tells Kurisu that he is actually the Prince but needs to find his true form (presumably the statue, just like Hassan did) and sends us out with the Gent ship. Darma Temple has also revived (in the dream world) so we can use classes. This is what I chose:
Kurisu: Goof-off (I should have done Martial Artist 2 levels first to get the spin kick move, I did this after mastering Goof-off)
Hassan: Martial Artist
Mireyu: Priest
Chamoro: Magician
Barbara: Monster user
I’m not sure that monsters are especially useful but I decided to make one anyway.
This is how far I got when I played this game many years ago when the English patch first came out. At this point the game opens up a lot and there’s more freedom, but this is a good place to end this post.
A commenter asked a good question as I come up on my 6th anniversary of this project — why the blog?
This can be answered in several ways. Why play all these games in chronological order? For some reason I like doing stuff like this; before I did this blog I was playing all the Super Robot Wars games in release order and I have other projects like this that aren’t video game related. I’m not entirely sure why I like doing this kind of thing.
Next — why do something like this site rather than just playing the games? I like having a record of what I did that I can look back on later. I was just looking back at my Dragon Quest V posts in preparation for making the first DQ6 post this weekend and it was fun. I wouldn’t have remembered all the things I wrote down. Plus I like getting comments from people.
Finally, why a blog? Why not a twitch stream or a youtube channel? The main reason for this is that it’s the least effort — the relatively low amount of effort the blog posts take is the main reason I’ve been able to consistently update almost every week for the whole 6 years I’ve been doing this. I never wanted to get into a situation where I was backed up on things, with the blog or channel 10 games behind where I actually was. So I never force myself to write more than I want. This means my posts aren’t as good as someone like CRPGAddict but at least I can keep the consistency.
I don’t know much about video editing so I would have to learn a lot to make youtube videos and it would take more effort than I’m willing to put in given the (probable) low viewership of the videos.
I did actually twitch stream for a little bit, but this is just too niche to attract even retro gamers who probably don’t want to watch games in Japanese. Plus, for several reasons I hardly ever play a game for more than an hour in a sitting, which isn’t good for streaming.
So the blog is the best way to record my progress in a way that’s convenient for me (I also like revisiting blog posts more than youtube videos).
I’m back. In the last post I mostly went over the game system of RS3. After the initial story sequence the main goal is simply to explore around the world and find things to do. I was stymied by that rat quest I mentioned, which is an annoying beginning to a game that’s supposed to not have these kind of blocks.
In any case, with a walkthrough I solved the rat quest. Many of the game’s quests do not really provide much in the way of rewards, they’re just a way to build your levels and earn skills without having to just grind in circles.
Early in the game I talked to someone who revealed what seemed to be at least the first major “story” quest and links up with the opening pre-title screen narration. There are four elemental abyss gates that need to be sealed by defeating their guardians. But the person can’t give any specific information on where these gates are, so that’s something that will need to be uncovered through game progress.
Meanwhile I gained some party members — it’s annoying to have party members like the 2nd one who join you just by talking to them without any confirmation, and can’t be gotten rid of (except by killing them off permanently). I also found a place where I could send various people around the world to work on forging weapons and armor, which seemed like a better way to get equipment than to buy it in stores with the very limited amount of money I had. Instead I was using the money to open new towns.
I also didn’t get much magic because it seemed too expensive.
Here are the missions/events I manged to do:
Protect caravans going from one town to another, and then visit the thieves’ cave to stop their marauding
Recover a strange woman’s “pets” in the forest
The rat quest
Rescue a boy named Gon from the Devil King’s Palace (which will have a more in-depth quest later, I think)
Deal with the “mysterious thief Robin” and the imitator
Defeat the master fish in the Ice Lake to allow the villagers to fish again. This was a tough boss at the point I fought it, and I barely survived.
The Muse Dream world. This may seem tough at first but each fight gives you an item that completely restores all your stats (including LP), making it hard to game over if you’re aware of this — all of those items disappear when you complete the dream section, so you don’t need to worry about wasting them.
Treasure Caves in the islands (although I didn’t do the Dolphin statue part)
The long series of events in the desert — this place can be a bit annoying because you get locked into a series of quests and cannot leave back to the world map until you complete them. The final boss in this section is rather difficult, but you can recruit an old woman that has the Tornado spell which the boss is weak to.
Although I can’t say I was having a huge amount of fun with this game I am sorry that my save got deleted. From the amount I played, it does seem like this is the most approachable Romancing SaGa game — RS1 is too hobbled and unbalanced, and RS2’s system is too complicated and unforgiving, and is even more unbalanced than RS1. As I said before, I felt that the first two games wanted you to figure everything out on your own but then made the difficulty so punishing that it didn’t feel rewarding to try to work it out. RS3 is much easier (as long as you don’t get stuck on that rat quest as your first thing). You’re able to try out more things and make mistakes and experiment without permanently missing things or locking yourself into bad results.
I also did not do the Business or Ruling minigame at all; they seem quite in depth and could add a lot of interest (and the Business game seems like the best way to get money).
The game was remastered for Android quite recently and has an official English translation so that may be the better way to play than the original.
I had a strange occurrence when I got back from vacation. I took my laptop along but I couldn’t find any convenient place to set it up so I played Another Eden (as I said in my last post). When I got back and tried to play RS3, my save file was gone or had been overwritten by the emulator, and all the emulator settings were gone as well. I’ve been using the same laptop and setup for all 5 years I’ve been doing this project and this has never happened before — I was still able to load save games from the other games I played before.
Although RS3 was coming along OK, I wasn’t enjoying it enough to want to start all the way from the beginning, so I’ll move along to Dragon Quest VI instead — I’ll post a final update about RS3 this weekend.
For now I thought this would be a good place to collect a list of the Super Famicom games that I have either skipped or not finished. First, these are the games that I started to play but did not finish:
SD Gundam Gaiden Knight Gundam Story – This game is a combined port/remake of several Famicom games; I found the game slow and boring and so stopped playing on the grounds that it was a port.
Dragon Ball Z – I had reached a point where I could not beat a boss and it looked like I would have to start over from the beginning; since there is a patch for this I moved on.
Romancing Saga – I reached a point where random encounters were giving me game overs and I was not confident in my ability to finish the game even if I did grinding.
Cyber Knight – The game was not fun and I was losing badly even in regular encounters.
Romancing Saga 2 – Basically the same reason as RS1; I didn’t want to do the amount of grinding it seemed like it would take to win.
Wizap! King of Darkness – Technically I “finished” this game but I got a bad ending that didn’t require me to actually accomplish anything. I couldn’t figure out how the game worked without a manual or guide.
Nekketsu Tairiku Burning Heroes – I finished two of the routes, but it looked like the other 6 routes were basically the same game with slight differences, and there was no bonus for doing all of them, so I moved on.
Mahoujin Guruguru – This isn’t really an RPG in my eyes, so I played it until it got annoying and grindy.
La Wares – This game was awful, has a patch, and once again was going to take a ton of grinding to beat.
Ruin Arm – Also not really an RPG by my standards.
Demon of Laplace – This game was OK but not great, and perhaps I skipped it too easily on the excuse that it’s a port.
Dunquest – Same as Guruguru and Ruin Arm, not really an RPG to me.
Romancing Saga 3 – Save game deleted, unwilling to restart.
Now here is a list of games that I skipped because they have official English releases (E), are ports of games from other systems (P), or I’ve already finished it before starting the blog (F):
Drakkhen (EP)
Ys III (EP)
Final Fantasy IV (EF)
Dungeon Master (EP)
Lagoon (EPF)
Super Chinese World (E)
Soul Blazer (EF)
Dragon Slayer: Legend of Heroes (P)
Inindo (EP)
Arcana (E)
Ultima VI (EP)
Shin Megami Tensei (F)
Lennus/Paladin’s Quest (E)
Elnard/7th Saga (E)
Wizardry V (EP)
Final Fantasy V (F)
Burai (P)
Might and Magic II (EP)
Spike McFang (E)
Legend of Heroes II (P)
Lufia (EF)
Final Fantasy Mystic Quest (EF)
Secret of the Stars (E)
Ys IV (F)
Dragon Quest I&II (P) – I feel like I should have played II, at least. I’ve beaten I for the game boy, but never II for any system.
Eye of the Beholder (EP)
Shadowrun (E)
Final Fantasy VI (EF)
Ultima Gaiden (Runes of Virtue II) (E)
Brandish (E)
Robotrek (E)
Super Drakkhen/Dragon View (E)
Ultima VII (EF)
Chrono Trigger (EF)
Princess Minerva (I played the PCE version)
Emerald Dragon (same)
Brandish 2 (P)
Wizardry VI (EP)
This leaves a few more: Shodai Nekketsu Kunio-kun, and Jojo’s Bizarre Adventure are both only marginally RPGs I think, and Jojo has an English patch. The Barcode Battler game can’t really be played without the unsupported peripheral. All the games relying on the BS modem hookup have content that can’t be emulated.
It’s possible that some day I may come back and do some of these games I skipped. I have an idea for what I want to do once I finish the SFC library, and that could include some revisits of these games.