Monthly Archives: August 2017

SFC Game 13 – Hero Senki

Hero Senki: Project Olympus (ヒーロー戦記 プロジェクト オリュンポス)

Released on 11/20/1992, published by Banpresto


This is the first RPG in the “Compati Hero” franchise, a series of games that combines Gundam, Kamen Rider, and Ultraman. Prior to this game they were all action or sports. I’m fairly knowledgeable about Gundam (at least the series that were out in 1992), but I know next to nothing about Kamen Rider and Ultraman. That makes the franchise hard to fully appreciate — judging from the way Gundam is used in this game, I’m sure they’re using a lot of characters and situations from Ultra 7 and Kamen Rider, but I can’t appreciate this aspect of the story.

The character designs are “SD” (Super Deformed) style, which allows them to fit together the series without it looking ridiculous due to size differences.

Gameplay is pretty standard RPG, with a few special features. Each character has a free move they can use, although it’s not clear what they do — the instruction manual tells you to try them out to see, but I don’t like this kind of coy thing they did in old RPGs. I can’t check to see what they do until my 1 week is up so until Monday it will be a mystery. The other special moves use TP, but you can’t heal TP in town. Instead you get a few points back when you attack, and a substantial amount back if you kill something. This is an interesting change and lets you use your moves a little more regularly.

The beginning of the game introduces you to ZEUS, a group composed of Amuro Ray (Gundam), Kotaro Minami (Rider Black), and Dan Moroboshi (Ultra 7). They’re the main three characters in the game. The fourth spot on the team rotates. At the beginning it’s Gilliam Yeager in the Gespenst, a character who would later appear in Super Robot Taisen 4 and then the Original Generation games, and is still appearing. Here he is in 2nd Original Generations:

There’s also a running joke where Gilliam tells you to play Hero Senki; this made sense when he first did it in SRW 4 (for SNES), but now it’s just become a tradition. Gilliam has lost his memory; all we know is that his Alpha Squadron was destroyed.

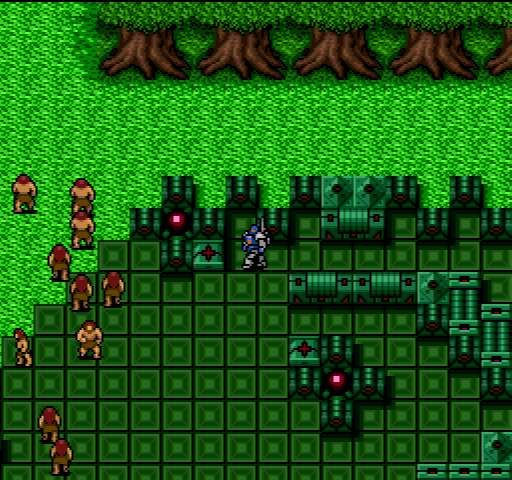
The main purpose of ZEUS is to fight terrorists, who have conveniently appropriated all kinds of mechs and other things from the enemies of the various franchises (or in some cases the actual enemies have joined the terrorists). The graphics remind me of RPG maker.

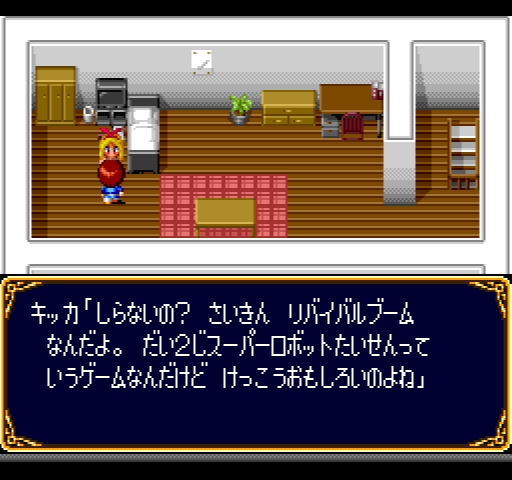
Kikka, one of the little children from the original Gundam

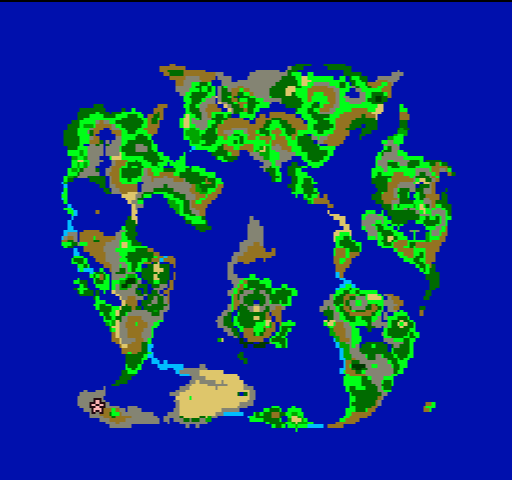
There’s no explorable world map. Instead, to go to different places you leave out an exit and then travel on a road of some sort to the next location.

Along with Mode 7 graphics

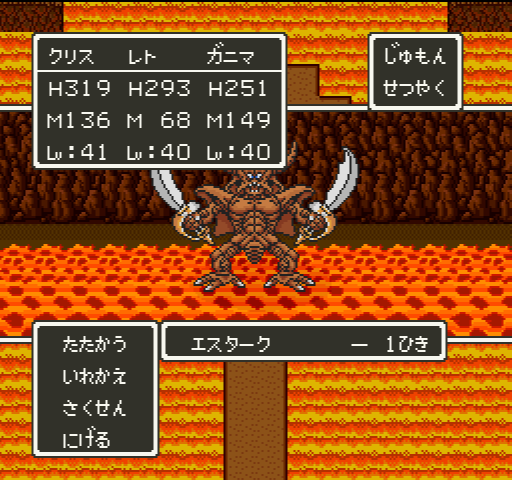
Our first goal is to take out the terrorists in a nearby cave.The battle scenes are typical RPG, but move quickly:
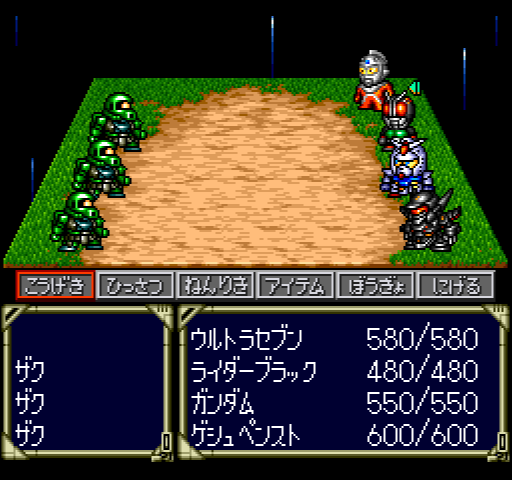
3 Zakus

You walk very fast on the map and the random encounter rate is medium, plus there’s no inventory limit (other than a 9 item limit for each item). You can save anywhere. All of that makes the game fairly easy to play. Fleeing from battle is automatic but you lose one “konjo” point. They can be recovered at a hospital, but the effect is fairly small. It reduces the amount of HP you recover when you defend, but you gain so little HP from defending that it doesn’t matter. Supposedly it also makes it easier to get hit by certain status effects if it’s lower.

Char and Garma

At the end of the cave are Char and Garma (from Gundam) who fight you but then realize you’re not terrorists. After this it’s off to Theis City, which I gather is something from the Kamen Rider series. The enemies here look like bugs or Mexican wrestlers:

Kamen Rider

Here we face off against the Shocker group from the original Kamen Rider, including Colonel Zol and Dr. Shinigami. The boss battles are generally manageable. Ultra 7 has a nice party heal tech. Regular attacks don’t do much damage against bosses but I’ve always had just enough power to squeak out a victory. This city involved an abandoned building that was controlled by Shinigami, along with hostages — but we can find a secret way in by getting the notes from the original builder. Gilliam gets trapped inside while trying to save a girl, so he’s not in our party for a while.

Finally we headed to Lhasa City, which is controlled by the Titans.

Jerid and Scirocco

At this point they’re not openly attacking us but they’re insulting and hostile, and I wouldn’t be surprised if we find out at some point they’re working for the terrorists. In the next dungeon are the Three Tristars from Gundam. They’re apparently working for the terrorists instead of Zeon.

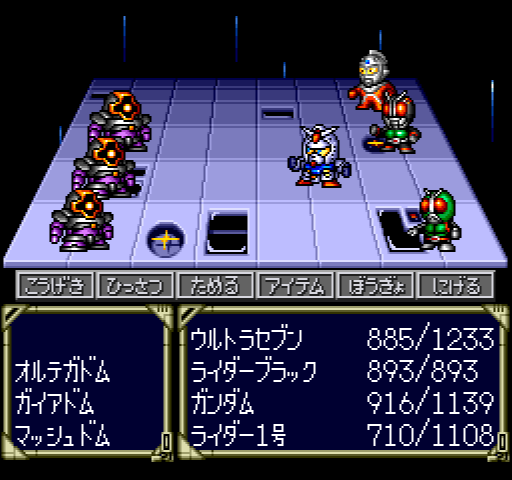
Ortega, Gaia, and Mash

That’s all the progress I made this week. I apologize for not taking more notes on the story; since there’s no translation patch for this I should be a little more descriptive about what’s going on. I’ll do better on the next update.

Three skipped games

Next up on the chopping block:

Shin Megami Tensei

This is the third game in the long-running Megami Tensei series, which started with two games on the NES. I played both of them in their Super Famicom remake. They are clearly indebted to the Wizardry series but introduce the system of being able to recruit almost any enemy in the game to your team, which can then be summoned via a computer.

The main problem with both games is a problem common to a lot of early first-person RPGs — large mazes with almost nothing in them. When I was 10 I thought it was fun just to walk around, map, and fight battles. Mapping a Wizardry level felt like an accomplishment even if I didn’t find anything on it. But after playing the gold box games and later Might and Magics, I lost interest in empty dungeons.

Shin Megami Tensei improves a little on that, but not enough. There are more dungeons so at least there’s more variety, and the story is certainly better than the first two, but I feel the game is a bit overrated. Maybe I just feel that this kind of game doesn’t age as well as a top-down DQ type game.

As you can tell I’ve already played this one so I’m skipping it, but I have not played II or If…, so when I get to those they will be on the blog.

A translation patch is here (that’s actually a bugfix for a translation but it links to the main patch.)


Lennus: Memories of Ancient Machines

This game was localized as “Paladin’s Quest” in the US; the title has nothing to do with the game but apparently the localizers thought it sounded more like a game Westerners would buy. It’s one of those localizations where they were too lazy or underfunded to expand the VRAM so the items have names like “Mid drs” and “Sct msg”. A friend of mine had this when I was a kid and didn’t seem to like it much.

Zenic and Shen will get here eventually.


Wizardry V

This is a port of a western RPG; the graphics are better but since it’s a port and it was released in the US I’ll skip it. I played the DOS version many years ago but I didn’t get all that far. CRPG Addict has completed this game.

SFC Game 12 – Cyber Knight Part 2

This game sucks. I’ve been procrastinating all week and then forcing myself to play it, and haven’t made that much progress. I’ve gone back and forth on whether to quit playing or not, and I think finally I’ve decided to move on. It may seem odd that I played through crap like Light Fantasy and Fist of the North Star 5, but Cyber Knight has an English patch and a walkthrough, so anyone can play it. It’s as bad as those “kuso 5” games I played earlier, though.

The main problem, aside from the insane random encounter rate, is that the designers let realism get in the way of fun. I’ve encountered this in other games — for instance, I’m typically very skeptical of any sort of system involving weapon or armor repair. It always seems like it adds more frustration and tedium than any sort of strategy or fun.

Cyber Knight’s problem is the way you develop your characters, and the failure of the designers to properly balance the game to take account of it. As I said in the first post, the designers were after a more realistic type of character development. So you can’t just go out and fight to strengthen your mechs, nor can you spend some nebulous “currency” to magically make your mechs stronger and stronger. Instead, you have to take parts off defeated enemies. And furthermore, it makes sense that you wouldn’t be able to use the same parts over and over again to increase your strength to infinity, so each part only works once (or at most twice). This is more realistic, but it also imposes a hard cap on your mech stats. This is especially a problem for defense and Energy Points (i.e. hit points).

What are you supposed to do when you meet a random monster that can attack your entire team for over 1/2 their HP? You can prevent that attack by closing in to fight, but that takes at least one turn. You can’t level up or equip better armor or anything like that. So basically just hope you can flee. If not, you’re screwed. And even if you do run, you better hope that the next encounter you get in three steps isn’t the same thing.

There are defensive barriers you can equip, but it’s not clear what effect they have. I equip them but random encounters still kill me in 2 hits sometimes. You either dodge completely, or you take 1/3 of your HP. If someone dies there’s no way to revive them, and there’s no way to heal or repair in battle. This makes going through dungeons heavily dependent on luck. Even with save states I found it frustrating.

Finally, the combat system has some issues that are annoying me more the more I play. The worst is the enemy movement — since you put in your commands before the enemies move, you frequently lose your turn because the enemy moves out of range. It adds yet another element of randomness to the battle.

Anyway, here’s what I did do. I had to go back to the Trader planet to hear about the Red Crystal. Once I did, I was able to grab it fairly easily, extending my jump range. Now I could go to a planet with “primitive” people:

More descendants from the Europa

Some of them had been captured by berserker robots, so it was time for another Berserker base. These always follow the same pattern — the enemies are a mix of old and new ones, and you have to find your way through the building. Often you have to deal with false doors or confusing passages, but finally you’ll come to a boss who will appear out of nowhere. In this case the boss is the Hydra:

Hydra

The Hydra could kill one of my units, defending, with a single shot. The trick is that you have to close in on the Hydra as quickly as possible to prevent it from using its attacks. It took me 7 save state reloads to successfully do this and beat the other enemies. But once I did I was able to free the captives, and they gave me a wood carving that one of the Traders wanted.

The grateful “primitives”

Also from the same planet I got a video disc that I could go back to the Europa and play; it just gave a bit of information on the last days of the Europa.

Next up is a planet with pink whales.

This came out before Macross 7

They’re upset that berserkers are on the planet, so it’s another berserker dome very similar to the previous one. This time the boss was easier, and after destroying it I was able to get the whale song.

Doo doo doo

Back at the Trader planet I was able to trade the song for some information, but not a whole lot — then it was off to find a Trader youth who had been trapped on a planet…and there’s another berserker base there. Same deal as before, but the monsters were much harder here. There were two bosses. The first consisted of a strong enemy plus 1-3 of the boss from the whale planet. I had to save state reset until there was only 1 to survive.

The second boss

The second boss wasn’t too bad. After the enemies are cleared I found a black cube in another area. Returning to the Traders gave me the information on the main quest — if I find all 4 monuments and the black cube, I can talk to the Mentana (the “gods” who created people). I already have 2 monuments, so I went in search of the next one.

The next planet had yet another berserker dome. I met more monsters who slaughtered my party and began to curse myself for not skipping this game in the first place.

So unless someone who has played this game can come in and tell me I screwed everything up and that it’s much easier if you understand the system better, I’m done. It’s a port so I could have skipped it anyway by my original rules, but it’s not something I like doing.

Here’s the patch if you want to give it a try.

SFC Game 12 – Cyber Knight

Cyber Knight (サイバーナイト) 

Released on 10/30/1992, published by Tonkin House


I can’t say I’m happy to see Tonkin House’s name pop up again. So far their contributions to the SNES are Ys III (a bad port of a bad game) and Light Fantasy (the worst RPG for the system so far). This is a port of a game that was originally released for the PC Engine (Turbo Grafx). I’ve said that I can skip a game if it’s a port, but that’s mostly to avoid bad/lazy/downgrade ports. In this case the game was extensively retooled and a lot of material was added, so it seems worth playing.

According to the manual and the box, this was an attempt to create a “Hard SF” RPG. They do seem to have put a lot of thought into this, since the system is different from other RPGs in a lot of ways that make the game more realistic. I’ve only played the game for 4 hours so far so I don’t have a lot of progress, but it will take a while to explain how the game works, so maybe that’s OK. (It also makes me glad I decided to buy a hard copy so that I could get the instruction book!)

The setup for the game is that in 2352, the ship Swordfish was attacked by pirates while on a mission. They had to use a hyperwarp jump of some sort to escape, but that left them stranded far away from Earth. Most of the crew is dead, and the ship is too damaged to make a long jump back to Earth. The main character is the person who has to sub in for the dead captain. Aside from him, there are only 23 survivors, 5 of which can pilot the Battle Modules (mechs).

Kurisu, our main character

At the beginning you can assign points to three attributes: Constitution (gives you more Life Points), Intelligence (greater hit percentage), and Speed (go earlier in combat and dodge easier). I assigned points evenly to each stat, but maybe I should have done differently. The other 5 characters have their stats pre-determined. One unusual aspect of the game is that these stats (and your life points) never improve throughout the game. They’re just a measure of the innate ability. What does improve are the Skill Ranks, on the bottom right. These are:

  • Combat (helps them fight better)
  • Mechanic (recover more EP from a repair)
  • Medic (recover more LP from a heal)
  • Science (greater chance of recovering Neo Parts from defeated enemies)

The main character has all 4 skills, but everyone else just has Combat and one other skill. When you level up, your skill ranks increase, although I don’t know what determines which one increases.

The other characters

Other than Kurisu, we have Klein (fighter), Killy (fighter), Shine (scientist), Vindo (mechanic) and Nijina (medic). Kurisu always has to be in the party, but you can choose the other two freely.

The Swordfish

On the ship you have five places to go:

  • Bridge (take off/land, or go to a different solar system or planet)
  • Lab (analyze Neo Parts)
  • Medic (restore LP, save game)
  • Lounge (switch party, see party stats)
  • Hanger (leave ship, assign weapons to Battle Modules, repair Modules)

Once you’ve assigned weapons to your Modules you can leave. Each time you leave you get 10 repair units and 10 healing items (the amount they heal or repair being dependent on your stats). You also get to refill the “option” weapons, which are weapons you can assign to the Modules in addition to the four main ones.

Kurisu’s Module, the Lex

Each Module has various stats and types of attacks they’re good with. You can bring 4 weapons along and have two equipped at a time (unless it’s a 2 handed weapon), but you can switch weapons any time you want. This gives you a lot of options during a battle, and it’s important to switch weapons frequently depending on who you’re fighting.

The Bridge lets you jump to different places, and scan planets to see if there’s anything worth visiting.

The galaxy

At first you can’t jump at all, but after the first mission you can jump one square as long as it has a planet in it. That effectively confines you to the six solar systems at the top right. Once you reach a solar system, you can do a Short Jump to each planet to see what’s there. Most of the planets are uninhabitable and can’t be landed on. Once you find one that you can visit, you can land and explore. This might seem like you have a lot of freedom but you actually don’t — if you don’t have a specific reason to visit a planet, you can land, but MICA (the ship’s computer) won’t allow you to walk more than a few steps from the ship. So despite that fact that you can visit 6 solar systems each with 5 or 6 planets, you’re actually extremely restricted in what you can actually do.

Once you’ve identified a place to go, it’s time to leave the ship.

Farworld, the first place

The first task is to repair the jump drive so that we can leave the initial world. There are two places of interest at the beginning — the town to the left which gives some information, and a crashed ship to the north. The ship is the Europa, a colony ship that left Earth 250 years ago but disappeared. The villagers in this town are the descendants of those colonists but have developed some myths about gods seeding the worlds with life. They also mention rogue robots that are plaguing the area. So our first task is to visit the Europa. Pretty quickly the combat system appears.

Kurisu, Killy, and Shine vs. four enemies

The combats take place on a 6×6 grid. Each turn you choose for each character where you want them to move, and what action to take. Then all the actions are executed. This can be problematic because if you move next to an enemy and try a hand-to-hand attack, if they move away that turn you lose your attack, even if you have a gun equipped. I guess the idea is that you already started to lunge at them with your saber or fist but they moved away. Same thing happens if you want to shoot an enemy but they move in your range. This takes some getting used to, and annoyingly it doesn’t seem to apply to the enemies.

Shine taking damage in the Winner

The attacks show a small animation and then how much Life Points and Energy Points you lost. As far as I can tell, there’s no way to heal in battle, you have to wait until after. There are different types of damage (e.g. beam, heat, physical) and each enemy has its own strength and weakness. The battle system is pretty complicated at first and I got a game over early on, but once you figure out what’s going on it’s not so bad.

However, there is one huge, huge problem — the random encounter rate. This is a common issue with older console games, but it’s especially tedious in a game like this where each combat takes some time. I actually think the strategic combat in this game is well designed and interesting, but when every 3 steps has a fight, it saps my will to play the game. This is partly why I made so little progress this week — as I said, I’ve instituted a new rule where the first week I play each game, I will not make use of any emulator features or walkthroughs. Starting on Tuesday I can use the speedup key to get through battles faster, but until then it’s rough. And it’s sad to see such a promising system torpedoed by a ridiculous encounter rate.

Kurisu hitting all enemies with a machine gun

The tedium was worse for me because I kept messing up and had to visit the Europa 4 times. I was supposed to go to the Bridge and try to jump, and learn that I need to take Vindo to the Europa because he’s the mechanic. I didn’t do that, so the first time I didn’t have him and had to go back. Then I had to leave because I got too wounded, then I tried to switch out a character and accidentally left Vindo behind, then finally I got the Coil to fix the jump drive.

The Europa

When you return to the ship, if you did something to move along the plot you get bonus XP. Then you can repair and restock, and take any Neo Parts you got from enemies to the lab for analyzing. Since the designers were going for realism, you can’t level up the Battle Modules by fighting, and the enemies don’t drop money (nor do they pretend that the defeated robots can be converted at a standard rate to some magic currency that works everywhere in the universe). So the only way to improve your weapons and mechs is to recover Neo Parts from the enemies and have Shine analyze them in the lab. Some people on GameFAQs said that only the first two parts from each enemy have any effect; I don’t have confirmation of this but it seems to match my experience. So far all I’ve gotten are new weapons and increasing the hit rate of existing weapon types.

Once I recovered the Jump drive I was able to visit another place on the same world and defeat a robot boss, who was apparently masterminding the berserk robots on this planet.

Rakshasa, the first boss

The boss wasn’t very hard. The next destination is the planet of Traders, who give several leads by giving you offers to trade for various objects.

Traders

The first thing I need is a Red Crystal to trade for an improved Jump Drive so that I can jump past the initial 6 solar systems. Although I thought I talked to everyone, apparently I didn’t because when I got to the place where the Red Crystal is supposed to be, MICA won’t let me go anywhere. This is where I stopped, but I’ll head back to the Traders and try talking to everyone again.

SFC Game 11 – Dragon Quest V Review

As I said at the end of the last post, this is the best game I’ve played so far in this blog. In a way I’m a little disappointed that in the first 11 games, the best one (with no question at all) is a well-known game that I would have expected to be good.

Story/Characters: The main character is the usual silent protagonist, but this really works well at certain points of the story where you can project your own reactions to the events onto the character. The other characters on the whole are not all that detailed.

The story is better than the characters, I think. It goes basically through three phases — starting with your character as an 8 year old child and going all the way up to his own children. Although ultimately the story is your standard “beat the evil demon” plot that Dragon Quest usually has, there are a lot of surprises throughout the story and some pretty dark stuff. 

This is supposedly the second game in the “Heavenly castle” trilogy of DQ4-6 but unlike DQ1-3, there are no actual plot connections, just similar elements. 

World: This category is always tough to write; maybe I need to redesign the review part. DQV is similar to previous DQs in that the world is basically a generic fantasy world. There’s really no attempt to build up a consistent, memorable world — which is fine, I guess.

Game Flow: The variety in the dungeons is what really keeps this game going. As is often true in DQ games, the encounter rate is a bit high, but fortunately most battles go quickly. The only sticking point I found was the end of the game, where the final boss is a pretty large leap in difficulty and requires some grinding.

The fact that you can die and keep your progress (but lose half your gold) also makes the game a lot smoother because you don’t have to worry that venturing into a dungeon and failing will wipe away an hour or two of progress. It’s too bad more games didn’t do this. Money is useful right up to the end of the game (I never had enough to buy the best stuff for everyone), so losing half your money is a significant penalty. You can store it in a bank, though, before you go.

I only had to consult a walkthrough a few times.

System: If you’ve played any other Dragon Quests you’ll be at home here. It’s the same basic turn-based “attack, magic, defend, item” system as usual. 

Most of the good spellcasters can also attack fairly effectively too, and there are a lot of items that can use spells for free. It’s also not as important as in some other games to hoard MP for a boss fight.

Monster recruiting is the big new system here, but it’s a little rough. The biggest problem I had is that there’s no way (absent a walkthrough) to determine which monsters you can recruit. Since you have to be stronger than them to recruit them, this means if you’re not grinding a lot as you play, to get additional monsters you would have to revisit old dungeons on the chance that a monster there might be recruitable. Fortunately, the monsters can level up and use equipment, so even monsters you get very early in the game (e.g. Slime Knight) can be useful right up to the end.

I do wish they had allowed 4 characters in the fight, though. Having only 3 makes it hard to use the monsters to their full effect, especially in the last third of the game when you have three good human characters.

There is an inventory limit but it’s quite reasonable, and I never felt pinched for space.

Side Quests/Optional Content: There’s a bonus dungeon! I believe this to be the first console RPG that does this, but I’m not sure. It unlocks on beating the game. It’s small and doesn’t really offer that much, but it’s nice to see this RPG staple finally making its presence known.

Interface:A lot more polished than other games from this period. You have the one-button interface to do common stuff. You can see power of weapons and armor before you buy it, and it shows you a list of all the characters and what effect the item will have on their stats. You also get to see when you trade an item what change it will make to the character’s stats.

Graphics/Sound: If you’ve played other DQ games you know what to expect. Toriyama’s monster design and Yujii Hori’s music are the same quality as usual, so if you like them you’ll like this. The monsters are a lot more memorable and less generic than Villgust, Light Fantasy, or even Heracles III. The monster still don’t have animation (we have to wait until VI for that). The SFX are the same classic ones they’ve been using since DQ1.

SFC Game 11 – Dragon Quest V Part 6 (Final)

The victory over Mildras

I ended up leveling until Kurisu was at 40 and everyone else was in the high 30s. With this and some strategy changes I was able to win, although it was close. I tried to keep up Fubaha (reduce fire/cold damage) and Bikilt (x2 damage) as much as possible. At first I was using Skult (def. increase) as well but his physical attacks aren’t that bad so I stopped. I would switch in Pierre the Slime Knight (as in the screenshot above) for Ghanima when I needed healing. When I finally won, Leto was completely out of MP and Ghanima was getting low. It’s really Mildras’ healing that causes such a problem.

The ending sequence isn’t anything special — you have saved the world, and the Master Dragon flies you around to significant cities so you can hear congratulations from people like Henry and Flora. You get to explore the city and then leave, and the Dragon flies you to the next place.

Congratulations

Finally Kurisu returns to Granvania to become king, and Papas and Martha watch over him from beyond.

A celebratory dance

And that’s it.

Or is it!?
There is a bonus dungeon. Rather than making a clear save, you just reset the game, load a save, and go into the marsh south of the final dungeon. I was worried at first because some walkthroughs said you had to talk to everyone in the ending sequence (which I didn’t do), but that’s not necessary. What I don’t know is whether there’s any way to know about this dungeon (or how to access it) without a walkthrough. I never saw anything that could be interpreted as even hinting towards its existence.
There’s not a whole lot to say about it. It’s fairly small and has mostly the same enemies as the final dungeon, with a few new ones. You find some great items, mostly powerful equipment for Kurisu as well as the Drum of War, which is an item that casts Bikilt on all party members. Also the Iron Ball of Destruction, an all-target weapon that is very powerful, and will make appearances in future DQ games.
At the bottom of the dungeon is Esturk from Dragon Quest IV.
Esturk

He doesn’t remember anything but his name, and wonders if you’re there to destroy him. You can pick “no” and leave, or fight him. He’s basically Mildras on steroids, although I don’t think he can heal.

Esturk in battle

I died pretty quickly. I would probably have to grind at least to level 45, and possibly higher, to beat him. There’s really no purpose to it — all he does is say how many turns it took to beat him, and then you can leave and fight him again if you want. I’m not going to bother.

I wonder how Japanese players would have found out about it. In the US I would have found out through Nintendo Power most likely. Perhaps there was a similar magazine that would have clued players in, or it could have been word of mouth. I remember a kid at school telling me about the Pink Tail in Final Fantasy II. I actually wrote Nintendo a letter asking about it and they wrote back telling me how to get it; I wish I still had that letter.

So that’s it for Dragon Quest V. Definitely the best game I’ve played on this blog so far. Review to follow probably on Wednesday, and then this weekend I’ll make the first post about the next game, Cyber Knight.

SFC Game 11 – Dragon Quest V Part 5

This is going to be a fairly short post since I didn’t get as much accomplished since Wednesday as I hoped, but I’ll put a few extra things in at the end.

I am now in the final phase of the game, where we go to the demon world and face Mildras. I knew that I had to get in through the locked door in the cave leading to Elheven, but I had no idea where the final key was and had to use a walkthrough. You have to revisit Salabona for a new scene. I guess they probably assumed the player would do that at some point to see what happened to Flora in the 8 years while Kurisu was a stone; I overlooked that, however.
Flora has married Andy, who was blundering around the fire cave

Flora’s father is worried about a prophecy that’s being fulfilled where a huge monster is going to come back and kill him. He’s up on the large tower, and when I went to see him, he went back to town to “get ready” for the fight while the huge monster comes up.

What a coward

The monster is not very hard, and once I defeated him I was rewarded with the Final Key. I probably should have been keeping better track of where the locked doors were, but I did go back to the Medal King castle to get some items and to the temple to get the Heavenly Armor for Leto. Now we can get into the demon world, by using three rings (the Water and Fire rings I already had, and the Life ring that I got once I beat Ibul).

The demon world

It’s an actual overworld area with one town and dungeon. The town is monsters and other formerly evil people who have been converted to good by Martha, who is up at Evil Mountain holding back Mildras.

The journey from the town to Evil Mountain is really difficult. I think the designers must have realized that because you can use Rura to warp to Evil Mountain once you reach it, despite it not being all that far from the town.
As is typical for Dragon Quest, the final dungeon is rather long. It also has some fairly tough monsters — they can all be dealt with the right combination of spells, except for these stupid giant things:

Screw you

Even with a defense up spell they can sometimes kill me in one hit. And running is no solution because it often fails. I realize now I’m rather underlevelled but even after some grinding they’re still tough. Partway through the cave I finally came across Mom:

A tearful reunion

She tries to sacrifice herself to stop Mildras, but just dies instead. Then, the ghost of Papas arrives to lead her to the afterlife.

Reunited in death

So it’s all up to us. Next up are some puzzle-like floors with trap doors, multiple staircases, and floors that automatically move you.

Level 34 is rather low.

Then we walk down a corridor of faces with eyes that watch us.

That horse is quite well trained

And finally one of those puzzles on a 3×3 grid where you have one open space and you can move pieces around. Fortunately there aren’t any encounters in this section.

The stars move the section of floor if possible

And then we’re into the last room, where Mildras awaits.

“You’ve finally arrived.”

At first he doesn’t seem very hard, but of course once I take him down he has a second form.

This looks more like a DQ final boss

He wiped the floor with me pretty easily. He can often take 2 actions, has a damaging multi-hit spell, takes away your buffs, and heals himself. Since the Sage Stone heals everyone, even people in the wagon, you can swap people around to conserve HP. I think I need to use buff spells even though he’ll get rid of them.

So this is where I am. Some people claim that save points in dungeons are cheap or dumbed-down, but in cases like this I prefer them. I would like to try fighting Mildras a few more times and use some different strategies, but I don’t want to walk through the 30 minute dungeon just to get one attempt. In the past I might have used save states for multiple tries but I’ve restricted myself to only using those for crappy games. So basically I’m going to grind levels before I try again. The best place is in the final dungeon, in this area:

The tiles make you fall through

Because of this enemy:

Metal King

When he appears I swap in Ghanima, Bianca, and my slime, all with Poison Needles to try to kill him. He gives 30K a pop. The other enemies give 1-2K so even if the Metal King doesn’t appear it’s an OK place. I’m going to try it again when Kurisu reaches level 40, and then my plan is to raise 2 levels every time I lose after that. One GameFAQs walkthrough recommends level 47-48; walkthroughs often recommend levels that are way higher than necessary, and I hope I don’t have to get that far.

Unfortunately the encounters give very little gold. If I wanted to buy better equipment I’d probably have to hunt down the gold enemies on the overworld, but I’m not sure buying better equipment would be that helpful.

OK, a few extras.
Extra 1: Dragon Quest 5 has a bonus dungeon after the game’s ending. Is this the first console RPG to do this? It eventually becomes a staple of RPGs, but it’s rare during this period. By a “bonus dungeon” I mean an optional dungeon that’s usually unlocked by beating the game, and is harder than the final dungeon.

Extra 2: I got a Dualshock 4, which is far superior to the PS2 controller I was using before, hooked up to some 10 year old adapter I had, with fraying wires I held together with duct tape.

Extra 3: I’ve decided to start buying the games when I can get them for reasonable prices. I think for games of this era, you don’t get the full experience without having the instruction manual. By the end of the SNES’ life a lot of games put enough help and information in the game that it’s not as important, but where I am, there’s often additional story and character information in the manual, and I can never be sure what they allowed the players to know about the game. I just got Cyber Knight in the mail yesterday so I’m ready when DQ5 is done.

SFC Game 11 – Dragon Quest V Part 4

At the end of the last entry, 8 years had passed and I now have my children, Leto and Ghanima, on the team. Leto is instantly a great character because he can equip all the Heavenly stuff. I immediately went back to the desert castle to grab the helmet, so now the only missing piece is the armor. Ghanima is less effective. In general, magic users aren’t that impressive in Dragon Quest because there are too many random encounters and you have to save your MP. The twins start at level 5, and die quickly. So I continued to use Pierre, the slime knight.

I also followed nofakenews’ advice and got a Miracle Sword, which is a great weapon for Kurisu. It heals you every time you attack. The Holy Armor is good as well (30 HP heal every turn) but I haven’t bought one.

Henry, Maria, and their 8 year old son

I made a quick visit to Henry to meet his son. Leto and he repeat the same stuff that Henry and I did years before. There’s no point to this but it’s a nice touch. Then it’s off to follow the rumor of the village where Kurisu’s mother came from, Elheven. You get there by going through a lake cave. Once in the village, I learn that Papas showed up there years ago looking for the hero, and Martha fell in love with him and they both left the village. 

The elders

The elders of Elheven tell me that there are three worlds: Earth, Heaven, and the Demon world. Martha went to the Demon world to hold off the Great Demon Lord Mildras. They want us eventually to save Martha and seal off the Demon world, but the first step in doing that is finding the floating castle. A man in town gives me the Magma Staff to remove some rocks which will let us find the castle, sunk into the sea, as well as a magic carpet.

Why don’t you come with me little girl

The carpet is fairly limited; it can go over the sea but not over any obstacles. By removing those rocks we can go to the cave. One nice thing about DQV is that the caves and dungeons are all very different. For this dungeon we have a bunch of mine cars whose paths can be changed by flipping switches.

The cave leading to the “sky” castle

In the mine we find a guy stuck on a cart going around in circles. Once freed, he says he’s one of the sky people and accompanies us to the castle. Which is not in the best condition:

The “sky” castle

So why is the castle in the sky now the castle in the water? As we explore the castle we reach the control room and find out that one of the two orbs is missing that keeps the castle in the air. The silver orb is there but the golden orb is gone. Astute players might remember that child Kurisu found a golden orb in the haunted castle but then it was destroyed by Gema before he sold Kurisu into slavery. I had forgotten about this but fortunately the game reminds you with some flashbacks. There’s also a reminder of a small detail I had forgotten; when I was doing the quest for the elves, a mysterious person is hanging around town. He asked to see my golden orb — you can pick yes or no but you don’t have a choice. I thought he was suspicious but he just looks and gives it back. Now in the flashback I can see the guy was adult Kurisu.

Anyway, with the orb destroyed it seems like our only option is to go to the elves and have them make a new one — finally they can repay me for my service as a child. But how do we get there? There’s a forest that supposedly leads to the elves’ village but it’s just a maze. Until Leto hears a mysterious voice:

We want to go to the elves’ village!

Since Leto can see the elf, he decides to lead us to the village.

Bera is still around

Everything is exactly as it was when Kurisu was a kid. The leader is happy to help but can’t make an orb himself — he gives us a horn that we can blow in the middle of a lake to make the elf castle appear. I had already found this lake when I was trying to find the forest before, so it was a quick return.

The mysterious lake

Unfortunately the elf queen is useless too; they can’t make any more orbs like the Golden Orb. They tried, but it didn’t work. She gives me their failure and seems to think I’ll know what to do. Indeed, in the same castle we come across a mysterious picture. Gazing at it, Kurisu is transported to Santa Rosa, in the past. Just as it happened at the beginning of the game, the “mysterious man” approaches child Kurisu, looks at the orb, and switches it out for the failed orb that the queen gave him.

Isn’t there some rule against doing this in time travel?

Now armed with the Golden Orb, it’s an easy matter to make the castle rise into the sky again.

The castle revived

Some people are also in the castle now, and we can fly it around. None of the people seem to recognize that guy we saved in the mine, though. One guy gave me a stupid clue — it’s time to revive the Master Dragon, which requires going to the Bobul Tower on a Northeastern island. Here’s the location of the “Northeastern island”:

See the little man at the bottom left? That’s where the tower is

I had to use a walkthrough to find it. Technically the island is to the northeast of where the castle was, if you wrap the map around to the bottom left. But that’s an annoying way to refer to it — I guess perhaps I should have known since it’s one of only a handful of places I haven’t been, but I wasn’t keeping careful enough track. Anyway, the tower is in a jungle.

The front door is locked

The goal of the tower is to recover both eyes of the dragon statue, which have been taken by monsters. This dungeon had some nasty monsters, like these birds that cast a spell that can kill your entire party:

This seems a little unfair.

At this point I was using Ghanima because she has Bikilt, one of the best spells in the franchise, which doubles your attack power. If you use this plus Skult (raises defense) and Lukani (lowers enemy defense), the bosses are a lot easier.

In this case the bosses turn out to be Gonz and Gema, the other two members of the trio that killed Kurisu’s father.

Now is the time for revenge!

Gonz is easy, Gema is a little harder but still easy. Ghanima has the Staff of Blessing which can be used to heal a character, so even things he could do weren’t that bad. Once you have the eyes, it’s annoying to go around in the tower because you have to be careful not to fall off ledges. But finally I restored the eyes and got the Dragon Orb and the Dragon Staff. The Staff is awesome because it casts Dragoram (BeDragon in the English DW3), transforming you into a dragon for a few turns.

The Master Dragon

With the Orb, I headed back to the sky castle. It turns out that mysterious guy I found in the mine is actually the Master Dragon in disguise. Now that I have the Orb, he gives me the Dragon Flute so that I can call him down and fly around on him. This allows me to go to the other place I’ve seen for a while in the middle of the map, a large temple at the top of a huge mountain range. Here we find a large group of slaves praying to the Demon God with Martha at the head, and the Bianca statue behind her! Well, it’s not actually Martha. After she forces you to pick “yes” to “Will you follow the demon god?” she curses us and reveals herself to be a monster instead. Beating her frees the slaves from their hypnosis, but the Bianca statue can’t be restored without beating the high priest Ibul.

Bianca’s home for the last 8 years

One nice touch is that if you talk to the slaves after they’re freed, one of them is George, the little boy that got captured during the scene when Kurisu was a statue.

I found a secret stairway where the priest was standing, and descending into the depths, it turns out to be the slave mines where Kurisu worked. I do sometimes think the silent protagonist works well in cases like this — modern RPGs (or even later SNES RPGs) would have a conversation here, but absent that you almost get to project your own realization onto the silent character.
Deep in the mines is the priest Ibul, the final boss of this section.

Ibul

Ibul can’t be beaten by the method I described above because he uses a move that eliminates all your buffs. However, his actions go on a predictable cycle. Once you figure it out, you can defend during his most damaging attacks, and the debuff move becomes a wasted turn for him that can be used to heal.

Once Ibul is defeated, he tries to use the last of his power to bring the Demon Lord into the world, but something stops him — it seems that some power is holding back the Demon Lord in the demon world. So he dies, and now we can revive Bianca and head back to Granvania.

The family is reunited

So I guess that’s the end of the game, why risk everyone’s lives further? Kurisu will return to being king of Granvania.

Of course not, we now have the final task to enter the Demon World and defeat Mildras once and for all, and hopefully save Martha as well.