Monthly Archives: May 2019

SFC Game 37 – Romancing SaGa 2

Romancing SaGa 2
12/10/1993, Square


This is the 5th game in Square’s long running SaGa series. The hallmark of the series is to go against standard RPG gameplay; in the Game Boy games this was mostly in the way level ups were handled, but starting with Romancing SaGa, there is also a “free quest” system that introduces a lot of non-linearity to the games.

RS1 was one of the first games I played on the blog. Overall I really appreciated the idea behind the game, but I found the implementation of it was poor and ultimately I didn’t like the game much. I reached the point where random enemies were one-shotting my entire party despite them having the best buyable equipment in the game, and I gave up.

I have always heard RS2 described as one of the most punishing, hardest old games from this era, so I’m expecting to possibly get stuck again. I typically don’t make a lot of use of walkthroughs but I at least read the basic gameplay and browsed through the GameFAQs forum to see if I could get any general tips on not getting stuck. We’ll see.

The basic idea behind the game is that the “Seven Legendary Heroes” have returned, but in fact they seem to be evil. You are the Emperor of Avalon, trying to fight against the neighboring kingdoms held by these “heroes”. One peculiar aspect of the game is that you are supposed to die — every character has HP and LP. HP are restored at the end of each battle. If they hit 0, the character loses an LP, and loses an additional LP if any damage is taken beyond that. If the LP hit 0 they are dead. If your Emperor’s LP hits 0 or if the entire party is wiped out, a new Emperor takes the throne and inherits the old Emperor’s skills. The game is intentionally designed so that you will be losing characters and replacing them with new ones.

The game begins with Emperor Leon taking his son Gerard and some other minions on several local quests.  The system is the same “symbol encounter” system as RS1 but the vast improvement is that your formation now only gets messed up if you get attacked from behind, not the sides. Also, they got rid of the system where certain weapons can’t be used in certain positions. It’s also easier to avoid enemies, so all of that is a big improvement.

The battle system is much like RS1. You can equip 4 attack items (either weapons or heal/etc items). As you use the weapons you level them up. Unlike RS1 you don’t automatically learn skills on levelling up; instead you have to “spark” them in battle, which seems to be highly random. A huge improvement is that the skills are now associated with a type of weapon rather than individual weapons, so it’s no longer the case that unequipping a weapon forgets all the skills, or that a stronger weapon comes with 0 skills. You get a specific number of “tech points” at the end of a battle but I’m not sure why since there’s no way to check what that number actually means for your characters. I really don’t understand that — is there a reason they can’t show us how many points our characters have?

Anyway, the first dungeon is short and simple. Gerard has nothing, but he sits at the back of the formation, making him easy to protect. The enemies have resistances vs. different types of weapons, which takes some testing. One difficulty I had was getting trapped by slimes, which take almost no damage from anything — eventually I found out that Light Ball hurts them, and hits everyone, so they can be taken out.

Chests give you enormous amounts of GP; one of the other interesting things about this game is that your empire has a treasury that gets filled as you go — each battle gives you “taxes” based on how big the empire is. Your personal wallet can only go up to 10,000 gp but the treasury can hold millions; apparently this money can be used for things like researching magic and weapons, and building new parts of your capital city.

After a few more initial quests, the first of the 7 heroes, Kujinshi, shows up and attacks Avalon, killing Gerard’s brother. Leon leads us out to defeat him, but is himself killed by the same Soul Steal attack. Fortunately a witch helps him transfer his skills to Gerard.

With Gerard, I first went to defeat the goblins that attacked Avalon, and then on to fighting Kujinshi himself. Fortunately Leon figured out a way to dodge the Soul Steal attack before dying, and passed that on to Gerard. I still found Kujinshi fairly difficult because after a while he regenerates HP every round, and he can use some nasty attacks. On the third try I managed to beat him.

Afterwards Gerard moves on to the next kingdom over to solve its problem.

I wanted to make this first update just to talk generally about the game; I should have more to write about with this because each dungeon isn’t just “Mash A in every battle”.

SRPG Game 19 – Shining Force II (Part 2)

I’m finished with the game, so this post will carry through to the end. In general, I found myself getting tired of the game — I think the main problem I had is that there are too many generic maps. You’re going from point X to Y and just have to fight an assortment of monsters on a normal battlefield. Very few of them have named, specific enemies in them. As before, I will only point out some of the more interesting battles.

At Creed’s mansion you get the choice of 4 people; I chose Twiggy (the priest) although I came back for the rest later. I saved Twiggy to turn into a Master Monk although in the JP version you don’t get the force ball until pretty late in the game.

Battle 28

Here you have to save a “helpless girl” from enemies, although she turns out to be a foul trickster enemy. The Wyverns come flying in from the sides, as well as nasty demons that cast area effect spells.

Battle 30

Zalbard is the first major boss, although he’s really not that difficult. For the most part, the bosses’ HP are low enough that they might get off a damage spell or two but you can take them down pretty quickly.

Battle 34

Now we reach the Nazca Ship, which reminds me of Illusion of Gaia.

And it’s back to the first area to do the last set of battles.

This is where you finally get the Vigor Ball in the JP version, so (with Sheela) I now had two master monks. I had mixed results with them; their healing was good and their damage was fine, but their defense was very low. In general it seemed like (compared to SF1) the monsters in the endgame do a lot more damage. It wasn’t uncommon for the grunt monsters to do 2/3 of a character’s HP with one attack, meaning if they get the double attack, they can die from full HP.

Also in this next set of battles, I finally reached the Dwarf smith who could make Mithril weapons. I was able to get all the good weapons with surprisingly few reloads, which helped in the remainder of the game.

Battle 36

These Prism Flowers were annoying, but at least they hit the enemies too. Since this is the JP version I was able to send Peter down to get the Valkyrie chest (in the English version for some reason you can’t use “search” in battle so you can’t open treasure chests).

Battle 37

From here to the end I found the battles got a lot harder — I tended to just go through them, and if I felt like I lost too many guys to win, retreat and try again. Red Baron (Lemon) has a ton of HP but with everyone beating up on him with their Dwarf weapons he goes down.

Battle 38 


The next battle has these annoying bomb things that pop up — if you just ignore them, they will often blow up themselves far away from any enemies. Geshp has even more HP than Red Baron.

Next, the final four battles. All of these required multiple retreats and retries.

Battle 40

This is pretty much my endgame party:

Oddeye wasn’t as hard as I thought he would be; it helps that there’s just one path through the map so you can take down the enemies slowly as you go.

Battle 41

This map has no boss but it’s tough. There are hidden enemies that come out, and also enemies from the upper floors can easily fly down and cast nasty spells. It took me several retreats just to get past the second floor, but once I did that the rest of it was OK even though I lost most of my party. Typically I would be left with Kurisu, the armored archer, Petey, and Jaja.

Also in the last section of the game, the healing no longer kept pace with my characters. I never got Aura on any character, and Heal 3 was only moderately effective.


Battle 42

King Galam.

Battle 43

And then the final battle. I started here with my guys in the 24-25 level range, I think when I actually beat the stage they were closer to 26-28.

The grunts were not especially bad, but Zeon is tough.

I sent up guys one or two at a time to do as much as they could; as you can see in the above shot almost everyone died. After that screenshot I lost Claude and Sheela, but Shippo (Slade) was able to beat him on a counterattack.

I decided not to try the bonus battle — if you wait after the end credits for quite a while, you will be taken to a fight against all the bosses in the game (even the rat boss from the cave).

SRPG Game 19 – Shining Force II (Mega Drive)

Shining Force II: The Ancient Seal (シャイニングフォースII 古えの封印)
Release Date: 10/1/1993
System: Mega Drive
Developer: Climax Sonic
Publisher: Sega

[A number of sites romanize the subtitle as “koe no fuuin”, but it should be “inishie no fuuin”.)

More Shining Force! This is the fourth Shining Force game in a two year period, second in the main series. From what I’ve seen, many fans consider this the best one (or at least the best one that was brought out in English).

The system has no huge changes from SF1; it’s basically the same as the one used later in the CD remake of the Game Gear versions. The interface is cleaner and easier to use. The RPG elements have been increased, with more town exploration and story sequences. The main system changes seem to be that you longer lose stats when promoting (yay!), stat gains on the whole are more even, and you need to be level 20 to promote now.

The Japanese instruction manual contains a long story introduction that’s not in the English one, I’ll summarize it:

Grans Island is to the east of Parmicia, and has two kingdoms, Granseal and Gram, who are friendly. Long ago, there were three demon kings on Grans: the fallen angel Lucifer, the sage Darksol, and the powerful, uncontrollable Zeon. They fought huge battles in Arcbarey for control. But Darksol sealed up Zeon in magic stones, and Lucifer and Darksol were chased away by the gods. All of the evil power in Arcbarey was sealed up in a tower north of Granseal. The two gems that sealed this tower — one light and one dark, were sought after by treasure hunters, but if they were ever removed, the evil would be released. Most of those who went looking for the gems couldn’t touch them, much less take them away. But the thief Shippo (“Tail”, the English version calls him Slade) was able to take them, thus releasing the evil and causing harm to Granseal…

As with the last SF Gaiden posts, the early missions are not difficult enough to make a blow-by-blow description interesting. The way the game progresses feels much more like an RPG than a simulation game. The story is not about an army fighting to retake a kingdom or two armies fighting, it’s more like a standard RPG party doing things like saving a princess, traveling to the next town, or finding a sage. There is an interesting development in the story when you go to a new land and build a new capital there, although I assume we’ll be returning to Granseal at some point.

One annoyance early in the game is that the inventory is too limited — the instruction book says I will get a caravan later that I can store 64 items in, but I wish they had done something like Dragon Quest’s bag earlier in the game.

The party members are essentially the same as the other SF games. The thief Shippo (Slade) is new, although it’s not clear right now how he’s different from other fighting classes. I also have a turtle with low HP but high defense, and a child phoenix. I’ve been trying to keep my levels fairly close so I have a rule or guideline that if someone is 4 levels ahead of the lowest levelled character I avoid attacking with them if I can.

Battle 11 was the first one I actually had a bit of challenge with, because of the vampire bats that cast area spells. I’m used to watching out for mages by this point but not bats.

Battle 13, in town, was the first one that I couldn’t beat just by marching everyone forward and using basic tactics. I lost a bunch of guys here. One thing that makes SF easy is the cheap revive cost; I like revival better than permanent death but I think it might have worked better to make the revive cost double or even triple what it is now, so that you might actually have to think of replaying a stage if you lost too many guys.

Battle 16, against the Kraken, was annoying because the tentacles don’t move in very fast, and when they do, only one person can attack at a time unless they have a range weapon. I sent out my two fliers to beat the Kraken head but they died with the head at 1 HP. Even when the head finally came in it took several more deaths to get someone close with a turn to kill him — I probably could have played this stage better but at least I won.

Battle 18 is against the giant statue Taros. It’s a tough fight because he can often go twice before your guys can go once, the Achilles Sword is the only thing that can hurt him, and he has an area effect spark attack. I think part of the strategy has to be having other guys who can take the hits, even though he seems to go for the main character (because he had the Achilles Sword?) This took me three tries.

In the Elven Town I wasted quite a while trying to find the Vigor Ball only to finally figure out it’s not in the Japanese version. I also wasn’t able to get to the Mithril or the secret battle, but maybe I can come back later and figure it out.

The next few battles got more difficult. I’ve now promoted all of my characters except for Mick; I’m going to wait until I can make him a pegasus knight. I didn’t want my archer to be one of those bow machine carts, but apparently I hit the wrong thing and that’s what he became. He does barely any damage.

Battle 22 is the chessboard battle. At first this seems like a really tough battle because the enemies don’t come for you unless you’re in range, then you get swarmed. However, you only have to beat the King to end the battle so in the end it’s not that bad.

I’m nearing the halfway point of the game. Once again I want to say that this really feels more like an RPG than a strategy game, which I think is what they were going for.

SRPG Game 18 – Super Robot Taisen 3 (Part 2)

Part 2 of my 10+ year old posts on Super Robot Taisen 3.

—-

Stage 23 – Storm of Jaburo

Vigaj appears for two turns in this stage.  I could swear that in the CB version he had double move, but here he doesn’t, and he can’t do much.  Not a very hard stage; the Dais both give 36000 each with Luck.

Great Mazinger joins here and there’s a 4th-wall break.  In SRW 2, Tetsuya was not there, and Great Mazinger became an upgrade for Kouji.  Kouji refers to players complaining about that in this level.

Stage 24 – Decoy Plan

This level is fairly short; there are so few enemies that you can just launch all your most powerful attacks and ALL attacks and finish everyone off.  Grendizer joins here.

Should I go to Bermuda and get God Voice?  I’m only at 213 turns so I think that’s a lot of leeway for Ragnarok with only 13 stages (not counding Bermuda Triangle) left.  God Voice might be helpful…

Stage 25 – Bermuda Triangle

This stage is not hard, and it’s very good to do because each Pigdrone is worth 50,000 (with Luck) and you get a new weapon for Raideen.

Stage 26 – Female Spy Infiltration

This stage uses another First Gundam plot point; it seems like a lot of the Gundam plot elements in this game were taken from FG.  Although this stage has a Zeta plot point with Scirocco — this is yet another example of the shaky continuity the original games have; Scirocco basically plays exactly the same role in this game as he did in the first one with no real explanation other than “oh geez, he’s alive again!”

MAP weapons are really good in this game but I’m probably overusing them; most of the XP goes to the pilots of the four MAP weapon-enabled mechs.  I don’t think it’s a big deal, though, the way XP works in the SRW games it’s really easy to catch up just by beating up grunts in the later levels.

Stage 27 – Brocken’s Shadow

Scirocco and Reccoa are both suffering from an unfortunate memory loss; they don’t know each other despite Reccoa serving alongside Scirocco in SRW 2.

Stage 28 – Odessa Day

This is the first stage where you are required to defeat one of the Inspectors.  Vigaj isn’t too bad, though; he doesn’t have double move and he’s easy to hit.  Mekiboz is more problematic because he uses his ALL attack when you get him down to 80%.

This stage is funny in the CB version because of Taunt — what you can do is Taunt Vigaj, then one turn later taunt Mekiboz.  Vigaj will reach your guys and Mekiboz will be in the middle of the enemies (but out of your range).  Take down Vigaj in one turn, then Mekiboz uses his MAP attack, damaging a good chunk of the enemy force and none of your guys before retreating.  It’s kind of cheap, though; the original version seems like a more epic battle.

One thing I have noticed about the stats in this game is that even though you cannot upgrade your weapons, your pilot attack value is very high compared to other games (i.e. right now a lot of my pilots have 1500-1700 attack) and rises a lot with each level.  So levels are probably more meaningful than in other games.

Stage 29 – Operation to Save Matilda

Cecily appears; she’s once again been hoodwinked to DC but Seabook can save her.  The enemies in this stage were too low-leveled to bother with so I just used MAP attacks to take them all out quickly.

Stage 30 – Sister!

They’re including non-Gundam stuff in the story (finally) as well; here’s something from Grendizer.  You also get Sazabi after this if you convince Naida (after fighting her); I put Quattro in that, Amuro is in the Nu Gundam, Judau is in the Hyaku Shiki, and Kamille in the ZZ Gundam.  Cecily is in the Methuss (she has Love and double-move, better than Fa).

Stage 31 – The Limit of Sadness

After this battle you get the Musashi death scene from Getter Robo; this is the longest story sequence so far.  The story writing doesn’t have many lengthy in-depth sequences like this (later games have many, of course).  Benkei joins the Getter Team after this.

My turn count is 271 after this stage, so I have 149 turns to finish 7 stages.  I think I should be able to do that without too many problems.

Stage 32 – Countdown

Phew, this is a huge battle.  41 enemies total, including five major ones (if Reccoa appears).  Getter G comes along to help, though.  The annoying Dragonasaurus enemy gives you max money (65535) if you use Luck when you kill it.

Stage 33 – Puru and Puru II

Once again the shaky continuity rears its ugly head; Puru and Puru II seem to be meeting for the first time, despite the same thing happening in SRW 2.  At least this time Puru doesn’t have to be defeated for you to get Puru II.

Stage 34 – La Vie En Rose

The enemy forces are getting larger and more fierce, but MAP attacks cut them down to size.  Kamille used the Hyaku Shiki’s MAP attack with Hot Blood and gained 12 levels.  When Shuu finally came out the dialogue is supposed to indicate that your guys are having trouble, but I had already taken out over half the enemy force.

So here comes Granzon, this time on your side.  It’s odd to have Shuu with Neppu! Shippu! Cybuster as his music (Dark Prison did not come along until Masou Kishin:LoE)

Stage 35 – Space Swirl

This is Haman’s last hurrah for SRW 3.  Kind of a tough stage in the end when you’ve got all the Geymalks and Quin Manthas up at the top with Haman and you have to move into their range.  Since I have a surplus of turns to take, I focused on trying to get people double move.

Stage 36 – Gate of Zedan

DC makes its last stand here, at A Baoa Qu.  This is a tough stage; there are all kinds of strong enemies (multiple Big Zams, Psycho Gundams, Lafressias, Quin Manthas, Doros, etc)  But that also means it’s worth a lot of money; I made over 600,000.

I finally got to use God Voice, which isn’t that impressive:

Stage 37 – Axis Burning

Wow, this was a tough stage; definitely the hardest stage yet.  Every enemy is strong — you know you’re in trouble when the weakest enemies are double-move Doven Wolfs.  Even though there aren’t that many enemies compared to some other stages, they all rush you so you don’t have much time to wait around and heal.

I played this stage kind of desperately, trying to kill as many enemies as I could each round, and using my three Love seishin (from Cecily, Puru, and Duke Freed) when I needed to — often I had to save and then see if the enemies would kill one of my guys; their AI tends to be kind of odd, and sometimes they will pick a different target instead of killing someone.

The Inspectors are not that bad alone, but fighting three of them at once plus the “grunt” enemies is not very nice.  I went for Vigaj first, then Sikalog, then Agiha.  In retrospect I should have done Sikalog last because he has the most HP, but it was fine.  I only lost Great Mazinger.

After all that, the Gilgilgan is a wimp.  Even though he’s sitting on Axis, by the time you get down there with fully healed and EN regenerated robots, he can’t do anything.

So that’s it for the Inspectors.  Mekiboz never got killed; he was waiting in Axis with Wendolo and they both left.

So here are the last inspectors:

And here’s a full tableau of all the SRW 3 originals:

Stage 38 – Last Battle

I wasn’t able to play yesterday so I gave this mission some thought, and was agonizing over it a bit, but it turned out not to be that bad (certainly easier than stage 37).  I was worried about the lack of a ship for repair.

I started out by funneling the two Gelmarks that can hit you off the bat, and then killed the Yagd Doga near them with beams.  Then I waited a couple of turns until everyone came into range and was lined up well.  I then used the following:
– Hot Blooded Mega Graviton Wave (Granzon)
– Hot Blooded Hyper Mega Cannon (ZZ Gundam)
– Two Cyflash (Cybuster)
This killed almost all the enemies and took the Big O down pretty low.  A few more attacks defeated Big O; for some reason Scirocco kept attacking Daitarn 3 even though Raideen had 300 HP and was standing right next to him.

Now, the true boss comes out:

He starts in the upper left and three Quin Manthas appear near you.  I used Hyaku Shiki’s ALL attack (Hot blooded) and then killed the QMs with some additional attacks, then the next turn the Valsion Kai was there.  Despite what the “secrets FAQ” says on GameFAQs, the Valsion Kai cannot kill a max upgraded Super Robot with one attack.  The Valsion Kai was actually surprisingly easy.  All I used were two hot blooded Sun Attacks, two hot blooded Shine Sparks, a God Voice, and a God Bird.  Here’s the killing strike:

Yes!  I beat SRW 3!

Wait…

What are you talking about, Shu?
Hey, what are you doing…

OH MY GOD IT’S NEO GRANZON!!!!!

(Kind of a silly transformation there with the Granzon vs. Granzon battle animation)

Stage 39 – Ragnarok

This is the infamous battle against Shu in the Neo Granzon, and two Valsions.  It’s often touted as one of the hardest battles in SRW history, but I honestly didn’t think it was as hard as stage 37.  You have four big advantages:
1. Shu cannot use his most powerful attack until he reaches 110 Will.
2. Shu will not use his ALL (MAP) attacks until the enemy phase after he gets down to a certain level of HP.
3. Shu will not move from his starting position. [2019: Actually I have seen in other videos that it’s possible to get him to move, but I’m not sure how it happens.]
4. Neo Granzon is not very hard to hit, even by your Super Robots.

I don’t like the strategy outlined in the Final Scenario FAQ on GameFAQs.  Wasting all of Shu’s ammo before you do anything gets Shu up to around 150 Will, which IMO is too big of a price to pay.  Instead, I like Sunset Kid’s approach of killing the Valsions the safe way (i.e. through wasting ammo + funnels) and then defeating Neo Granzon in one round.

These were my people, all with double move, and all fully upgraded:

I defeated the Valsions by wasting their ammo.  Set the Geymalk up at the maximum range with the Methuss behind it:

Once the shots are all gone, funnel it to death; do the same with the other one.  At this point, Shu is still at 100 morale, so he cannot use any attack with over a range of 5.  Then I set up my guys like this:

First, I used the ALL attacks of the Hyaku Shiki, ZZ Gundam, Valsione, and one Cyflash (I saved the other turn for Cosmo Nova).  I used Hot Blood and then as many Kiai (will up) seishin as possible.  The total damage from all of this was around 12,000 of NG’s 65,000.  After this, I just went through my super robots one by one, using as many hot blooded finishing attacks as possible.  Soon his HP were below 10,000:

As you can see, most of my characters still have turns.  From this point is was pretty simple to finish him off; I did use a Love seishin in the middle so that he wasn’t able to kill anyone.

Kyara got the final shot:

So that’s it for SRW 3.  Overall it was a lot better than 2, but still kind of primitive.  The story is simple; for the most part it’s just “go to this place and fight another DC or alien army” — the interweaving of different anime plots that is such a staple of the series is still missing.  The system is still too primitive to really allow for a lot of strategy, although certainly more so than 2.  I also think the battles can get pretty tedious at times, with giant 20 vs 40 battles.  The enemies are unmemorable because everyone is just mixed together into DC or Aliens, and the only different is the color of the units.

2019 again: In comparison with these other games that came around at the same time, this is actually a pretty impressive SRPG in a lot of ways. It’s hard if you don’t know what you’re doing, and certainly far from the best SRW game, but it has a chance to be game of the year for 1993 depending on how the other titles fare.

PCE Game 25 – Aurora Quest Otaku no Seiza IN ANOTHER WORLD

Aurora Quest Otaku no Seiza IN ANOTHER WORLD
Released 12/10/1993, published by Pack In Video

This is a complete remake of a Famicom game. It was designed by two mangaka, one of them (Motomiya Hiroshi) is well known for Salaryman Kintaro, a popular series in Japan. From what I can tell, the original Famicom game was not well received or liked, partly because it came out in the waning days of the system. But somehow there was a pachinko machine based on it, and then an idol group (pop singers) as well, thus spurring the remake.

Unfortunately the remake also seems to have been poorly received. It looks to me that by the end of 1993, even hardcore Japanese RPG players had gotten tired of basic RPGs that offered the same battle system unchanged from Dragon Quest II.

The story is a little embarrassing for 2019 — the idea is that somehow five women have come to Earth, devastated by a world war, and taken control. They live in a floating city and are representatives of the goddess Maria. The world is ruled by women, and men have become marginalized and are all called “otaku”. The main character was found unconscious near a teleportation device between the Earth and the floating city, and his goal is to make the 5 goddesses recognize his strength as a man.

You start out on the Earth, and have to beat a monster to open up the transport area that can start transporting you to the floating cities where the five women are.

The battle system is completely standard AMID, with a high encounter rate. It even has the old “ineffective” thing from FF1 where if you attack a monster that then gets killed, your attack is wasted.

At least the monster graphics are detailed, although this aspect reminds me a lot of Maka Maka. As I said back then, I’ve never found Japanese gag manga particularly funny. Although the above bat might look good, the vast majority of enemies you fight are more along these lines:

Once you reach the floating platform, there’s a small overworld where you travel to several towns. The towns all have music themes, with the mayor being a “manager” and the city halls being discos or live music houses. The goddesses are all dancing at the top of disco buildings with followers, while the men (all named “otaku”) are wandering below.

To reach the first goddess helper, Yang, you have to clear some monsters out of a flower shop and an antique store, and get three entry tickets (one from each town). With those you can enter the disco. Yang herself wants you to show her your kindness, which involves bringing her a rose from the flower store you saved earlier. After that she says she’ll recognize you if you defeat her.

Once you defeat Yang, she regains her memory and tells you to “awaken” the other four women as well. She also gives Jonjon a plasma crystal that lets him use spells.

The second world is basically the same thing; this time I had to get three sets of armor to let me withstand the attacks of Rin’s bodyguards, then show Rin herself my “beauty” by bringing the right set of clothes.

Rin also regains her memory upon being defeated, and remembers that they came to Earth to find a man who would save the world by defeating the forces of darkness (sigh). She gives another crystal, so now Nekketsu can use spells.

I think this is where I will stop — it’s clear from looking at the walkthrough that after you save the five women the story changes to a more standard “save the world” plot.

This game is probably worth a try if you don’t mind the old gameplay. At least the world concept is different, and it has a retro vibe (maybe an out-of-date vibe?) The enemy graphics are detailed and colorful, albeit offputting sometimes. There’s a lot of equipment, and it looks like the story is OK. Apparently there’s a translation patch for the original Famicom game coming out soon.

Next up will be Romancing SaGa 2 — I put it back a bit because I wanted to get the instruction manual, but I still don’t have it. I’m playing Shining Force II on my other blog, but once I finish that I’ll start RS2 whether I have the instructions or not.

SRPG Game 18 – Super Robot Taisen 3 (SFC) (Part 1)

As I mentioned when I posted Super Robot Taisen 2, I played a large number of the SRT games over the last decade or so. The entries for these games will be reposts of the comments I made while playing the games, so they will have a different tone from the normal posts.

SRW 3 is notable in the history of SRPGs for being one of the first to have a branching storyline with very different endings (different final bosses even).

SRW 3 was the first of several SRW games for the Super Nintendo. From what I’ve seen on Japanese sites, this game is fondly remembered by long-time players, and considered one of the best of the games. People liked the difficulty, as well as the numerous branching story paths that can actually affect the storyline (i.e. appeasing Mekibos , getting Gato on your side, or making Scirocco the final villian instead of Wendolo). It’s also known fairly well among English-speaking players because of the full translation patch that was made for it (still the only SRW other than the odd-man-out SRW 1 to get a full translation patch).

All of the series from SRW 2 return, and five new series debut. Gundam 0080 and 0083 round out the standard UC Gundams (08th MS team did not yet exist, and V Gundam was still in progress when the game came out, and probably wasn’t even begun yet when development on SRW 3 started.) On the Super Robot side, Combattler V, Raideen, and Daitarn 3 all debut.

However, even within the series that already existed in SRW 2, a lot more material gets put in. There are over 60 possible playable characters in this game, as opposed to around 20 in SRW 2. There are also more named characters on the enemy side from each series.

As far as the system goes, SRW 3 takes a humongous step forward towards the “modern” SRW gameplay. These are some of the changes that were made from SRW 2’s system:
– Pilots and robots now have separate stats, and you can switch pilots on certain robots.
– The scale of the numbers is still low, but moves a long way towards how they are in recent games.
– Each robot could only have 2 attacks in NES (2 per transformation) but the number of attacks is now effectively unlimited; even the crap suits like the GMs have 4 attacks, and Combattler V has several pages.
– The item shop was removed (so there are no items at all in 3)
– Will, bullets, and energy have all been added to the game
– You can now indirectly affect the action of your units when they are attacked, by picking an overall strategy from a list
– Terrain compatibilities of units were added
– You can upgrade your mechs during the intermission
– You can sell old mechs
– The seishins are much more like the modern ones, although the list is much smaller than it later became
– You now have more characters than can be sortied each level, and you have to choose who you will send out (and the optional characters no longer leave soon after they join).

Things that are still lacking:
– You cannot upgrade weapons
– There are no items in the game
– You cannot pick evade/block/counter on a per-attack basis
– Repairing still does not grant EXP
– The skills (i.e. newtype, shield block) still do not exist
– The concept of a “post-move attack” still does not really exist; any range-1 (and only a range-1) attack can be used post-move.

I played the PSX version remake of this game, which is considerably easier, but I haven’t played the SNES version yet. Should be a barrel of laughs.

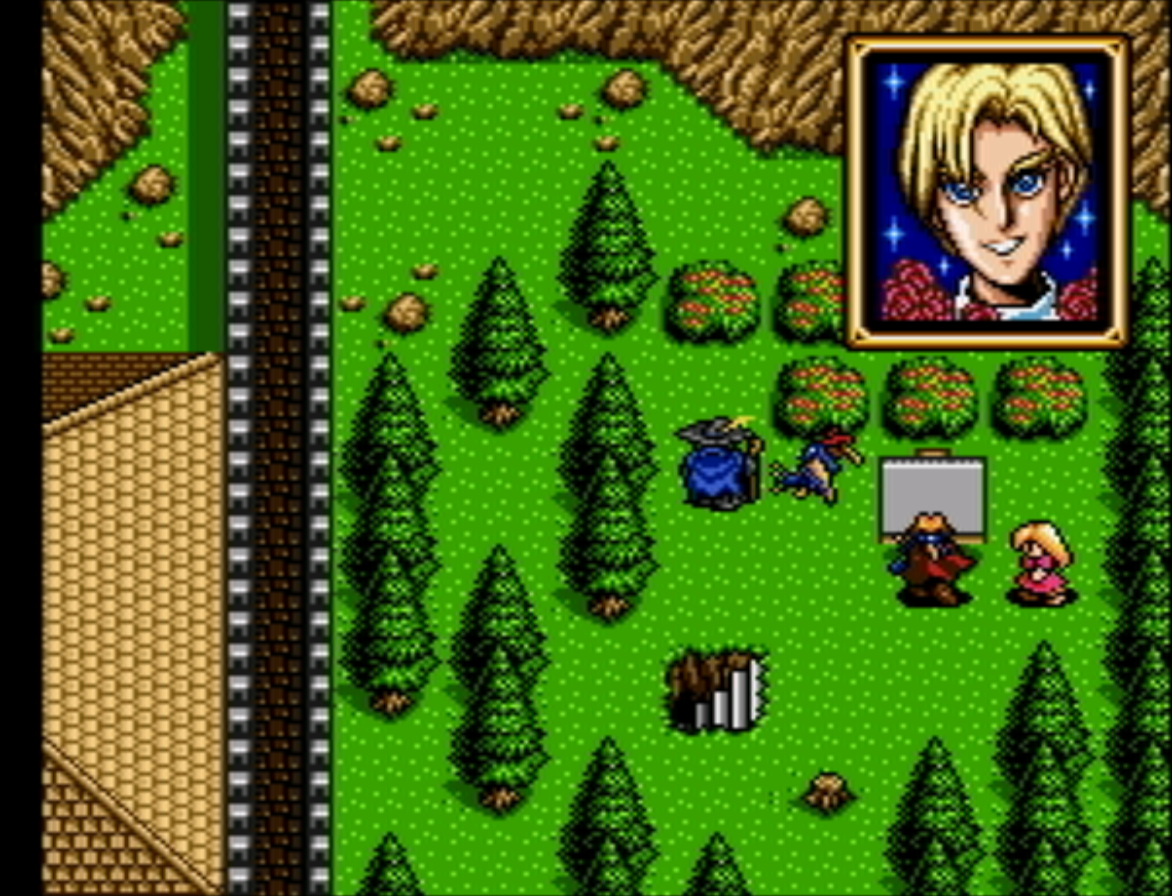
Stage 1 – Dark Clouds

The prologue brings in the Zabi Family resurrecting DC; the writers seem to be moving more towards using the anime plots, although they still aren’t really doing that.  They also had to explain why the heroes go back to their crap units after 2, the reason is that the Earth Federation distrusts them.  Char also appears again, and his role is a little unusual — in the anime series he never betrayed the Zabi family to the benefit of the allies (i.e. he only did it for his own purposes).  The G3 gas incident is coming in from Zeta Gundam.  This is also notable for being the only appearance of the Proto Getter in the series.

Stage 2 – Knight of the Rose

I took the side route, so you just have to fight a small force headed by Mashmyre — nothing much to say about this.

Stage 3 – G-3

This is a rough stage.  The Dogos Gear runs away, but it’s kind of tough to deal with Lila, Kakricon, and Jerid with your weak units.  I used Getter a lot because he has the Luck seishin…very happy to get the real Getter after this stage.

The plot is also developing; these “mysterious aliens” (bian’s prediction) are attacking Earth.  Now you also get Reccoa after this mission which is a contradiction to SRW 2; there’s no indication that anyone in Londo Bell remembers that she was an enemy in SRW 2.

Stage 4 – Entering the Atmosphere

First encounter with the Inspector troops.  On the one hand I feel like they kind of copped-out; they just used the same old Gundam and Mazinger/Getter enemies but with robot/faceless pilots instead.  But, it is kind of interesting to see this mysterious force using Earth robots.  Kamille also joins in this stage — the same Gundam theme is used for all Gundam units no matter what series they are from.

Something else that was added in this game is the ability for people to have conversations before they fight.  So when you attack Jerid with Kamille, they have a conversation — but in another instance of ignoring any continuity from SRW 2, they both act like they have never met before.  You can get Emma on your side here, unfortunately she has swapped out her Marasai for the Mk-II.

At the end of the stage Gihren Zabi gives a First Gundam-like speech about unifying Earth and space under the Zabi Family and DC, following the will of Bian Zoldark (instead of Degwin Zabi as in FG anime).

Stage 5 – Gundam Theft

0083 enters the SRW world, and they basically just copy the content of episodes 1 and 2.  Kou sucks as usual, but without Amuro and Kamille having the newtype abilities, he’s not quite as bad.

Stage 6 – Gato’s Raid

Not much going on here.  After this you get Christina McKenzie; there’s not much in the way of 0080 inclusion here, just Chris and Bernie.

Stage 7 – Seaside Panic

The part at the beginning where they go to the beach is an early example of a conversation that isn’t just “why are we fighting the next set of enemies”; the amount of these increases vastly as the series progresses.

Stage 8 – Combattler V

This is a notable, but odd stage.  This is the first time in SRW that some anime plot comes in completely separate from the Divine Crusaders storyline.  On the other hand, it’s odd because Garuda just shows up and gets killed in this mission.  I’m not sure why the designers did this; maybe they didn’t quite realize that they could keep multiple plots going in one game, but then why did they include this little bit at all?  Did they feel like some explanation was needed for why Combattler V would join Londo Bell?

Stage 9 – Crimson Wings

Ashura and Brocken make their first appearance in the SRW world.  My units are starting to get a little overpowered by the enemies, but the next two stages have powerful units for me.

Stage 10 – Hero Raideen

Like the Combattler stage, this pits you against the Raideen enemies which you finish off quickly, then the alien units come.

After this stage, Four gets captured — they kept continuity by having her on your side, but then they wanted to have the Kamille vs. Four battle again so they set this up.  Sort of cheap, but oh well.

Stage 11 – The Rumored Haran Banjo

Unlike the Raideen and Combattler intros, there are no Daitarn enemies in this stage, just the robot.  There’s a pretty big enemy force here although you can get some relief if you set up your guys right since the Inspector units will fight the DC units.

Stage 12 – To Space

Quattro Bajina makes his first appearance in SRW.  Sayla doesn’t get much chance to talk to him since she leaves after this mission, but the conversation with Bright from First Gundam does appear.

Steiner is from 0080; I didn’t remember any enemies from 0080 besides Bernie.  You can do the scene with Christina and Bernie fighting; Bernie sucks so there’s not really much point unless you want to get all the secrets.

Stage 13 – In the Midst of Sorrow

Oops, I forgot to sortie Chris, so no Bernie.  Huge loss.  This was a much easier level after the previous two, and you get a battleship to destroy for 40,000 coins (with Luck).  Towakun and Demitri are kind of random in weak suits; I have no idea who they are.

The missions in this game tend to get a little repetitive because it’s just the same DC or Alien units every battle, and they all rush you.

Stage 14 – Suspicion

There’s a huge enemy force in this mission but they’re pretty weak enemies so it’s not too bad.  I love the Dogos Gear — another 40,000 coins.

The “suspicion” in the title refers to DC possibly having some relationship to the aliens.

Stage 15 – Pursuit Battle

You get Roux and Judau here (of course the ZZ is a lot more useful than she is).  The ZZ means yet another ALL (MAP) attack.  The Hyaku Shiki’s MAP attack isn’t a straight line like later games, it’s a rectangle like everyone else.

Stage 16 – Fight at Side 1

Yay, another Dogos Gear stage. 🙂

Gato turns against DC here, although there are different factions — Gato works for Gihren Zabi while Bask is in Kycilia’s group.  Seems Bask is consorting with the aliens, though.

Stage 17 – Shangri-la

This is a really short stage, but kind of odd — Mashymre and Gotton help you out.  F91 also joins up here; finally I’m getting a full team of good units.

Stage 18 – Conscon’s Assault

Poor Conscon.  They only ever put him in SRW or Gundam games for one reason, [2019 me: To make fun of his surprise that you can beat his Rick Doms.]

This stage is fairly easy; I beat it in 5 turns so I didn’t have to face Lakan and the reinforcements.    The Nu Gundam is a welcome sight after this stage; I’m a little surprised they give it to you so early in the game.  Funnel units are really important in all the early SRW games, especially when the Newtype ability comes into the game (in 4?).

The other funnel users I can get are Puru’s Quebeley (stage 29), Sazabi (stage 30), and Puru II’s Jagd Doga (stage 32).  I’m not going the Kyara route, I don’t think.

Stage 19 – Nightmare of Solomon

This is a neat stage.  First of all, Masaki shows up in his Cybuster, and the Inspectors make their first appearance.  The only one that sticks around is Vigaj.

Gato also comes in and blows away 13 of the units, which is quite helpful, and is a neat story element.  I still think the designers were much more adventerous with their story elements in these early games.  They really nerfed this part in the Complete Box version; Gato only destroys *3* units.  After that, the most difficult part is the force around Bask.  Rosamia in particular has double move, is on good terrain, and the Baund Doc has high armor.  She took multiple finishing moves from SR’s to take down.

Vigaj leaves if you have Gato come in, but what if you don’t activate that event?

Oh yeah, Dogos Gear. 😀

Stage 20 – Prelude to a Hard Battle

This is an “inside the base” mission, which they seemed to use a lot in the early games but not so much later on.  Vigaj is here and you actually have to fight him this time, but as long as you can reduce his HP to 80% in one round it’s not so bad (I used God Bird, Breast Fire, and Sun Attack and that did it).

Kamille now has double move; I want to get more people to have it before I reach the Ryuune stage.

Stage 21 – Terror!  Big Zam

Haman makes her first appearance (in SRW 3) here, in the Dogos Gear.  This makes the Dogos Gear very hard to hit, and sadly you can’t kill it — maybe if you could do 6500 in one shot.  But if you do any damage to it, she runs away and Big Zam comes out.

Sleggar will take out the Big Zam for you like in FG, but it’s harder than Complete Box.  In Complete Box, as soon as the Big Zam appears, Sleggar goes over and kills it.  Here, Sleggar has to actually reach the Big Zam without getting killed.  This makes it a bit harder.

Also in this stage is the very frequently used device of “Persuade Four with Kamille, then destroy the Psycho Gundam to get her on your team”.

Cyflash is unbalanced as usual.

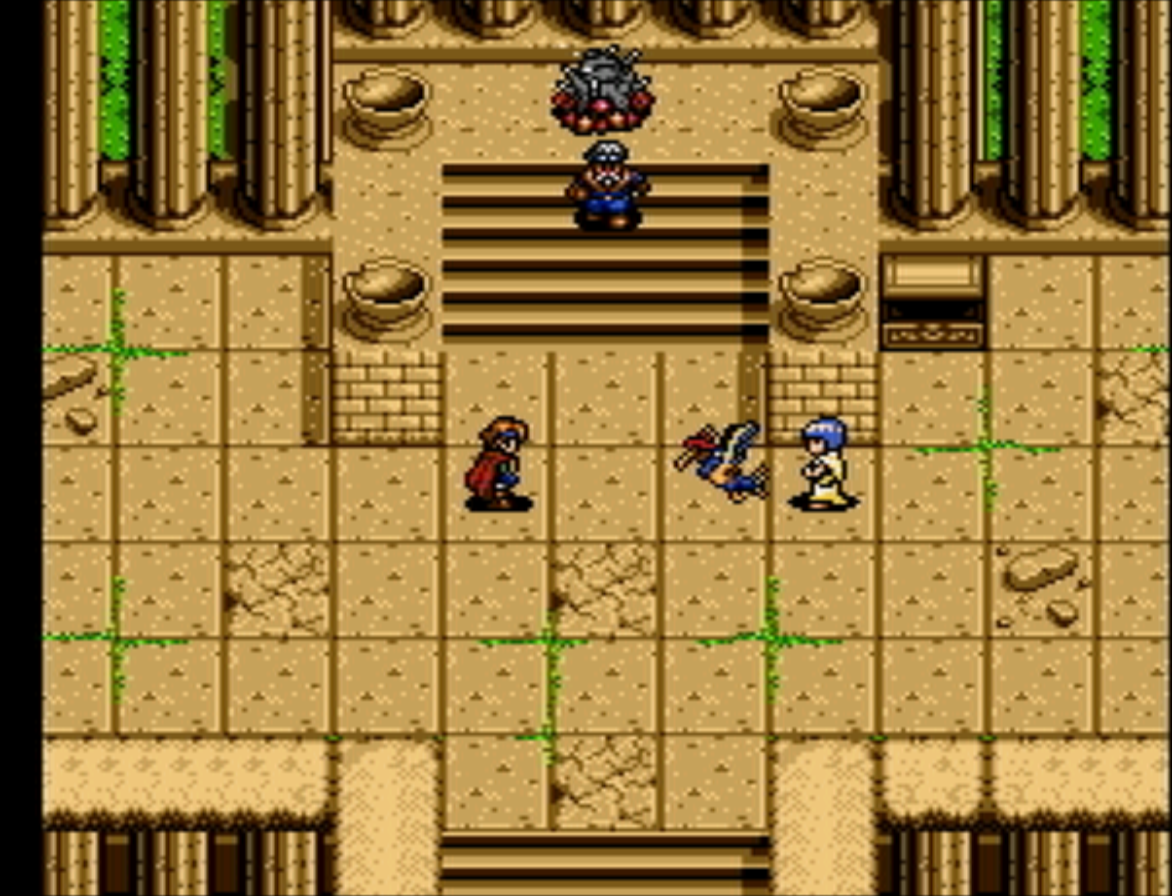
Stage 22 – Ryuune, and Valsione

This stage was reused, almost line-for-line (even down to her use of Psycho Flasher), in OG1, although the F91 bunch is replaced with OG-only DC enemies.

Ryuune is the new Banpresto Original hero(ine) for this game; they gave her the same music as Masaki (neppu! shippu! cybuster); I’m not exactly sure why, but maybe it was just so the designers wouldn’t have to make another music track.  In Complete Box she is a godly character because she has the supremely unbalanced Taunt seishin; even here she seems good with her 5-use 1800 power Cross Masher (which I assume is not a beam attack) and ALL attack that works like Cyflash.

(Some people apparently have trouble keeping Ryuune alive; the key both here and in the CB version is to leave an enemy at low HP for her to attack and kill each turn.  Do not leave the Laflacia as the only enemy unless you are sure you can kill it before the enemy turn.)

The Laflacia is even better than the Dogos Gear; 60000 gold with Luck.

Ryuune’s first appearance, with her oddly proportioned mech about which absolutely nothing is said in the game:

SRPG Game 17 – Shining Force Gaiden II (Chapters 3-5)

As I said in the last post, I’m going to make it a general rule from now on that I don’t do stage-by-stage commentary for games that don’t “deserve” it. That’s not to say SFG2 is a bad game, just that it tends to involve the same strategy on the maps.

Stage 13

This is when the game moves back to the other party, leaving you with only 5 guys. It’s kind of a tough stage because of that (with Bill the Monk as my only healer). I’m fortunate that I was trying to level everyone evenly so I didn’t end up with a worthless party here. Bill sucked at first but he’s pretty good now.

I also appreciate the creative stage design here — not that there’s any gameplay difference with these vines and cliffs, but it’s nice to see the design team attempt to change things up at least in the visuals.

Stage 15

This stage has darkness in it so you can’t see the whole layout. Monsters also appear as you move on — not a hugely difficult stage but at least interesting.


Stage 16

Lava! As you move, lava flows block off areas, but this doesn’t make the stage any harder.


Stage 18

This is one of the boss stages, as we head into the endgame. Solo puts his hopes on these “death balloons”. They appear as you advance through the stage, and blow up if you try to attack them, doing big damage.

I also accidentally got Hanzo (named “Higins” for some reason in the English version — I don’t understand why they think American gamers are OK with made up names like “Iom” or “Woldol”, but a Japanese name like “Hanzo” is no good. They also later change Musashi to “Rush”. This is not the only bizarre name change because Shu is “Deanna” for some reason in English. Did they think the character was female?)

I knew the secret characters were there but hadn’t been paying close attention, especially because there’s no display of the stage number. So this was a huge chunk of luck — I was just moving Shu back to get him out of Solo’s range.


Stage 20

The gimmick on this stage is a repeat from Shining Force 1, a weapon that takes many turns to charge up but hurts a huge range, enemies and allies.

I ate one blast but everyone survived. The stage is a little hairy after this because you have to get in range of the mages in order to take down the orb, but it’s not too bad.

Stage 21

This is the stage with the second boss, Barbara. In general I think the bosses here are easier than in regular Shining Force; usually you just have to eat one nasty spell and then you can take the boss down. Part of the problem is that their AI often doesn’t approach you when you’re involved with other enemies, which would make things a lot trickier.

Stage 22

Next up is “Death Woldol”, a revived version of the boss from the original SF Gaiden.

You’re supposed to get a Light Sword for beating him. But Shu, who had the final strike, had no space in his inventory so it just disappeared. Fortunately the shop then sold it in the “buried treasure” section so I could have it.

Stage 23

Wardola (or Waderer or however you want to romanize it) is basically the same as the previous bosses, just approach him slowly and beat him after he uses one spell. Now we save Kurisu from the first game, and he joins up with the Haja Sword for the last battle

Stage 24

This is a tough battle. Iom uses nasty spells, and you have to take out some other guys first. After a couple of failures I decided to begin by taking out the Iom Worms with archers so that they couldn’t attack, while the rest of the units took on the Iom Dolls that come from the top. I had the healers use heal every turn just to gain XP, because I thought I would have to exit from the battle again.


As it turns out I didn’t have to. I sent the two archers, the birdman, Kurisu, and my monk up to deal with Iom since that’s who can actually attack. I had no MP left at this point. You can set the characters up so that at most 2 can be hit at once — this allowed me to last for a long time even with no MP left for healing. By the time I had to send up reinforcements, he was already down to about 70 HP, and I finished him off with little trouble.

There’s a short ending sequence.

So that’s the end of SFG2, although Shining Force CD is not finished yet. As I said after SFG1, I’m going to hold off on the wrap-up post until I actually finish the entire Shining Force CD game; the only thing left is the short third scenario, and the bonus battle where you fight all the bosses at once.

Next up will be reposting of Super Robot Taisen 3, then the actual Shining Force II.

SFC Game 36 – Soul & Sword (wrap-up)

This game is another attempt at a “free mission” system where there is no set order to do the various events and quests. Obviously the closest comparison is going to be with the Romancing SaGa series. In comparison to RS1 I think this game wins in a number of aspects.

First of all, it’s much easier to find quests than it was in RS1. You don’t have to pay to travel around the world, and the quests don’t involve talking to random people in specific towns at specific times. If you just take good notes, you’ll probably find almost all of the events and quests in the game.

The scaling of the monster difficulty is done much better as well. RS1 had this problem where you would suddenly start fighting ridiculously hard monsters, whereas the S&S difficulty is much more graded. On the whole it’s a pretty easy game, with only a few parts that require special tactics or equipment.

One interesting decision the S&S designers made was not to have any sort of overarching story. There really is no final boss and certainly no “save the world” plot. There is one quest that does seem intended to be the last quest, but even that isn’t hugely epic. The use of multiple endings was an interesting choice as well, with the ability to leave the island any time you want to end the game.

The battle system is pretty boring, as is typical for games of this era. The random encounter rate is way too high, and you have to walk out of dungeons, which makes the quests more tedious than they should be. Even well-designed quests like the horror themed doll quest or the satirical fairyland quest are undermined by the constant heaps of random encounters that detract from the experience. This last part is why it took me so long to get through the game.

At least the magic users can make good use of their spells because MP restoring stuff is so cheap. The lack of healing spells is odd. I never made much use of the “waza” (tech) abilities.

Ultimately I would give this game a B rank — a game that’s not terrible, but I did have to force myself to finish it. I may need to re-evaluate the criteria for abandoning a game. I’m not sure it benefits anyone to have almost a month be taken up by posts about one game that’s only being stretched out that much because I have to force myself to play it.

Next up is a PCE game, “Aurora Quest”, which I’m not expecting good things from.