Monthly Archives: March 2019

SRPG Game 14 – Just Breed Part 5

Battle 23
Levels: Kurisu 17, Rolan 17, Duval 17, Lydia 15

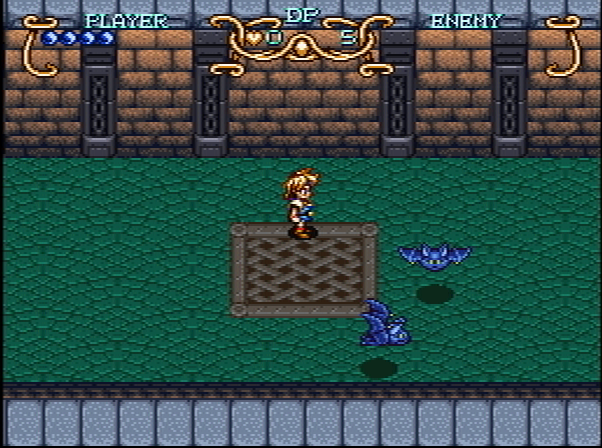
This is another dungeon map, so only the commanders can fight. It turned out to be quite annoying.

After some fights to get items, there’s a third fight that has monster lairs and monsters. I fought through using a lot of magic, figuring I would go back and heal before moving on. Unfortunately this fight doesn’t disappear when you beat it. So you have to beat this and the ensuing boss without going back to town. Since I had no idea how hard the boss would be I tried to beat the stage using as little magic as possible. I failed 3 times trying to split my party so in the end I just sent everyone over to the right to beat those lairs, then up to seal the rest.

The boss turned out not to be as bad as I thought. After using 4xBuraizer and Kururein to take out the grunt enemies, for the boss I just set up as follows:

Every round I attacked with the three people up front and healed with Lydia.

The upside of having to do these battles so many times is that I gained a bunch of levels.

Battle 24
Levels: Kurisu 19, Rolan 18, Duval 18, Lydia 16

This is the last overworld fight with the troops, and it’s a tough one. By the end of the first turn, Duval’s entire squad was gone and Rolan had lost most of his troops as well, so I decided just to try to get Kurisu up to the town at the top (Rumble Bill).

This turned out not to be all that difficult; I did lose the majority of my forces but Kurisu made it. I just made sure to move him forward every turn and use powerful spells and focus on healing Kurisu. The monster dens are off to the side and don’t produce many monsters.

Battle 25
Levels: Kurisu 19

Kurisu is alone for this battle against 5 clones. It’s a repetitive battle but just keep healing; the enemies usually don’t heal enough to keep up.

Battle 26
Levels: Kurisu 20, Rolan 18, Orlof 18, Hans 19, Duval 18, Lydia 17

The rest of the game is a series of battles in the Rumble Bill tower. As usual, there are a lot of chests with good weapons and armor. You can’t leave the tower once you enter, but there are shops and an inn.

First up is the Red Dragon (after a series of normal enemies and lairs). The dragon’s fire breath can be circumvented by the setup at the top, since it only hits people outside of the starting range. You get the Light Sword (which damages all enemies on screen but not for much) and the MP Ring, which restores MP, very useful for Lydia. Next up is the same fight but with a Green Dragon.

This is harder because the tornado attack doesn’t have the range problems that the fire one does, but I only lost Hans (twice).

Next up are similar battles against a Blue Dragon, who casts thunder, and a Snow Dragon, which breathes cold. The Blue Dragon fight is not tough because he can only hit one person at a time. The Snow Dragon battle itself is hard because there are tons of enemies that use whirlwind and frost breath. Lydia with the MP Ring is a big help because she can heal frequently; there’s another MP Ring that I gave to Rolan, who used the Bunsheed spell to do 4 attacks frequently. The dragon itself is basically the same as the Red Dragon.

Now it’s time for the penultimate fight, against Gel Du Ray. This is a much tougher fight than any of the previous ones in the tower. You basically have 6 bosses that are at the strength of the dragons you’ve fought up to now, with a monster lair spitting out Wolfens (that cast the Tornado spell).

I was not impressed with the Light Sword because of its low damage, but with the Bunsheed spell it goes off 4 times, which is much better. I basically used up all my MP clearing these first two bosses. The Wolfens that come up can sometimes be thwarted with the MP stealing spell, but in some sense I just had to take the hits. Lydia had one MP Ring for healing, and Kurisu had the other MP ring for repeated Bunsheeds with either the Light Sword or the Just Spear.

Next up is the area with the monster lair and three additional bosses.

They cast a lot of spells and have too much MP to deplete, but I found that once I sealed the lair and it was only them left, they couldn’t really do enough to stop me from killing them. I then swapped the MP Rings around to restore everyone’s MP, and went for Gul Du Rey.

With full MP, he’s a complete pushover; he has a few nasty spells to cast but with multiple 4x attacks coming at him every round he goes down quick.

Next up is the final battle!

Battle 27
Levels: Kurisu 21, Rolan 21, Orlof 19, Hans 19, Duval 19, Lydia 18

This battle is just two bosses. The first is just a normal guy that casts the same familiar spells; he goes down quickly.

It should be possible to retreat and restore MP by swapping around the rings like in the last battle before taking on the real final boss, but I didn’t do that.

You have to beat the green face in the front and the two red things at the top first, and then the orb. The boss initially has 4 attacks per round, although each part destroyed takes off one attack. Once only the orb is left, the boss’ main area gets stronger spells. The spells are the usual fire breath, and thunder (multi or single hit). I split the party up and alternated between healing, attacking, and using Hardy or the Warrior Wine (which increases damage for two turns). Every so often someone would die, and then Life Herb brings them back.

Once only the orb is left, I was only able to attack him with three people a turn, so the other three used healing or Hardy to support the main guys. Ultimately it wasn’t a tough battle.

Finally Just Breed comes to an end. I’ll post the wrap-up on Wednesday.

SRPG Game 14 – Just Breed Part 4

Battle 16
Levels: Kurisu 14, Rolan 14, Hans 14, Duval 13

This is a short, easy stage. All you have to do is get Kurisu to the town. Two more monsters come out of the town each turn, but if you combine Duval and Rolan’s magic with Hans’ bow attack it’s not hard to open up a passage.

Battle 17
Levels:  Kurisu 14, Rolan 14, Hans 14, Duval 13

This is basically a boss fight, with the Sandworm mouth. Mini sand worms come out, and you have to destroy all 3 parts to kill it. The boss can use an earthquake attack. Even so his HP are pretty low and I think once you beat it the mini worms stop coming out — if not, I think you can finish the battle by killing the boss and having Kurisu get to the mouth and go in.

Battle 18
Levels:  Kurisu 14, Rolan 14, Hans 14, Duval 13

The gimmick to this stage is the stone barriers, which you can remove by attacking 4 times (I think). It has to be a melee weapon attack directly adjacent to the barrier, and the area weapons like the Whirlwind Sword won’t work.

The main threat in the stage are the Hell Hounds, which can use Barlizer (the wide area flame spell) for free. However, the rest of the enemies on the stage are not much of a threat, and I now have enough high damage spells that I was able to target them first and take them down. Also, they can be put to sleep, a basic spell that a lot of characters have. Attacking a sleeping enemy does not wake them up. So with all that in my bag of tricks I only lost 2 characters. Once again I’m not sure how the enemy lairs work. Every time I think I understand them, something happens that goes against that understanding. I know the distance between your characters and the lair is a factor, but I think there may be a limit to how many characters can be on a screen at once — that would explain why sometimes lairs don’t spit out monsters even though you’re right next to them. But even that doesn’t seem like a complete explanation.

Battle 19
Levels:  Kurisu 15, Rolan 15, Hans 14, Duval 14

This battle initially seems like it might be a headache with 16 monster lairs, but it’s not that bad. There are two sets of monster lairs, both like this:

One set is guarded by those 4 things in the above picture, which have high defense. The other is not. The enemies they spit out aren’t anything especially dangerous, so advancing and using multi-target spells helps a lot. I am now certain that one of the conditions for a monster lair to produce monsters is that there can’t be too many characters on the screen. In the following picture, despite the 6 active lairs, only one enemy appeared. Before I got down there they were spitting out as many as 5 monsters in one turn.

Battle 20
Levels:  Kurisu 15, Rolan 15, Hans 15, Duval 14

This is another cave, meaning you only use the 4 leaders. The cave has five rooms; the first four have some good equipment, the last has the boss. They also have traps that shoot out missiles and such.

The boss is pretty strong; I lost two guys. The Bunshin spell helped a lot — it creates 4 copies of the character and they go out and attack. Duval got the Flame Sword which casts Barlizer, so having 4 of those going off in one turn helped a lot. Rolan has the same spell.

One of the items you find in the cave is the Luna Bow, Hans’ ultimate weapon. Which of course means he immediately leaves the party.

Battle 21
Levels: Kurisu 15, Rolan 16, Duval 15, Lydia 14

This stage has a lot of nasty enemies, but I now have casters with spells that hit every enemy on the screen. With that, plus Duval’s quadruple Barlizer spells, and the rest of the forces, it’s not that hard to take down even this many enemies. Only 4 monster lairs.

After visiting the town you have to do the same thing again, this time to put a log in the dam to open up the next area. It’s no harder than the first time.

4 Barlizer spells in a turn is really powerful.

Battle 22
Levels: Kurisu 16, Rolan 16, Duval 17, Lydia 14

This stage has tough monsters, like the new Manticore enemy that can use Barlizer for free, and other nasty enemies. On the other hand, the “hit all enemy” spells and quadruple Barlizer and other such spells are so powerful that ultimately the stage isn’t that hard. I lost a few guys, but at this point in the game revival is so cheap that it really doesn’t matter that much.

I split my army into two to deal with all the monster lairs.

Next post will be the last one for this game. 

SRPG Game 14 – Just Breed Part 3.5

See the previous post’s update for how I made it past where I was stuck. Lesson there: pay more attention to the dialogue.

Battle 12
Levels: Kurisu 11, Rolan 11, Orlof 11, Hans 11

This is a side mission, in a cave nearby the town to get Orlof’s ultimate weapon (a bit early?) It has double the attack power of the iron swords everyone has now, and it’s a spear.

The boss there isn’t very hard because you can put it to sleep. I found this out accidentally when I was trying to exit from Hans’ magic menu and pressed the wrong button. I’ll have to try sleep on other strong enemies — once he was asleep I just cast a bunch of magic until he died. (Apparently elemental magic doesn’t work, but I used the Gusachi spell which isn’t elemental.)

Battle 13
Levels: Kurisu 11, Rolan 12, Orlof 11, Hans 11

This is another map where we need to split in teams and go off in different directions.

I sent Rolan to the middle, Orlof to the left, and Kurisu and Hans to the right. In retrospect I should have done it differently. Orlof’s weapon is a lot better than I thought — it hits all enemies adjacent to Orlof. Hans would have been better in the middle island because of all his archers. In any case it wasn’t that hard.

Battle 13
Levels: Kurisu 12, Rolan 12, Orlof 11, Hans 11

The challenge of this map is that Kurisu, Rolan, and Orlof are sick. Randomly when you select their squad they might be paralyzed, which automatically ends their turn and then does auto for the rest of the troops. This means either that they get left behind, or that the troops run into disadvantageous positions to attack enemies (even the magic users will try to go hand to hand) and then get killed. This makes the mission incredibly annoying because so much randomness is involved. I had to retreat from the battle twice. Then it town it’s annoying too because as you’re trying to walk around, your character will randomly walk another direction or jump instead of moving. I understand the desire to vary the battles but this is not the way to do it.

It seemed to me like the key to winning is not to activate any of the monster lairs, although I wasn’t sure that was possible. I know you can successfully complete a battle without sealing all the lairs, but maybe there are certain ones you can’t. On my second try I figured out at least that if there are no enemies, but there is a lair in range that will produce enemies, you don’t win.

In the end I was not able to avoid the lairs, if it’s even possible. The key was just to go fairly slow, and get somewhat lucky with the paralyze hits. You have to make sure not to let Hans get too far ahead or he’ll get mobbed and die. Fortunately I can heal the paralyze in the next town.

Battle 14
Levels: Kurisu 13, Rolan 13, Hans 13

Orlof ate double the poisoned meat so he’s out. In fact, he won’t return until almost the end of the game, so it makes more sense that they gave out his ultimate weapon so early.

I don’t understand how the monster lairs work in this game. Sometimes they’re active, sometimes they’re not, and sometimes they will spit out one monster and then quit. There must be some sort of programming limitations involved that may introduce some luck or potential manipulation into the process. The second time I tried this map, I was able to seal 6 monster lairs without them ever sending out a monster, whereas the first time I tried it some of them were spitting out ghosts and hornets. I think it’s because I activated the west monster lairs before I approached the other ones, but it’s hard to tell. 3 shouldn’t be the limit.

The most dangerous enemies here are the ghosts, which cast an instant death spell. If it hits your commander then the entire troop runs away. I ended up taking two squads down and one squad left, but this backfired when none of the lairs downwards brought out any monsters. Rolan was completely outclassed on the left side and was wiped out, but Kurisu was able to make it to the town and end the battle that way.

Battle 15
Levels: Kurisu 14, Rolan 14, Hans 14

This is not a hard stage. The main annoyance is this NPC who yells at you as you move along, but the enemies don’t attack him and there aren’t that many enemies or lairs on the map.

After this, you have to navigate through a maze cave which is annoying.

But then it’s on to the next part. The name of the legendary god or kingdom or something that is related to the 7 Holy Stones is called ランブルビル. When I first saw that it looked to me like Rumble Bill and now I can’t read it as anything else. So I will continue to look for the secret of Rumble Bill.

SFC Game 35 – Illusion of Gaia

Illusion of Gaia (ガイア幻想紀)
Released 11/27/1993, developed by Quintet, published by Enix


This is a spiritual successor to Soul Blader (Blazer in English), and the second in the loose trilogy that ends with Tenchi Sozo (Terranigma). I played this game when it was first out in the US and really liked it, and I played it again some time ago and liked it then too. I still liked it after this replay, and the storyline that I always liked is especially impressive now that I’ve seen what else was coming out around it.

I did some spot checking vs. the English game script, and the translation seemed reasonably accurate. There is the usual Nintendo censorship, with references to alcohol and religion removed. Some names are changed (for instance, Tem->Will, Peggy->Hamlet, Rob->Lance). The ending sequence seems very slow in the English version. This happens a lot in localizations because Japanese requires fewer symbols than English does to express the same thing, so a reasonable text speed for Japan becomes a crawl in English if they don’t do any changes.

One thing I wanted to do in this playthrough is get all the 50 red jewels — this opens an optional dungeon that features a boss from Soul Blazer. I had never done this in any of my previous plays; it’s very difficult to do without a walkthrough. I believe this is only the second game I’ve played on this blog (after Dragon Quest V) that had an optional “superboss” dungeon.

I’m going to write this post more as a review than a step-by-step playthrough; this is a game that I think everyone should try, and it’s not especially long.

The game begins with Tem (Will) and his friends. Tem’s father went out adventuring, seeking the Tower of Babel, and never returned. Tem has some sort of psychic power. Soon he is called to Edward Castle to surrender a ring his father had left him, and once there, he gets thrown into prison. The voice of his father calls to him, telling him to seek out the six Mystery Dolls (Mystic Statues in the localization) and then come to Babel. After the princess Karen rescues him from the dungeon, you face the first dungeon.

For the most part the game is very linear. Tem attacks with his flute, and gains several power ups during the adventure. Beating all the enemies on a screen gets you a stat upgrade (HP, Strength, or Defense). This means that dungeon areas are often quite tough when you first get to them, but once you clear a few areas and get some of the stat ups, they get much more manageable. Soon Tem is able to transform into the dark warrior Freedan.

Freedan gets his own powers throughout the game. Although he is more powerful than Tem, sometimes you need Tem’s abilities to progress through the game, and you can only transform between characters at certain specific save points.

One great thing about the game is the variety of locations. The world seems oddly Earthlike without actually being Earth, and you visit the ruins of ancient civilizations like Angkor Wat and the Nazca line drawings.

There are also extended story sequences, like when Tem and Karen spend many days on a raft floating at sea.

All of this gives the game a much bigger scope and richer experience than other RPGs were offering at the time, even if it isn’t great by later standards. The ending stayed with me for many years after I played it, especially with the great BGM:

The gameplay is a bit light on the RPG elements; there are no experience levels or money, and no equippable items. You just progress in stats by clearing rooms. This, plus the relatively linear gameplay and almost total lack of backtracking, sometimes make it seem more like an action game than an RPG, but it’s still a lot of fun.

This is a game I suspect some people reading this have played, so let me know about your memories or thoughts on the game. 

Quintet would follow this game up with Tenchi Sozo (Terranigma), which is a masterpiece by any standards; one of my favorite RPGs of all time. I’ll get to that eventually, but up next (after I finish Just Breed on the other blog) is Soul & Sword, an RPG that seems somewhat Romancing Saga-like.

SRPG Game 14 – Just Breed Part 3 (temporary)

Battle 11
Levels: Kurisu 10, Rolan 11, Orlof 11, Hans 11

This is a long stage; tedious but not as hard as it looks like it might be at first.


In order to open three gates, you have to leave a person on the buttons (the circle at the bottom left). This means that each gate you pass through, one of your bands has to stay behind. However, they can move such that they can help out a bit through walls (either with spells or bows). The majority of the enemies in the stage are weak skeletons, but there are a lot of monster lairs. One Japanese site was recommending level 15 for this but I didn’t have all that much trouble with it at the levels I had above. Once you know which band you’re leaving behind, you can use up all their MP resources (or save a bit for healing through walls). I left Hans, Orlof, and Rolan. If you leave Orlof second he can use his Fribanen spell on the bosses which helps a lot, especially if you leave MP for two castings.

Once you get through all the gates, you save the women you’re after!

But no, they turn into monsters. Orlof was able to cast his Fribanen spell which does quite a bit of damage. They use the Marlo spell so they can do a fair amount of damage, and heal themselves. Even so, Orlof and his archers helped out quite a bit and Kurisu and his band were able to do the rest.

Battle 12
Levels: Kurisu 11, Rolan 11, Orlof 11, Hans 11

Actually not Battle 12 yet. I’m posting this early because I can’t get the next event to trigger. The gamefaqs walkthrough says:

“Go to the building left of the inn. Talk to everyone inside on every floor and leave. A pidgeon will come. Search it to find that Rolan and Orlof sent a letter, saying they’re OK. Go back in the building, talk to the guy at the counter and give him 100 gold to send a carrier pidgeon to them. Go down from the place and talk to Hans. Leave the town and go back in, and to the water fountain. Another pidgeon will come.”

I’ve talked to everyone in the town multiple times, left and entered over and over again, walked to all the fountains, talked to Hans, gone back to other towns. I even tried talking to everyone in Winga again, and I can’t get the second pigeon to come. The Japanese walkthrough only covers the battles, so I can’t figure out what I’m doing wrong. I’ll try again later but if anyone knows what to do, let me know.

[EDIT: Thank you to skyrunner14 in the comments below for pointing me to a Let’s Play. It turns out that you are not paying 100 gold to send the pigeon, but just to make the message for you. You then have to go back to the pigeon and use the message as an item to send it. I wasn’t paying careful enough attention to the dialogue.

I already started playing Illusion of Gaia for my other blog; it’s a short game so I’ll go ahead and finish that and then come back to Just Breed.]

SRPG Game 14 – Just Breed Part 2

I made two mistakes in discussing the gameplay last time. First, going back to a previous area does not let you fight the battle again. You can freely retreat from battles (as in Shining Force) but once you complete one, the map will be clear of enemies unless the story puts another battle there. Second, to enter a town and end a battle without beating the enemies, it has to be the main character that does it.

Battle 5

For the first part of this map, we have to head up to a mansion that supposedly has a person who is stealing women.

There aren’t many enemies, but there are a ton of monster lairs. It can be tricky to charge up to them quickly enough to fill them all without getting killed. As you can see, I split into two squads.

It turns out the guy was not stealing women, he was taking in poor and abandoned women, and he now joins our party as the third guy (one of his women was stolen by the same enemies that stole Feris and the others.)

The second part involves getting to the west town. I warped back to the first town to cut out some movement. It’s a pretty tough section, with lots of monster lairs.

My basic strategy was to seal off the first Skeleton lairs near the town, then move left. Rolan’s squad went up to seal off the first flying lair while Orlof headed into the eastern area, with Kurisu back to deal with the skeletons coming up from the rear. Kurisu then went up to join Rolan while Orlof dealt with the monster lairs on the east side. Equipping all the archers with Boomerangs helped a lot; they have a 1-6 range in any direction (even diagonal). With this, I was then able to approach the strong monsters at the top from both sides, use boomerangs to take out the casters, and then whittle away the strong crab things.

Battle 6

Levels: Kurisu 8, Rolan 8, Orlof 9

Yay, no monster lairs! The monsters all rush us at the beginning. I got a lot of use out of the “marlo” spell that shoots arrows out in all 8 directions, hitting every enemy in their path. I lost the first time because I was dumb and sent out Kurisu near the front — there are enemies with boomerangs that can quickly gang up on someone. As long as you don’t do that it’s not hard. (I swear I took a screenshot but it’s not in the folder…)

Battle 7
Levels: Kurisu 8, Orlof 9

The monster lairs are back, and no Rolan. This stage is not especially hard, but it takes a while. One of the lairs is out of the way, and spits out the boomerang monsters so I made sure to take care of that with Orlof’s party, while Kurisu supported with the boomerangs. Then I had Kurisu hold off the skeletons coming one at a time from the top while Orlof made his way back. With both parties active it wasn’t that difficult to finish off the stage even with the monsters blocking the bridge.

Battle 8
Levels: Kurisu 9, Rolan 9, Orlof 10

Rolan rejoins the team, and we have an interesting battle — a three level tower where you can only use the commanders. However, after each floor you can leave, and your non-commanders can cast heal spells and the like. I made sure I had the best equipment and plenty of Herb 2’s for healing. The first two floors are not too bad, although the second is annoying with its MP-stealing enemy. I used Orlof’s marlo attack spell a lot.

This boss can only be hurt by Rolan’s new freeze spell (apparently). At level 9 he had exactly enough MP to use the spell enough times to beat the boss; everyone else was on healing duty.

Battle 9
Levels: Kurisu 9, Rolan 9, Orlof 10

This introduces a bunch of new annoying enemies. They can roll towards you and hit any guys in the way. They stay where they end up, though, so they can be dealt with at least in this stage by slowly approaching them.

I took Rolan’s unit up to the left hill to deal with the monster lairs, and then kept them up there with boomerangs and Rolan’s freeze spell while the other groups went north and lured the rolypolys down one or two at a time.

Next we have to go to the same map to protect some people digging a well. After 5 turns they figure out it’s oil rather than water and return, but until then it looks like if they take one hit they die.

The monster lairs spit out these new monsters that shoot some sort of rock or cannonball; they can quickly take down one person by ganging up on them. I used a lot of magic (especially the spell that sends out three attack missiles). The lairs aren’t as bad as they seem at first because once you get near them, the monsters that come out of the lairs will stop moving off the lair. I ended up only losing one guy. Afterwards monsters start coming out of the other lairs so I just retreated back to town.

Battle 10
Levels: Kurisu 10, Rolan 10, Orlof 10

This battle is simple. One person (it may have to be the main character or his party) has to attack the rock areas near the town to make the water reach the town.


Everyone else can deal with the monsters that come down, but it’s only 12 total with no monster lairs, so they can be dealt with easily. There are annoying rolypolys up at the top but they don’t move so there’s no reason to fight them.

Back in the town we get the Winga medal, which lets us summon a thing that can fly us past the north walls. Using the medal makes it appear but start moving away. It’s to the NW of where we start. Moving up there is fairly easy and it can be reached in a few turns. Orlof got a powerful new spell that does a lot of damage to multiple units, which is nice.