Monthly Archives: November 2018

SFC Torneko no Daibouken (skip)

So this game is not really an RPG, it’s a console version of a roguelike game. If you want to play it, there’s a patch available. It has quite a good reputation.

The next game on my list is Trinea, which doesn’t qualify for my definition of an action RPG.

So the next actual game on the blog will be the PC Engine game Startling Odyssey, which later had a PS1 remake. Not sure I will be able to play it enough by Saturday to do the normal Saturday update, though.

Also check out Shining Force on my other blog.

SRPG Game 9 – Shining Force (Chapters 4-6)

Chapter 4 – The Great Fortress of Balbazak

We come to the moving town of Pao, which is a carriage or train that moves around from place to place. The story borrows (perhaps) from Fire Emblem in having Elliot, an enemy commander who hates Darksol but still supports Runefaust, so we have to fight him.


Battle 12

Elliot is the hardest boss so far, but he wasn’t too bad. I think in general bosses that have no area-effect attacks or other annoyances can’t stand up to the full assault of your forces (a similar problem happens in a lot of SRPGs).


Battle 13

There’s my part at this point. I decided to only promote units that needed to promote for equipment, otherwise to wait until level 20. This was possibly a mistake — one thing I don’t like about this game is how much of a stat hit units take on promotion. I basically could not use Zappa (Zylo) or Bleu after promotion because they were just too weak and I didn’t want to have to do the acrobatics that would be required to level these guys doing 1-2 damage a hit and getting instantly killed by most attacks. I really hope this aspect of the game is tempered in the sequels. I also decided to use only at most one of each class (Gort is promoted here).

The battle itself is easy; having flyers like Kokichi and the wing unit help a lot.

Battle 14 

Now we are at Uranbatol for the ship. Of course, there’s a fight at the docks.

There are the usual challenges here of protecting all the guys from the flying units. The hardest part is probably those three artillery units above the Dark Priest. But as usual losing a couple of guys isn’t that bad. I ended the game with 250,000 gold and even at the end of the game it was costing about 250 per person to revive.

The boss won’t move even if you use distance attacks, so you can guess how hard he is.

Now we have a ship!

Chapter 5 – Gateway to the Hidden Shrine

The ship gets beat up a lot by successive ship battles which always send us to a place we don’t want to go.

Battle 15


Still the same party. And a really easy stage.

Now a mermaid invites our hurt group to Waral.

And I decided to promote the Hero, giving him a new face.

Battle 16

The Mermaids and the other people who live on this tourist attraction need us to solve their problem, so while the ship is being repaired let’s do it.

Still no party changes.


The skeletons are somewhat stronger but my party is still pretty good so no big issues.

Battle 17

Back to the ship….which gets attacked again.


Same party. This is an easy battle but I actually had to retreat the first time because I charged ahead too much. This is (I think) the first stage where new enemies appear during the battle. The reinforcements aren’t hard, but if you’re too far down the stage dealing with the initial enemies they might cause problems.

Chapter 6 – Descendant of the Sacred Dragon

We end up in a strange town where children seem to control most of the place, and learn about a friendly dragon that we have to go save.

Battle 18

Finally a new party member, Lyle. I subbed out Diane for the mounted archer. Still mostly unpromoted. Arthur is a very poor unit that I’m trying to build up because people say he’s the best centaur knight. Ultimately I will ditch him because he just doesn’t advance fast enough.

The main annoyance of this battle is the terrain, and making sure your units don’t advance too quickly and leave the slow ones behind.

Battle 19

And another new party member, Bleu (or Baryu in Japanese). He starts out pretty good. Unfortunately once I promoted him he did 1 damage to everything and died in 1 hit, and I never even got him to promoted level 2 even though I used him in every battle.

The main difficulty here is Cain, the hardest boss yet. I guess I got lucky because his insta-kill “sword of darkness” never worked, and he tried to use it about 3 times. Those free turns were very useful given his fast regeneration.

Cain had been controlled by Darksol, but now with his help we can open the Dragon shrine to try to protect the book of secrets…of course Darksol was just waiting for us to do this so he could steal the book himself. Mean. Now the only option left is to find the Chaos Breaker to deal with Darksol and the Dark Dragon.

Battle 20

Another tough terrain map. Same party, not really that different from last time.

Battle 21 

We go to Mishaela’s castle. This is one of the toughest battles in the game, I think. The difficult part is Mishaela herself, who is at the empty spot in the center below.


Only one short range fighter can fight her at a time unless they are flying. She has a large HP regen, does pretty strong damage spells, and has an unusually high defense as well. This took me several tries and some lucky criticals to beat.

Two chapters left! I already beat the game so the next post should be up Saturday and then the wrap-up soon after that.

SRPG Game 9 – Shining Force (Mega Drive) (Chapters 1-3)

Shining Force: The Legacy of Great Intention (シャイニング・フォース 神々の遺産)
Release Date: 3/20/1992
System: Mega Drive
Developer: Climax and Sonic
Publisher: Sega

This is the first strategy RPG I played. A friend of mine had a Genesis with a cart copier, and so he was able to give me the floppy disk with this game that I played on Genecyst. I didn’t beat it, and I’m not sure I even got halfway through. But I definitely remembered it. 

Shining Force is technically in the same series as Shining & The Darkness, but the previous game was a first-person dungeon crawler. This game takes strong inspiration from both Dragon Quest and Fire Emblem — the creator claims he was not inspired by Fire Emblem but I find this hard to believe. The “100 xp = level”, promotion at level 10, per-character base stats and growth rates, and other aspects seem clearly to have been taken from Fire Emblem despite the creator’s claims.

However, I would also not call this a simple Fire Emblem ripoff. Of course it’s in the same genre, but this game takes a large stride towards a true “Simulation RPG”, that is, a game where both the simulation/tactics and JRPG elements are fully developed. In many ways, this is like a standard RPG but with tile-based strategy RPG maps replacing the dungeon exploration. There have been games before (stemming from Ultima III) where the random encounters took place on a grid. But they tended not to have terrain as a feature, or set enemy formations.

I believe this is the first game I’ve played on the blog that does not have an automatic counter attack by the defender. It also has a speed-based turn system rather than player/enemy, but unlike Lady Phantom each character gets one turn per phase.

The opening narration is also covered in the instruction manual and is pretty typical. 1000 years ago, the peaceful Rune continent was nearly destroyed by the Black Dragon, but the dragon was sealed away. But this is mostly forgotten now, remembered only as the legend of the “God’s Bequest.” The Guardiana Kingdom has protected the seal on the Bequest. Our main character has washed up on the shore of the Guardiana Kingdom, severely injured and with no memory (apparently this part of the story was omitted in the English translation). The priest Lowe found him and nursed him back to health. He shows an unusual aptitude for swordsmanship. But now the kingdom of Runefaust, led by the general Darksol, is invading Guardiana, hoping to use the God’s Bequest for themselves.

Chapter 1 – Runefaust’s Invasion

The game starts in Guardiana. The town music is very similar to Dragon Quest and the little beep sounds that play when people talk (at different pitches depending on the character) is also taken from Dragon Quest — the designer apparently said his primary inspiration for this game was Dragon Quest, so that makes sense.

Anyway, our team has to investigate the Gate of the Ancients.

Battle 1

This is an easy battle. The enemies don’t rush you the way they do in Fire Emblem or other games — sometimes the AI is shockingly bad and they’ll refuse to move in and attack you even when you’re sniping them or using spells. But then other enemies show more intelligence.

I wish you could turn off these battle sequences

One other aspect that makes this game relatively easy is that defeated characters can be revived at a church, and the revive price is extremely cheap.

Battle 2

The second battle has us fighting our way back to the initial castle. This stage showcases one of the more annoying aspects of the game — the limited mobility of many of your units makes it easy to get stuck in passes where nobody can move. Later in the game when you get more flying units this isn’t quite as bad, but at this point it’s frustrating. In the screenshot above, you can see another rather poor aspect of the game — those units will not move no matter what. So if you want, you can sit on the other side of the river and throw spears/arrows or cast spells until they’re dead. Otherwise you can only move one guy into their area, who then gets attacked by all three units.

Battle 3

Back in Guardiana, the King is dying, but tells us that we need to stop the key of the Gate of the Ancients from getting into the hands of Runefaust. We head up to Alterone to begin the quest to find the key, but of course enemies appear. Apparently I didn’t get a screenshot of this battle, so here’s this girl that appears whenever you start the game — there’s an odd frame story where you’re waiting for her grandfather to get home, and she asks you to read the book while you wait. So the whole game is what you’re reading in that book.


The battle has flying bats, which can put you to sleep. Otherwise the pockets of enemies are rather small and this isn’t too bad.

Battle 4

The king at Alterone screws us over, springing a trap on us and then imprisoning us — he’s joined up with Darksol. But we escape, and fight through his measly troops. Another priest joins us. Her name is “Khris” in the English version so I was afraid this was going to be a second “kurisu” in addition to the main character, but her name is Chip in the Japanese version so it was fine.


The main problem in this battle is the mage, who can cast Blaze 2 (with a 5 area range). One way to deal with this is to surround him — the range spells can only be centered on a square with an enemy unit, so with four guys surrounding him he could only cast it on one enemy at a time. But even if you don’t do that, the revive cost is so cheap that as long as you can win the stage it’s not that important if a bunch of guys fall to the Blaze 2.

Afterwards the king apologizes for joining up with Darksol and shows us a secret passage on to the next area.

Chapter 2 – The Spirit of the Holy Spring

We have reached the land of Lindolindo (which was shortened to just Lindo for the English version). Unfortunately all the ships are gone except one, so we can’t get to the eastern continent. The mayor refuses to let us use his ship, so the only choice is to go outside and wander into another battle.

Battle 5

The flying units can always circumvent your defenses and get around to weakened characters, but the AI is definitely not laserlike; they will often tend to attack whoever they’re next to even if they could go kill a weaker guy. The previous town also had Power Staves which lets the mages and healers attack, making it a little easier to level them up.


Battle 6

This one is in the Cave of Darkness.

The undead enemies are weak against fire, but the mages are the usual danger and there are priests this time as well that heal. There are also a bunch of treasure chests that can be opened during or after the battle — after is more annoying because the main character has to open them all and can only hold 4 items, so you have to constantly exchange items (this is a problem in town too).

Now with the Orb of Light, Kurisu finds out that his destiny is to defeat Darksol (what a surprise). But the mayor still won’t let us have his ship unless we find his son, who is hiding in the circus building….along with enemies.

Battle 7

This stage has a bunch of dolls and undead, but the real danger is the boss, who has a lot of HP and Freeze 3. So make sure not to cluster people together, and try to trap her so she can’t move to target the spells better. I lost a bunch of guys but still won in the end.


Now we have the boat….but Mishaela, who was controlling the previous enemies, sinks the ship, leaving us to go north to find another ship in Ulan Bator. Step one along the way is Shade Abbey, which is quite suspicious.

Battle 8

 
Undead aplenty, but they’re all the same normal guys so it’s not too tough to take them down. Now I get two winged soldiers. I like the flying characters because they don’t get in the way of everyone else and can move freely around.

Now it’s off to the north, to continue our journey.

Chapter 3 – Runefaust’s Secret Weapon

In Bustoke, the men have been captured to work in the quarry on a new weapon, the Laser Eye. There’s some kind of technology in this game but at least up to now they haven’t explained where it came from.

Battle 9

That’s my party for now, although I didn’t give it much thought. I got caught in a pass again:

That’s a nasty setup because the priests can heal the mage. Fortunately the mage is not that strong and the winged knights, at least can get around the edge even though their weapons are weak.

After this battle we can get Zappa the werewolf (Zylo in the translation). He’s one of a number of characters that can’t equip anything but (in theory) have decent stat gains to go along with it.

Battle 10

Now it’s off to Pao Bridge to take out that laser eye. This is just a regular overworld battle; nothing too difficult. Zappa is useful since he’s not slowed down by forests.

Battle 11 

This is a tough battle if you’re not prepared….sort of. The Laser Eye takes 10 rounds to charge up and then fires a huge beam that hits everything, enemy or ally, along its path. I hadn’t checked a guide here so it took out 7 of my guys. But I still had enough left over to beat the few enemies beyond the laser eye. I’m pretty sure this is the farthest I got when I played the game in high school.


On to chapter 4! I’m having fun with this game so far — it’s probably the easiest game I’ve played so far (maybe along with Little Master) but the RPG elements are nice, and the variety of characters is fun.

SFC Game 31 – Sword World SFC (Post/Review)

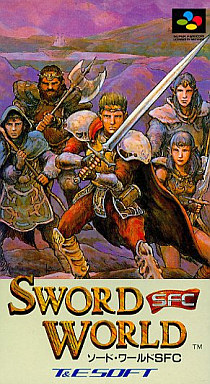
Sword World SFC (ソード・ワールドSFC)
Released 8/6/1993, published by T&E Soft


The cover of this game is quite different from the usual anime-themed cover of Super Famicom RPGs — it almost looks like the box cover art that would be used for the English release of games. But it does indicate that this game is quite different in many ways from other RPGs. I actually had a lot of fun with this game; it has flaws and it wouldn’t appeal to everyone, but I probably enjoyed this game more than any one I’ve played so far other than Dragon Quest V.

It’s based on a tabletop RPG that came out in Japan in 1989 and still is (supposedly) the most popular RPG in Japan. I think what was so endearing about this game to me was that it captured the nostalgia of playing D&D in the 80s and 90s with friends. The game is built around 19 short scenarios (of which only 12 constitute one playthrough). They feel like the kind of adventures we would make in high school — get some sort of mission or quest in the town, explore a dungeon or maybe solve a short mystery, do a few fights, and get some treasure. Most of the quests are stand alone, but there are a few recurring characters and they do manage to do a wrap-up climax in the last two missions. The story’s not going to win any awards but it was interesting enough.

In fact, after this game’s release, there was a companion book for use with the tabletop RPG, that had all the quests from this game and the PC game, plus another 37 that they hadn’t been able to include for space reasons. So I can definitely see this having been even more fun to players at the time who did play Sword World, the same way I enjoyed the Gold Box AD&D games more because I was a D&D player.

You start the game by creating a character. You get to pick a race (human, elf, dwarf, grass runner, or half elf). If you pick Human or Half-Elf you also get to pick a background for your character. All of this determines your starting stats and levels. Rather than a strict class/experience system, you can freely level in different classes, with a max of 5 in each class. Your “character level” is the highest level you have in any class, and determines damage reduction and a few other stats.

The classes are Fighter, Thief, Priest, Shaman, Sorcerer, Ranger, Sage, and Bard. The way the class restrictions work, some classes don’t work well with each other — for instance, Sorcerer needs a magic staff to cast spells and only light armor, so that doesn’t go so well with Fighter. One problem I did have with the game is that without the TRPG rulebook, it was hard to tell what some of the classes did or what levelling up the class would help. Sage was the biggest puzzle; the instruction manual says that this means you have a lot of knowledge, but it’s not clear what gameplay effect that has.

I chose a human who had been a scholar, and thus started with Sage 1. I then used her initial experience to level her up to 2 in Priest.

The basic flow of the game is that you find a place to get a job (usually an inn). But first you need 4 companions, which you can choose from a number of people that are wandering around the two inns in the starting town. I got the following:

  • Bart, level 2 fighter, 1 Ranger, 1 Sage. I ended up using him as a Ranger with a long bow.
  • Balam, a dwarf, 2 Fighter, 1 Priest.
  • Rooks, a level 2 Thief
  • Maira, a level 1 Sorceror and 1 Shaman. I used her mostly as a Sorceror.

After this, it’s time to equip the party. Once again I was hampered by my lack of knowledge of the system since there’s no clear indication of how a long sword, a maul, a morning star, and a spear are different. Some classes have restrictions — mostly that they can’t use metal, or that their armor or weapons can’t weigh more than half of their strength. All characters have a restriction that the equipment can’t weigh more than their total strength. When you buy weapons and armor, you can choose a range of weights depending on the item, and presumably a heavier weapon does more damage?

I beat the game pretty quickly, and so I don’t think I’m going to do a blow-by-blow account of all the missions. I’ll describe one in detail and then summarize some of the other key jobs that are related to the final story.

The first job involves an antiques dealer who is collecting God Statues that resemble weapons, and he has arranged to buy the axe statue from the Dwarf mountains. This actually turns out to have a connection to the overall story, but for now it’s just a fetch mission.
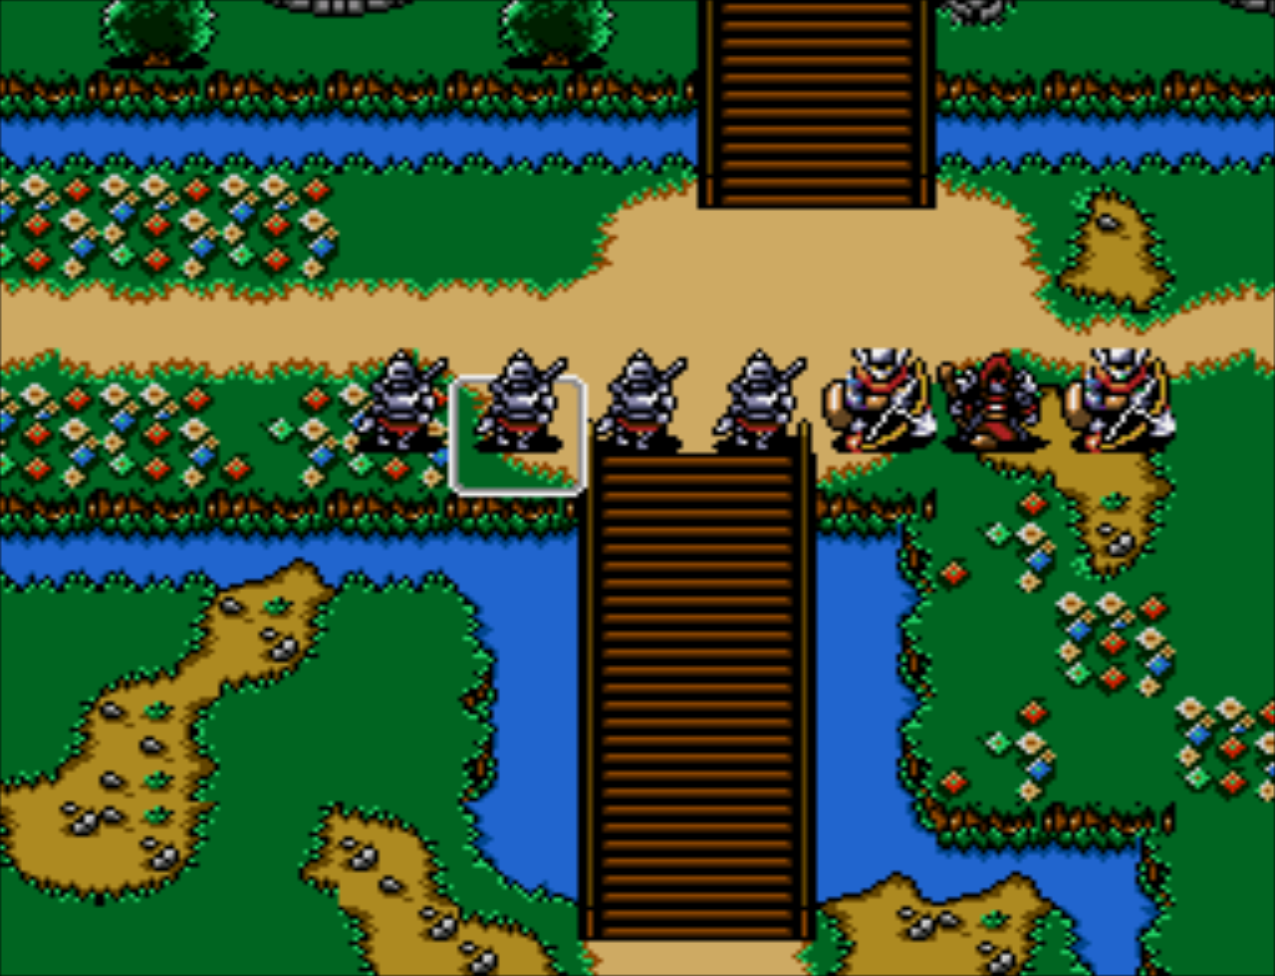
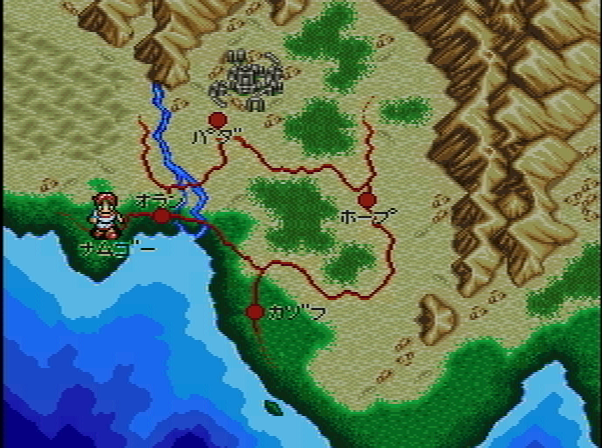
The world map

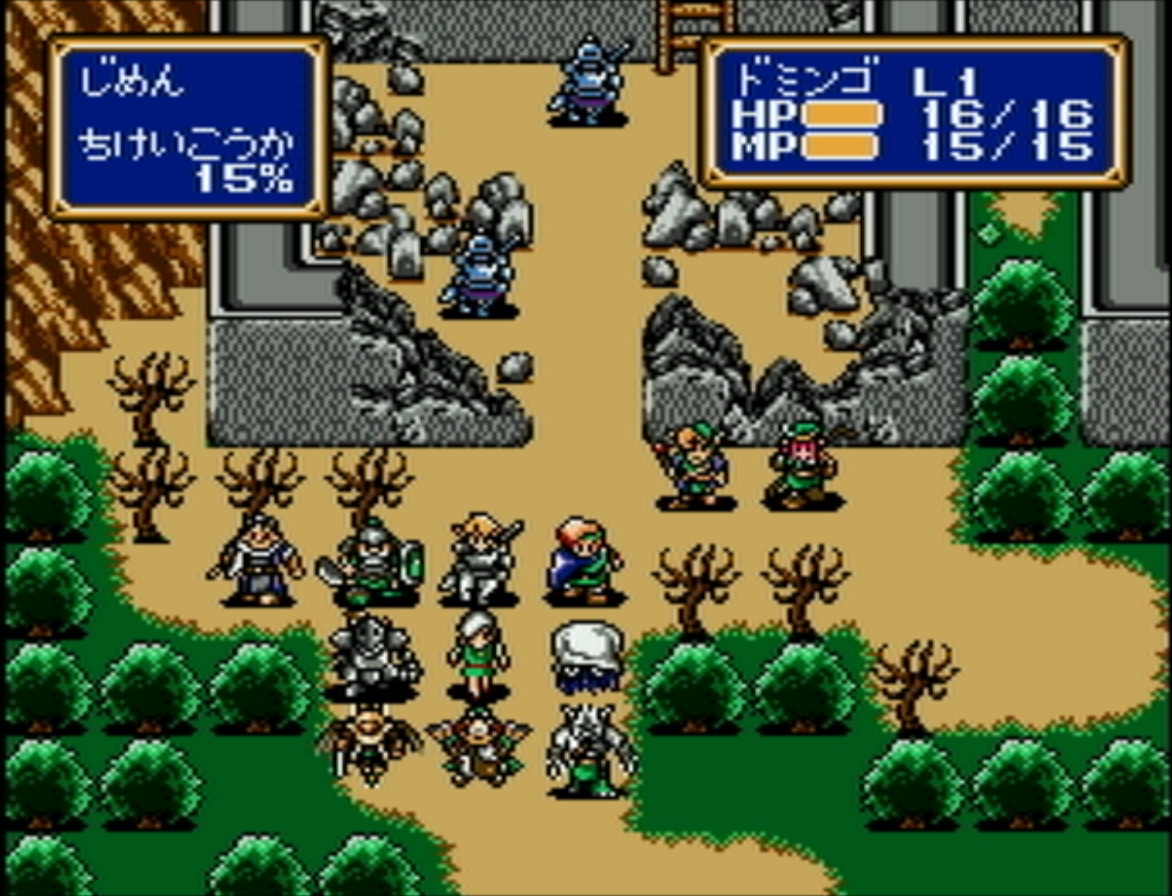
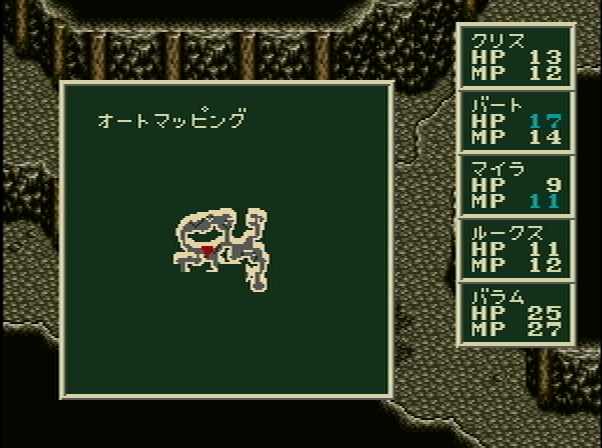
Unfortunately it turns out the axe has been stolen, so the first real quest is to get it back from goblins. The dungeons have a convenient automap feature, which also feels tabletop RPG-ish.

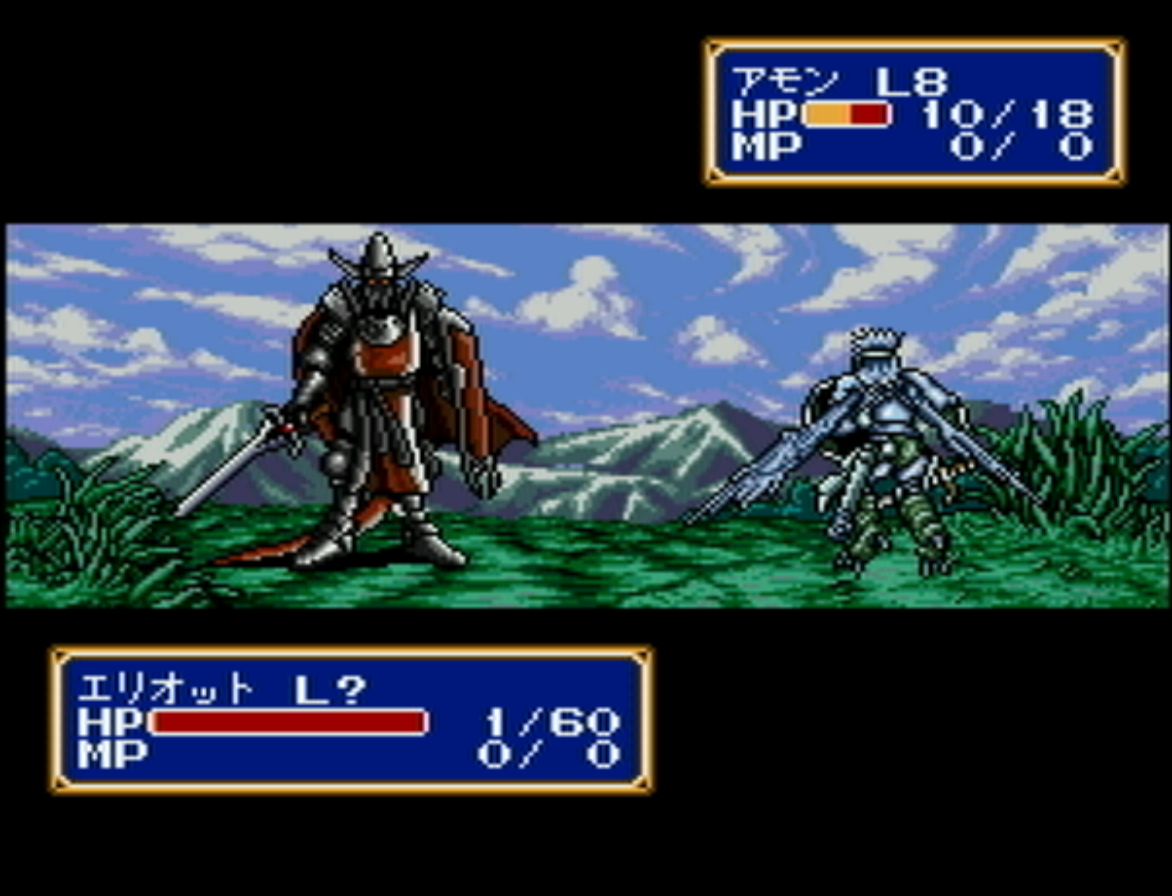
There are no random battles, instead when you meet monsters the game switches to a battle without going to a separate screen.

The battles play out on a grid, with faster units going first. The interface is very easy to use. Spells don’t seem to have a range, but they can have an area of effect. You can also boost their damage or effectiveness for more MP, and can use magic stones to substitute for MP if you’re low. As far as I can tell, the enemies do not return if you leave the dungeons, so you can rest freely. Misses are very frequent (on both sides), which also reminds me of a tabletop RPG.

The rewards for beating monsters are not especially high; you mostly get XP for completing quests. On the whole, the biggest problem I had with this game is a lack of feeling that your characters are getting better. HP and MP you have to pay for, and it’s pretty expensive — I never actually increased any character’s HP or MP.

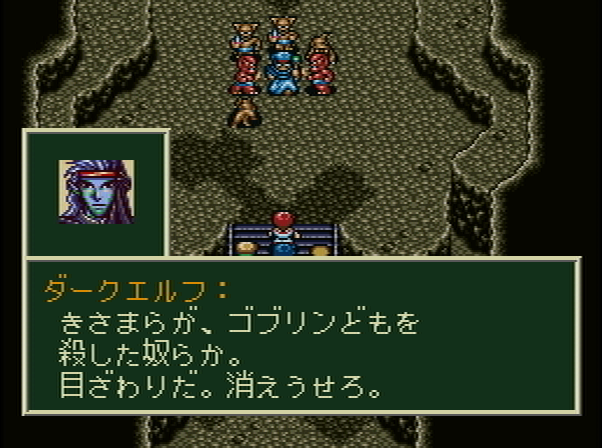
At the bottom of the cave we find a dark elf.

He’s pretty tough — fortunately you can save anywhere. The second time I tried the fight I used Sleep Cloud and it put all the enemies to sleep, which made the fight easy. In general Sleep Cloud is quite a powerful spell for most of the game.

Now with the axe, we can head back to the city and get our reward. Job 1 is finished! The XP can be used to buy level ups or stat increases.

The second job involves poisoned food — first we have to investigate the harbor, and then a cave where Sagran, a disciple of the dark sea god Milreef, is plotting.

The third job involves the thieves’ guild. A thief seems necessary for this game — not only to disarm traps and open doors and chests, but to enter the thieves guild for information.

Job 4 is also important to the overall plot; it introduces Tsure, who is trying to be leader of the nomadic desert people. He needs to find a water crystal in a tower to prove he is worthy to be the next chief. After saving his sister from assassins sent by a rival, we help him get the crystal and prove his worth.

Job 6 is protecting a ship from undead attack — it turns out they are related to the Dark Sea God (from mission 1), and are sacrificing ships to the god.

Job 8 has us rescuing another adventurer from the Lex ruins. He’s looking for secrets in the Dragon Temple. We run into Tsure again, who seems more sinister this time — the nomad people are looking for the god weapons (from the first mission) and threaten to kill us if we get in their way.

Job 10 brings Sagran back, and in Job 11 we learn that the nomad people are trying to get the god weapons to summon the God-Killing Dragon, to deal with the Dark Sea God that will soon arise.

This brings us to the final quest, stopping Sagran and the Dark Sea God. This is the longest quest yet and involves a number of dungeons, with mostly undead enemies. The Holy Light spells work well, since many of these enemies cannot be hurt except by enchanted weapons — as far as I can tell there aren’t any magic weapons you can find (another disappointment about the game), so you have to cast Enchant Weapon to kill them.

Along the way, Tsure is injured and we receive the God Statue from them, to help us in the final battle.

Eventually we find Sagran, but he runs away and leaves grunts to fight. After dealing with them, it’s another dungeon, but then the final confrontation with the Dark Sea God.

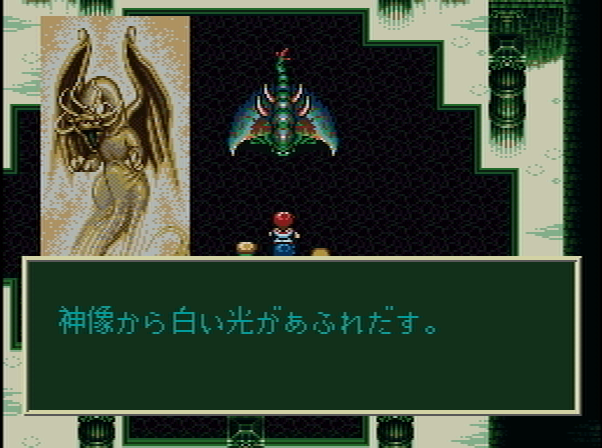
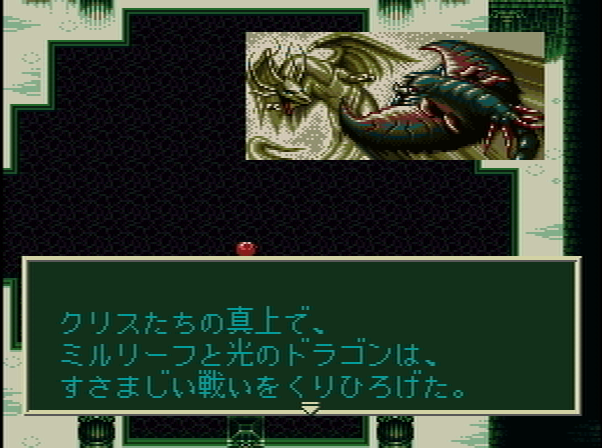
The first step is to use the God Statue, which makes the God Killing Dragon arise and drive away the god.

Now all that’s left is the final fight vs. Zombie Sagran. This is a fairly difficult fight — I had the max of 300 magic stones (which can substitute for MP), and basically I enchanted everyone’s weapons and then cast my most powerful damage spells. I focused on Sagran until he finally went down and then the others.

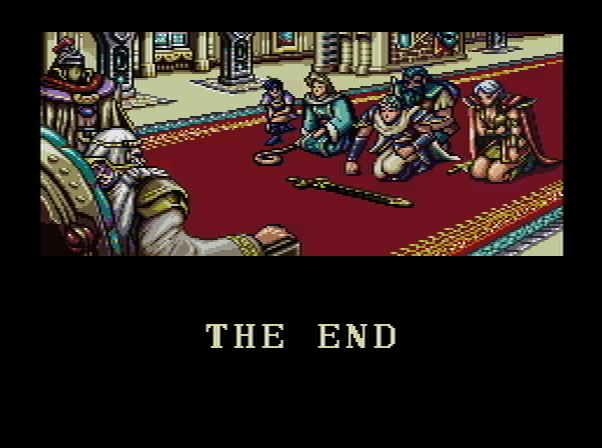
After the fight, the players are hailed as heroes, and retire to help support other adventurers or something like that.

I was then told I had completed 65% of the game — there are still 7 more scenarios I didn’t do, and an optional grinding dungeon I didn’t touch either. So this game has replayability, since I could also have tried with a totally different party.

So on the whole I enjoyed this game a lot. It has flaws and I can see some people not liking it, especially since in many ways it’s closer to a computer RPG than a typical console one.

Also worthy of mention is the soundtrack, which is pretty good. Here’s a link to a playlist (starting on one of the dungeon themes). There are 80 songs, which is impressive in a game from this era — I think that’s even more than Seiken Densetsu 2.

Sadly there’s no translation patch, but maybe one of the hard working groups will take it up at some point.

Up next is Shining Force on my other blog, then the next game on my list here is Final Fantasy Mystic Quest — I remember playing this several times as a kid, but since it has an English release I’ll be skipping it. Next up then is Torneko’s Adventure, a roguelike-inspired game from the Dragon Quest world.

SRPG Game 8 – Fire Emblem Gaiden wrap-up

 FACTS

  1. Turn type: Player turn/enemy turn.
  2. Maps: Small to medium. There is terrain that gives bonuses.
  3. Character Customization: Promotion of units at predetermined levels, by visiting goddess statues. A small number of units begin as “townspeople” and can be promoted to multiple different class tracks.
  4. Character Development: Standard XP level system.
  5. Party Size: Two different parties; on the maps you get different numbers of units (from 5 to 13 or so).
  6. Equipment: One item for each character (weapon or armor)
  7. Game Flow: Most of the maps are required and must be done in order, although in chapters 3 and 4 you can do Alm or Celica’s route in either order (and switch back and forth). There are some side maps that can be used for grinding, and a few optional maps. The game has towns as well, although they are much smaller than the towns from RPGs of the era.
  8. Saving: Only outside of battle.
  9. Death: Permanent death, although there are statues that can revive units a limited number of times.

 IMPRESSIONS

Early 1992 saw two attempts to put stronger RPG elements into the emerging SRPG genre. This is the first one. Rather than following the example of the first Fire Emblem, which simply had a sequence of maps to play in order, this game has some optional areas that you can grind in, as well as towns.

With the exception of the remake of this game, FE never tried this style again, and probably with good reason. This game feels odd to play, and there are a lot of frustrating aspects to the game. The RPG elements are rather shaky. The towns themselves have very little to offer (especially since there’s no money or shops). There’s essentially no RPG-like exploration, with the except of the last dungeon and one or two other small places. The equipment and item system is also not especially well implemented, with no useable items and only one equipment slot (for a weapon or armor). Now, it may not be fair to criticize FE Gaiden for this — I don’t know what the designers were aiming at in their decisions.

But honestly this could have all worked out well, but design and balance problems plague the game as well. There are a lot of maps that just feel unfair — with your guys spread out all over the place and high movement flying units that are hard to protect your weak units from. The increased range of bows is nice for your side, but when the enemies have bow knights it can really exacerbate this problem of not being able to protect the units on your side. The warping female mages add to this randomness.

The plot is a mess, but I’m not going to fault a 1992 game too much for the story. On the whole, this game just didn’t feel fun. The first Fire Emblem, despite its flaws, was (for me) an enjoyable experience. This game was not. I commend the designers for trying something new, but it just didn’t work out.

The music is not bad, though.

Finally, I forgot in the introduction to scan some pages from the manual. First off, here’s the map:

Valencia

Then, there are the usual pictures of the characters. This was important in early games because you sometimes couldn’t tell what they were supposed to look like just from the in-game graphics. I’ll just put the pages up with Alm and Celica.

So that’s FE Gaiden. The next FE game will be after another ten games or so. Next up is the other game which was influential in creating stronger RPG elements in SRPG games — Shining Force.

SRPG Game 8 – Fire Emblem Gaiden (Chapters 4 and 5)

Chapter 4 – The Land of Sorrow

Alm and Celica are still separated. Alm is chasing down Rudolph, while Celica is heading towards the Tower of Douma. I began with the Celica side, since she still has warping Silque to help out — she’ll be killed near the end of this part and sent back to Alm. On the whole, the battles get more annoying and more difficult in this section.

Celica begins by finding Nouma in the basement of the temple (he’s the one who looked after her as she grew up). Then we head off to the first of the annoyances, poison swamps.

These take off HP if you start your turn in them, and you move through them very slowly. So basically it’s the flying pegasus sisters and Warp units. Then you get this map:

This might be the worst designed map I’ve ever seen in an SRPG. There’s a castle below with some enemies, but obviously this is just the Falcon Knights and a couple of warp units. It’s not hard, but what were the designers thinking? How did someone look at this and decide it was an acceptable stage for the game?

Next, Celica moves to the lost woods. This is a great place to grind because there’s a fight with 8 Mummies, who are worth a surprising amount of XP for how easy they are to beat. There’s also a promotion shrine in the woods. I got everyone to their max promotions here.

Just like the Lost Woods in Zelda, you have to take the right path or you keep wandering forever. I used a walkthrough map; there are some chests as well and a village you can get to. This is important because it’s the way you get Alm’s promotion.


This is Hulk, the high priest of the Douma church, who has had to flee due to infighting with Juda, who we’ll be fighting soon. He knows that we’re going to Douma tower to find the hidden sword that can bring back Mira from where she is sealed. But Juda will never let us get close. He offers to help any we he can, and Celica asks him to give power to Alm — that promotes Alm to the Hero class.

Celica continues on to the Douma tower, and meets Juda along the way. I didn’t get a screenshot of this, but Juda is an optional enemy on the map — he can be hurt every 4 turns. So I surrounded him with the pegasus knights and killed him on turn 4. This gets rid of the multiplying eyeballs as well and makes the rest of the stage not so bad.

The tower itself is three successive fights where Celica has fewer and fewer allies, and things like this:


I’m really not a fan of these kinds of maps that split your party for no reason, in a game where you can’t control who starts where unless you play the map, reset, and then switch your party formation around. It’s not very hard with the Falcon Knights but still. (I killed Silque in the first map here so she could be resurrected on Alm’s side.)

Once this is done, Juda invites Celica to gaze into his jewel to see how Alm is doing. And now you have to do Alm’s route. On the whole I found Alm’s side much harder than Celica’s; his units (for me) were much weaker, and the Falcon Knight sisters were not available. It also takes a while for Silque to reappear with Warp.

As usual, the main problem is protecting weak units from flying or horse units with huge movement, and from the female mages who will sometimes decide to warp to a location on the map. After a few battles Alm comes across the first temple, which allows revival of Silque (yay!) and also has a bunch of useful treasures like a Speed Ring (which raises speed to 40 and movement by 5!)

The first significant place is the castle of Nuibaba, where a priest named Tita is (just a palette swap for Nina from FE1).

She was being controlled by Nuibaba, but now wants you to save Zeke, her boyfriend. He opposes what Rigel is doing but Nuibaba captured her to force his compliance.

Zeke turns out to be Camus from FE1, although I don’t believe that’s ever explicitly stated in the game. He lost his memory and found himself here. He sympathizes with Alm but can’t turn against King Rudolf, who saved his life and took care of him. But he sees a cross scar on Alm’s arm. He remembers Rudolf telling him that if he ever finds someone with such a scar he should give his fealty to him. So Zeke decides to join Alm after all. He’s a Gold Knight, the top promote of that class tree, so he’s a good addition to the force.

Eventually Alm reaches the Dragon Mountains, where he gets trapped. Meanwhile Celica is thrown into the basement of Douma tower by Juda.

Alm has to fight a bunch of annoying fights against these D Zombies — they’re manageable because the priests have this spell that kills monsters instantly, anywhere on the map, although usually one or two will be left behind. You still have to be careful because the dragons have huge range, but after shuffling my troop order around I was able to beat it. There’s then a secret shrine that provides a grinding place and the last promotion chance for Alm, so I used that. I also should have levelled my priests to get Reserve and Warp, but I overlooked that — fortunately I was still able to win the game.

The final battle of the chapter is against Rudolf in Rigel Castle. You only have to beat Rudolf to win the battle.

When I tried just warping Alm there it didn’t quite work, but with Zeke as well I was able to do it — a Japanese site also suggested something I should have done, using a mage that has a Magic Ring to increase range. I found that if I wasn’t careful, Rudolf would flee up and I wouldn’t be able to chase him, so part of Zeke’s job was just to block that from happening.

As Rudolf is dying he reveals that Alm is his son (sigh) so he’s the next king of Rigel. Maizen then offers a rather incoherent explanation of Rudolf’s behavior — he thought the gods were too involved in the world so became an evil ruler to cause heroes to rise up who would then create a new age. This is pretty stupid; I’ve heard that in the remake they made this part of the story a little less nonsensical by introducing a prophecy.

Now Alm needs to defeat the evil god Douma to end the game, which takes us to the short chapter 5.

Chapter 5 – A Reunion, and then… 

Alm heads to Douma Tower, where Celica is underground fighting. As you proceed, Celica’s team will randomly take damage when you switch screens. Apparently this can cause people to die, and there are annoying things in the dungeon (like having to go in the correct holes to get to certain places).

The first step is to find the Falchion, and optionally the Gladius spear. There are various fights as you travel around, but none of them are too bad.

Once you have that, it’s time to head to where Celica is fighting. The final fight has a bunch of strong enemies, plus Juda and Douma himself.

The first time I tried this I warped Alm up to Douma right from the start, but this didn’t work. So the second time, I sacrificed most of the party on the left and bottom. My main fighting force was Alm, Celica, the 3 Falcon Knight sisters, and Maizen with the Gladius. Two priests with Reblow for distance healing were hiding at the bottom. With this force I was able to clear away the grunts and Juda, and eventually get down to just Douma.

First you have to hit Douma until he starts showing damage, which I did using the sisters’ triangle attack (just like in FE1, surrounding an enemy gives you automatic critical hits). Then it was time to finish him off. If Alm is next to Celica on the battlefield he gets automatic criticals, so I set that up and it was easy to defeat Douma.

Douma tells Alm to use his strength and Mira’s love to create a new world without them, and not to repeat their mistakes.

The ending scene gives a common RPG thing about the evil in human hearts being greater than gods, etc. Then like FE1 it shows you what each character did after the end. If a character died, it says where. Also some of the characters get alternate endings if their friends or lovers died — for instance, if one of the three Falcon Knight sisters died. Alm and Celica get married and Alm becomes Alm the First. The end.

So I would rate this as an interesting experiment that is ultimately a failure, but I’ll say more in my wrap-up post.

SRPG Game 8 – Fire Emblem Gaiden (Chapter 3)

I’ve finished the game so the last two posts + review should come out staggered throughout this week.

Chapter 3 – The War of Liberation

This and chapter 4 have Alm and Celica’s parties on the map at the same time. You can choose which one to move, so you can completely finish one side and then the other, or switch back and forth. Periodically, new enemies will appear from the castles and chase you. I understand what they were trying to do here but it’s more annoying than anything else — if they move into your square you have to fight them but they get the first turn. If you do a battle and then they move into your square you have to fight that second fight without a chance to save, which would be annoying on a real console.

On Easy Mode you can freely transfer items between the two parties, but on regular play you have to find traveling salesmen to take the items between the parties.

I started with Alm. Warp is very important in this game so the smoothest way to play is to do Alm’s route, kill Silque on the last map, and then resurrect her on Celcia’s side. A Japanese walkthrough suggested doing the first map of Celica’s side so you can get the Angel Ring (which doubles stat growths on level up) and then switch to Alm.

Alm is chasing after Rudolph, whereas Celica is heading to the Temple of Mira to see what’s wrong there. Along the way, Alm learns that a damn needs to be opened from time to time to release water, and if this isn’t done, eventually it will overflow and completely flood Sophia. But this requires both Alm and Celica to visit places on their side of the map, which is the main goal of chapter 3.

Alm begins by going through some grunt encounters and picking up a few new units, then arriving at the fortress of Dozei. Evidently I didn’t get a screenshot of this part, but with warp it’s not very hard to send some guys right to Dozei and the other difficult units and kill them quickly.

The next part is much harder, though.

Ten gargoyles are tough at this stage — they are strong to begin with, and their high movement makes it difficult to protect your weak guys. This took me quite a few tries but eventually I was able to win and promote units. Yay! The Sacred Spear is also here, which does increased damage against monsters. Would have been nice against the Gargoyles.

This mohawk guy is a boss of the next map

Finally at the floodgate, there is a boss Tatara, who is controlling a girl to fight against you. This happens until you beat him, so what do we do?

Warp!

After this map, the guardian of the dam tells us that in order to open it safely, we have to do something at the Mira Temple first. So time to switch to Celica’s side. She begins with a fight in a graveyard.

The gravestones have a huge terrain bonus for some reason, which is good and bad. It’s bad when a group of random bowknights moves in to the square after the main battle. They can sit on the stones and attack everyone. I had to actually use the “retreat” command here and have them follow me to a better place. The fight also turned into just one bow knight, which was easy enough to defeat.

A guy on the next map has a Dark Sword, which is like the Devil weapons from the first game — not really worth using.

Now Celica reaches the Mira Temple but the guy refuses to open the dam control for anyone but someone of the Sophia royal family. Of course that’s Celica but she has no way to prove it, so it’s time to head to Geese’s fortress. Along the way you get the choice of two routes, to get one of two characters. I went with Deen.

The fight against Geese would be hard except for Warp. Here’s one of the Pegasus sisters (now a Falcon Knight, one of the best classes) sent up to deal with him.

Now after beating Geese, we rescue Est (the third P Knight from the first game) and find a woman who recognizes Celica as Princess Anteze. Apparently Celica’s mother was a priest from the same temple as this woman, and was made Empress because of her beauty. But she died right after Celica was born. The woman has a circlet for Celica, as proof that she’s of the royal line.

So now Celica can prove to the dam guardian that she’s a Princess. Both dams are opened and water is returned to Sophia. Now both Alm and Celica continue on their own paths to Chapter 4.

People on the Fire Emblem discord mentioned that the game gets more annoying starting in Chapter 3, and I agree with that. There are too many annoying stages, and the random enemies that appear are frustrating as well. Chapter 4 is far worse, though, but I’ll get to that in the next post.

SRPG Game 8 – Fire Emblem Gaiden (Famicom) (Chapters 1 and 2)

Fire Emblem Gaiden (ファイアーエムブレム外伝)
Release Date: 3/14/1992
System: Famicom
Developer: Intelligent Systems
Publisher: Nintendo

There was an interesting pattern in the Famicom era of sequels that were very different from the original game. Zelda II and Castlevania II are probably the best known examples (also Super Mario 2 from the American standpoint). Perhaps Final Fantasy 2 could count as well.

Fire Emblem also went this route, releasing “Fire Emblem Gaiden” about two years after the original game. The term “gaiden” usually refers to a side story of an established story, which doesn’t really describe this game. It takes place in the same world and has some returning characters from the original game, but it’s a completely new story that has no direct relation to the original. Perhaps the creators thought the term “gaiden” would also suggest the different gameplay and style. In 2017 this was remade as Fire Emblem Echoes.

As I said in my previous post, up to now all the games have leaned strongly towards the simulation/strategy side of the SRPG name. This is the first game to incorporate more RPG elements (although Shining Force was under development at the same time and came out soon after). Gaiden allows you to walk around towns and talk to people, and you can also move around the map. Caves have repeatable battles that you can use to grind XP if you want. However, the RPG elements are still not fully implemented, and the game has a rather strange feel to it. For instance, you still can only have one item (weapon, armor, or ring), and there is no money.

The system is based on the original Fire Emblem, with the following notable changes.

  • All weapons have unlimited uses.
  • Spells cost HP to cast, and magic users get spells by moving up levels.
  • There are multiple promotions for many classes, and promotions are done by visiting various goddess statues.
  • Archers have much greater range.
  • There are monster units in addition to the usual human classes (although only on the enemy side)
  • Pegasi do not take extra damage from archers.

I’m not going to cover all of the stages because many of them are just grunt battles with no story and no real difficulty.

I also am using “easy mode”, which you get by holding select and start. Normally I don’t do that kind of thing but literally everyone told me to, including a Japanese site.

The manual gives the back story: Valencia was created by two gods, the benevolent Mira and the evil Douma. They fought for many ages, but eventually Douma controlled Rigel in the north and Mira the Sophia kingdom of the south. They existed in harmony for a time, Rigel protecting the land, and Sophia growing the food. But eventually Sophia forgot their origins and stopped sharing their food, even when the starving people of Rigel begged them to help. Even the compassionate among the people of Rigel couldn’t go against King Lima. Eventually King Rudolf of Rigel, under orders from Douma, attacked Sophia. By the time Sophia realized their mistakes, it was too late, and war had engulfed the continent. Eventually Minister Dozei defected to Rigel and assassinated the royal family, and now even Sophia Castle is about to fall to Rigel.

(This makes Sophia sound like the bad guys!)

Chapter 1 – To Sophia!

Alm, the hero

We start in a tiny village, where Maizen, a former knight of Sophia, has fled the rebellion of Dozei. He’s raising Alm as his grandson, and teaching him swordsmanship. One day Luca comes to the village, seeking Maizen’s assistance in forming a resistance against Dozei. Maizen refuses but Alm decides on his own to follow, taking a few townspeople with him.

The townspeople actually start with no class and you can choose which class path to take them down once they hit level 3, which is a nice touch.

The first battle

The battles are reminiscent of Fire Emblem but in general far easier. The first few battles are nothing to speak of.

The overworld map

The little cave there is a thief hideout, where we rescue Silque the cleric. She learns warp at level 7 which apparently is quite useful later. There is also an opportunity to change class at the Mira statue and drink from a stat-increasing fountain (3 times).

The first challenge comes here:

The game lulls you into a sense of complacency and then throws Leather Shield Mercenary at you. He looks like all the other guys but is at a higher level and has a leather shield, increasing his defense. He’s not extremely difficult, but you have to notice that he’s there. Of course you get his leather shield, and the next stage gives a steel bow. This increases archer range to 5 — archers in general seem much better in this game than in FE1.

Next place gives us Claire the pegasus knight. She’s pretty bad, but at least in this game the flyers don’t have to worry about archers. Range 4-5 archers would make P Knights almost impossible to use otherwise. The Thunder Sword also appears here so Alm can attack from a distance.

Claire’s older brother Clerbe

We then come to the Resistance base, where Clerbe joins the team and we get a chance to promote some units and raise stats.Clerbe asks Alm to become the leader of the resistance and maybe even future King. Sounds appropriate for the main character, so on we go to the climax of chapter 1. Dozei is trying to call for reinforcements to Sophia but hopefully we can get him before he does it. Alm is worried about incurring Mira’s wrath if Sophia and Rigel fight, but Fors (another new recruit) floats the rumor that Mira has disappeared. The crops aren’t growing lately.

Chapter 1 boss

Dozei is at the castle. He runs away if you beat Slader, and it takes a lot of grinding and use of Warp to beat Dozei. You get a Dragon Shield but maybe it’s not worth it…I just bypassed it and beat the stage. I lost the first time because I charged ahead too strongly. Letting Slader come to you and beating him up first makes the stage a lot easier.

Maizen is in the castle; he now agrees to let Alm walk his own path, and tells him another person will be here soon, after which we can chase Dozei into Rigel.

Chapter 2 – Celica sets off

Chapter 2 focuses on the second main character, Celica. She is a holy knight who wants to go to the Mira Temple to see what’s going on with the crops in the land not growing. Her initial troop is an archer and two mages, which is not the best group for dealing with warriors. I believe she also encounters the first monsters.

Appropriate for this time of year

Celica heads out for the harbor, where she picks up a rough fighter for her team and a ship. This chapter has a lot of ship battles.

Yo ho ho

Here’s another Leather Shield Mercenary, by the way. There’s also a map with lots of mages, and one with a necromancer that summons a lot of zombies. So they tried for some variety in the stages, which is good. This game also has magic defense (which FE1 didn’t have), so it changes the strategy vs. magic using characters.

Brrraiiinnss

In the thieves’ fort the first NPCs appear. They fight on their own, and if they survive the map you (generally) get them. In this map they try to fight the boss — I think I got lucky because the weakest unit, the archer, got wounded early and retreated, so it wasn’t that hard to have them all survive and join the team.

The next challenge is a Dragon Zombie, who guards a holy ring (that lets you regenerate HP on your turn). If Celica is high enough level to cast Angel, then the fight is not too bad although you do have to make sure you don’t leave weak units where the Dragon’s high move can get them. Beating the dragon also lets you enter the shrine where a Holy Sword awaits (good against monsters).

Reaching Sophia, the team meets Paola, one of the three P Knight sisters from FE1. But she doesn’t join us now.

This stage does not have any boss. Celica just reaches Sophia and reunites with Alm, leading into the third chapter.

As I said, this game feels odd in a lot of ways, but it’s not terrible so far. Apparently it gets a lot slower and more tedious starting in chapter 3, so we’ll see how it holds up in the end.