This game is taking me a while; partly because it’s a long game, but also because I’m actually doing things like talking to all the villagers, and there’s more to explore in this game compared to others where it’s mostly linear.
At the end of the last post I had defeated Mudo; I think the first section is intentionally playing up the stereotypical “beat the demon king” part. This unlocks Dharma Temple where you can get jobs — I feel like they delayed the job part too much (I felt the same about DQ7). Also in comparison to FF5 or other similar games, it’s a hassle to have to go back to Dharma to change jobs because if you master a job while you’re in a dungeon, you don’t want the next battles to go to waste so you warp out.
This is the way my jobs have progressed by the end of this post:
- Kurisu: Goof-off -> Martial Artist (lv 2) -> Dancer -> Superstar (will then go to Hero)
- Hassan: Martial Artist -> Soldier -> Battlemaster
- Mireyu: Priest -> Magician -> Sage
- Chamoro: Magician -> Soldier -> Magic Fighter
- Barbara: Monster Master -> Magician -> Priest (will go to Sage)
- Amos: Thief -> Merchant -> Monster Master (will go to Ranger)
Amos is not a very good character with this setup; I’m not sure why I’m trying to cover all the jobs: there’s a bonus dungeon where you have to have all jobs at level 5 or 6 to unlock, but that includes a hidden job that you can’t get until after you beat the game. So to unlock the dungeon you have to fight around 100 battles after you beat the game (minimum). Even then the bonus boss is very difficult unless you either do a ton of grinding, or plan in advance for it by saving stat up items and getting the right summoned monsters and jobs; I don’t plan to do the bonus dungeon at all.
Despite having Barbara in my party as a Monster Master quite a bit I have yet to recruit any monsters. I’m not a big fan of systems like this which were also in Dragon Quest V and the Monster Maker games, where everything is so opaque and difficult to acquire. It looks like getting a Heal Slime is good, but I’ve fought tons of heal slimes and haven’t recruited any of them — maybe I don’t fully understand the way the system works.
After beating Mudo, the long middle section has very little direct or plot development. Most of the time you’re not given any explicit indication of where you can go next — at times there really is just one place you can go and you have to find it, other times you’ve opened up a bunch of different areas you can try to visit. The only real overall direction you have is that (a) the Queen of Reidock told Kurisu that he needs to find the other aspect of himself to reveal his true nature, and (b) It’s clear that despite Mudo’s defeat there’s still something going on behind the scenes with the monsters.
I think this game will not appeal to people who want a lot of strong character development and plot — I know that in the US this game has often been compared unfavorably with Final Fantasy VI. Someone asked in a previous post how DQ6 was viewed in Japan. Of course sales were through the roof (3.2 million, making it the top game of 1995), although some of this is that late 1995 was a bit of an uncertain time for game makers because many of them were abandoning the SFC, but the relatively new Saturn and Playstation were not yet established as big selling consoles. It seems like DQ6 was well reviewed at the time, but I’m not sure in retrospect where Japanese RPG fans place this in their memories.
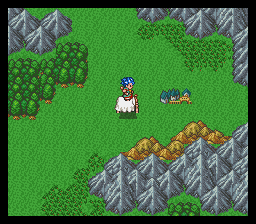
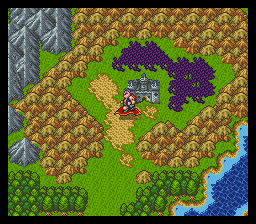
We now have access to the ship in the real world, so we can explore the NE area of the map (shoals block the way to other areas). The first town is Monstro, where someone named Amos has been changing into a monster at night. If you tell him his true identity he leaves the village and you can’t get him to join — instead you have to get a seed from a nearby mountain to make a cure for him.
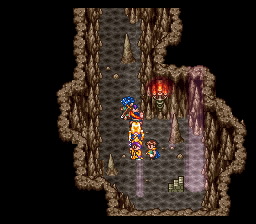
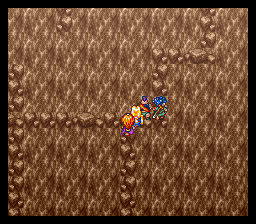
Next up is Arcbolt, where the King is looking for people to defeat a monster in the nearby tunnel. After proving our worth we set out to defeat the monster, but a guy named Terry beats us to it. Terry reoccurs throughout the game (I read somewhere he was initially intended to be the main character so they could have a different style of main from previous DQ games but in the end they went with the silent protagonist instead).
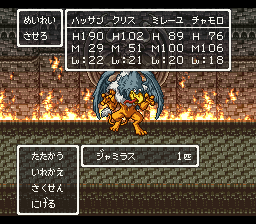
Next up is Calcado in the Dream World, where a monster named Jamiras is bewitching the people by supposedly leading them to paradise. We also take the floating island to “paradise” but instead we have to fight Jamiras to free everyone. He was tough at level 22 with still underdeveloped jobs; the strategy change that worked was to have Hassan be the main damage dealer and have everyone else focus on healing if needed. After Jaramis is beaten we get the island for ourselves to sail around in the dream world, and the Medal King’s Castle returns.
The Medal King is similar to DQ4 and 5, where you find Small Medals around the world and give them to the King for rewards. The big change here is that you no longer buy the prizes with medals, instead the prizes are just rewards for reaching certain numbers of medals. Also the Thief job has an ability that tells you how many treasures are in an area, which is a big help if you want to try to find them all without a walkthrough.
There are various small places you can visit with the island, but the next major destination is a stairway that takes you back to the real world to Holstock Castle.
The goal here is to help 15-year old Prince Holse undergo baptism in a nearby cave, but he’s too weak to fight the monsters on his own. He keeps running away and you have to track him down…I also had to leave a lot to switch people to their 2nd jobs. The reward for this part is the Magic Key, which lets us open red doors. One of them provides a way back to the dream world in a new area, where we visit the town of Clear Vale. We hear about a boy that came through on a flying bed, but he hasn’t been seen in a while. Switching to the real world we figure out it’s because the kid died. His parents tell us that a wanderer was going to give him a Badge of Courage carved from a Courage Rock nearby, but never came back.
So we head out there to give him a grave marker. This dungeon is more interesting than some of the others as you have to fall down in certain areas to advance. Once we get the rock fragment, his parents are thankful and allow us to sleep in his bed(!?) Of course we enter the dream world and it becomes the flying bed, allowing us to fly around the dream world (but we can’t pass forest, hills, or mountains).
That’s certainly a unique method of transport. In any case this once again allows a bunch of small places to visit for things like small medals or clues, but the next major destination is Foan Castle back in the real world.
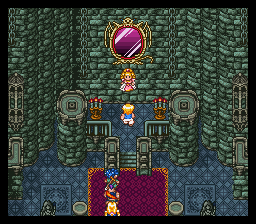
The prince here has fallen in love with a girl in a mirror, but she seems to be held captive by some unknown person. Even the Mirror of Ra doesn’t show what’s really going on, but we learn from the King that a magician called Miralgo in a tower may have something to do with it (the tower is actually back in the dream world)
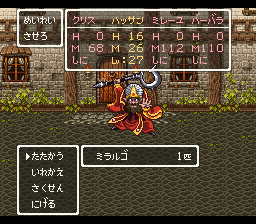
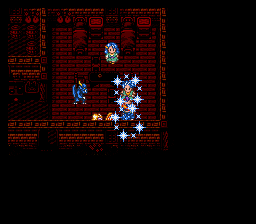
He’s pretty challenging! The crucial hint to beating him I got from Ian Kelley’s very old walkthrough — Miralgo prioritizes keeping up an anti-magic shield which breaks after one spell, so if you keep casting a weak spell on him to break it, he’ll waste a lot of turns. I still had to try it several times to get some luck out of the AI (if he just keeps summoning monsters and casting Begirama it’s hard to win even with that tactic). Beating Miralgo frees the lady from the mirror to marry the prince, and he opens a watergate for us that allows us to sail into the south of the real world.
Next main destination is Pescani, where we encounter a man that is in love with a mermaid that got separated from her tribe.
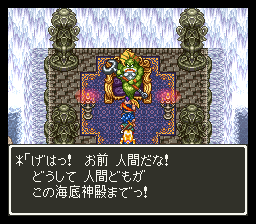
We return her to her mermaid tribe and they give us the Mermaid Harp which allows us to go underwater. There are a number of things to find here — an Inn (I don’t understand how they make money), the goddess from the beginning of the game (who doesn’t really do anything), a sunken ship with the Final Key (allowing us to go back for treasures to previous areas), and Poseidon’s cave (he tells us to kill Glacos). We can also access the Slime Arena (a minigame with monster fighting) and the Style Contest.
The Style Contest is pretty annoying. Ever since the beginning of the game, you can see that every piece of equipment has a “coolness” rating associated with it. The main application of this is the style minigame, where you have to beat other contestants. You have to clear level 3 (220 style points) to get the flying carpet to win the game; this is not particularly easy. I eventually did it with several pieces of platinum equipment for the hero, a couple of Beauty Grasses, and some other accessories. But the contest takes forever to do even with speedup and I wish they had just kept it an entirely optional game. You can keep doing it up to level 8 if you want.
Anyway, Glacos’ lair requires you to push buttons to raise and lower water levels to advance. I had to leave many times here because everyone was reaching their 3rd jobs. Glacos is a relatively tough boss; I had been using Barbara because of her monster master skills but I switched in Chamoro because she had learned Bikilt (doubling damage). With this cast on Hassan, he could build power and use the Seikenzuki which would do about 400 damage. This allowed everyone else to focus on healing if necessary and just contribute damage if they could.
Glacos’ defeat restores the town of Calberona. It turns out this is where Barbara was from, and the people there teach her the Medante spell and also restore the flying carpet.
At this point there is no real indication of what you should do. Here and there we’ve been hearing about four pieces of “legendary equipment”, and now with the flying carpet we can get them all and bring this section of the game to a close.
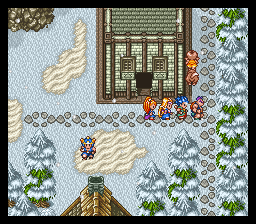
The Sword of Ramias is on Mt. Snow. Terry actually beats us to it but when he sees it’s just a rusty piece of junk he lets us have it. Someone in the nearby town gives us a pass to enter the city of Longadeso to find a legendary smith who can repair it.
Next, the armor is in Castle Grace, which can be accessed with the flying carpet. The castle is in ruins, but a well takes us to the dream world where we see the last days of the castle — the king tried to summon Deathtamoor in the hope of controlling him, but of course Deathtamoor just killed everyone instead. While evacuating the people, the guards chief hid the armor. Back in the real world we can search the place where the armor was hidden and find it.
The shield is in a cave north of a place called Gandino; to find it you need the help of a number of clues that you may have collected up to now (only one of them is really necessary, the one you get from Gandino — the other ones just make it so you don’t have to wander around the dungeon as much).
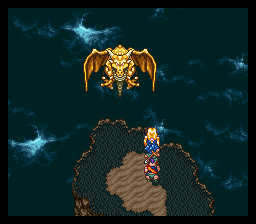
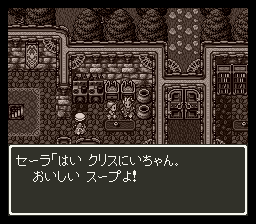
Finally, to get the helm it’s time to go to Lifecod (the starting village) in the real world. There we meet the real world Kurisu, who came here recently without his memory. When the town is attacked, the real Kurisu reluctantly agrees to merge with the dream Kurisu, and we learn what actually happened. As was clear from early on in the game, Kurisu is the prince of Reidock who went out to fight Mudo to help his parents. In the opening scene, Mudo split Kurisu into two parts, with one going to each world.
Now that the Kurisus have merged into one, we can go back to Reidock to tell the king and queen. Kurisu still doesn’t have a complete memory of himself, but that night he goes around to various places in the castle to see flashbacks of his early life.
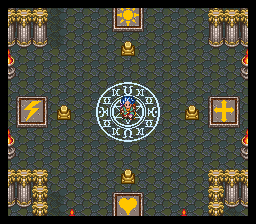
The King then gives Kurisu the legendary helm, and the smith has finished the Legendary Sword, so we have them all. Now we have to go to a shrine west of Gandino to use all of the equipment.
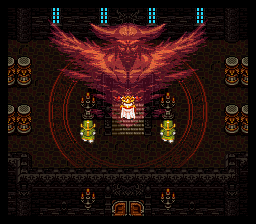
This causes the Cloud Castle (the Zenethian Castle from DQ4 and 5) to come down; unfortunately it has monsters in it, including Duran. He sends a number of his underlings at us, including Terry, and then fights us himself. At this point I had people with Bikilt — Kurisu’s Hustle Dance (restore HP to all) would have helped, but I learned it right after the battle. But Hassan with Bikilt can almost do the battle by himself, leaving everyone else to heal.
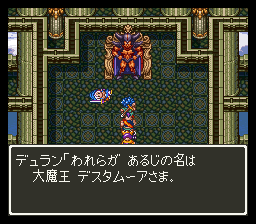
Afterwards, Duran says that Deathtamoor is still remaining, who is much greater than Mudo, Juramis, and himself. Terry also joins the party, and we now enter the final part of the game. Which hopefully I will have finished next week.