SFC Game 41 – Shin Momotaro Densetsu (Part 2)

This is quite a long game, but I hope I can have it finished by next week.

One other system I failed to mention last time is the “popularity”. As you progress through the game you gain popularity, but you can also lose it by letting your comrades die in battle and making wrong choices. If you get over 80 you get discounts and over 90 or 100 you start getting other good things — I can’t keep it much above 80 though because it goes down 1-3 any time your guys hit 0 HP.

Last time I had just managed to wake up Netarou, who moves and lets me pass the bridge. Ajase, one of the sons of Basara, is growing increasingly suspicious of Karla and tries to fight Momotarou, but leaves seeing how honest his fighting is.

Now we progress to the odd Smile Village, which has an area with a lot of bizarre monsters.

They’re worth a lot of XP but do strange things like ask you quizzes, feed you onigiri, and such. There is one good encounter, though — a friend that makes you invincible for a short time. Normally this wears off quickly enough that you can only fight one or at most 2 battles. But, if you use the Demon Flute you can repeatedly call encounters without moving and level up easily. You can also go anywhere else on the map with Momotarou’s warp spell.

Smile village has a strange singer menacing the town, but he goes down easily.

Next up is Hope Village, which is all in darkness which requires you to solve some puzzles to get access to the central tower, and then fight Ashura.

He’ll join the party afterwards. Now Hope Town opens up; it’s a huge town with a lot of shops. There’s also a lot of slowdown; I recommend bsnes’ overclock option to deal with that. There’s also a secret woman’s bath which lowers your popularity but gives you a special picture that I guess is a standby of this series.

Now a castle gets built for Momotarou very quickly, which becomes sort of a base to hold all your extra characters. But soon, we meet the Wind God:

He blows away all the characters, leaving me with just Momotarou. Kintarou can be recovered pretty quickly, but the rest take a while. It’s actually better to switch around your party so Urashima isn’t there because losing his healing for a long time hurts. I found the best party member to replace him is Mashira, that singing dude that fought us earlier.

His attack has the keyboard, and he can do various moves by playing songs. I don’t know how you’re supposed to figure these out without a walkthrough, but for me the most useful are:

  • Copy the attack stat of the strongest character (Bb, C, B)
  • Heal everyone (uses MP: C# G# E)
  • Attack all (D# F# A)

Next the party proceeds to the cold north, where Yasha Hime is injured. Healing her (with Ashura’s help) requires an item from a cave.

 After the party is together, I proceeded to the southern continent through a cave, and then proceeded to the “new village”, where Karla had crucified some of my characters.

Karla sends us on a quest to recover some item for him, but partway through Ajase appears and agrees to help us, and we head back to recover our party members. After some fighting, Karla just burns the city down and then sends Wind and Thunder God ahead to put poison rain all over the land.

Chasing them on, we arrive at Sarugani Town.

This is a difficult fight. Ashura can get a duplicate of himself out so that you can heal twice, and then if Mashira copies the attack power he will be a decent fighter. Once Thunder God is down it’s much easier. After this, Wind and Thunder God decide that Momotarou is right and join the party. Meanwhile Karla continues to lie to Basara to trick him into to continuing his fight against the human world. We also get a ship here.

I still have 6 of the moon crystal parts to get. I got the third by getting a strange monster on my team and then going to a town with a bunch of other strange monsters. After this I went to the Mechanical Village and upgraded the castle so it can fly, and also dive in the water.

That’s it for this update — time to go seek out more of the moon crystals.

SFC Game 41 – Shin Momotaro Densetsu

Shin Momotaro Densetsu (新桃太郎伝説)
Released 12/14/1993, published by Hudsonsoft

This is the final game of 1993. It’s another entry in a series of games by Hudsonsoft, beginning with the 1987 Momotaro Densetsu for the Famicom. This one is apparently a remake of Momotaro Densetsu II for the PC Engine, thus a sequel to the original. The main character is based on the legendary Momotaro, or Peach Boy. The basic story is that an old man and woman who want children find a peach, and Peach Boy is born from it. When he grows up, he goes out to defeat demons that are troubling the area. Along the way he picks up three animal companions by giving them millet dumplings, and with their help he beats the demons.

The game begins after the first game, where Momotaro defeated King Enma, who then decided to try to bring love and friendship to the demon world. But King Basara, influenced by a demon Karla, decides to imprison Enma, and capture Princess Kaguya again. Momotaro goes to save her, but Basara’s sun Daida steals all of Momotaro’s equipment and powers, scattering them into 8 jewel parts around the world.

Momotaro wakes up in the old man and woman’s house, and he has to set out to try once again to defeat the demons and save Kaguya.

I was pretty disappointed by this game at first. This is the end of 1993. Final Fantasy VI comes out in four months. And this is what Shin Momotaro Densetsu looks like:

It’s basically an NES game. The interface is awkward, and there’s an 8 item limit (with no doubling of items). Using powers, like healing, require way too many menus and button presses — something that was common in earlier games but most developers have figured out by now. At least the damage numbers come up on screen instead of being communicated through text boxes. And in weapon shops you can exchange your weapons and armor for what they sell, seeing the numbers, so that’s nice.

Ginji, a swordsman, joins up as a friend — he has 4 different katanas that have different strengths or side abilities (e.g. healing after the attack).

By the way, the overworld is done with Mode 7 graphics and benefits greatly from bsnes’ recent “Hires Mode 7” feature — it looks a lot better at 720p.

The first thing we do is go see a Hermit. These are scattered throughout the game, and teach Momotaro his powers after fulfilling various conditions. For this one, you just have to beat him in a fight and get Kintan, the healing power.

The battle system, for the most part, is standard AMID. There is a system where the weather can change in battle, giving certain powers or monsters a boost or a nerf. Also Momotaro never kills the enemies, he こらしめるs them, which can be translated as “chasten” or “teach a lesson.”

Next up Momotaro frees some cave dwelling rats from monsters, and then gets the first of the 8 moon crystals. The next power, escape from dungeons, is past that. To get this, you have to escape from a cellar in 5 minutes via secret passages (if you fail you can try as much as you want).

Momotaro then has to make his way through a mountain, which has some nice graphics.

In this area you have to learn the thunder technique to get through the rocks that block your way.

Eventually Momotaro defeats a demon and rescues the bird, who joins the party if you give him a millet dumpling. The animal companions don’t fight directly. You feed them things you can find or buy, increasing their stats and teaching them different techniques, some of which are in battle, some out.

Next up is the Hanasaka Jiisan, although the demons destroy all of his flowers. When Momotaro defeats the main demon, Karla comes in and kills it, although a different horned demon seems to save him before he does so (this happens several times in successive boss battles).

After, the flowers are restored and the dog Pochi joins up, and in the next cave, the monkey (the last animal companion).

Next up in the traditional myths is Kintaro, who joins up on the adventure. He has various special attack moves that reduce his HP. In the next section Daida appears again but quickly leaves, frustrated at how weak Momotaro is.

After we beat Ryutoki, Karla once again kills him but he’s rescued by the mysterious figure.

Next up is Urashima Taro, who is kind of the priest/spellcaster of the party. This part is really annoying because (following the myth), Karla opens a box that ages your entire party. You already walk slowly in dungeons, and now you walk even slower — even with the speedup key on it’s pretty slow, I can’t imagine this on a real console.

This fight starts out hard but Urashima Taro comes in with the medicine to restore us to youth, and Karla is thwarted once again. Now underwater to save the Dragon King’s palace from the demons. This also provides a way to the moon, where Momotaro is given a mirror that shows the locations of the remaining Crystals.

The next goal is to go up to the snowy area. Karla sets up a set of puzzles/traps in the Oe Mountain — I don’t like puzzle solving with a bunch of random encounters, but that’s what you have to do. The boss in this area is Shuten Doji, who gives Momotaro the second moon crystal.

In the ice area, we go to the Netaro village, which I think is based on this legend. He’s asleep blocking the bridge to the next area, and Karla’s demons start attacking the town with ice.

The nearby ice tower has pegs that we need to cross using a hookshot given by the giant Dekataro.

The boss of this section is Princess Yasha. She joins the party after being defeated.

Now Dekataro gives us what we need to wake up Netaro.

This seems to be about a third of the game so it’s pretty long. It’s not bad, I just wish that they had put more effort into the interface to make it more like 1993 and less like 1989.

SRPG Game 26 – Shining Force CD (Mega Drive CD)

Shining Force CD (シャイニングフォースCD)
Release Date: 7/21/1994
System: Mega Drive CD
Developer: Sonic! Software Planning
Publisher: Sega

Back to Shining Force again. This is a remake of the two Gaiden games for game gear, plus a new 6-stage scenario and then a bonus “museum” level where you fight all the game’s bosses. I did the Gaiden games in their own posts, so this will just be about the six stage third scenario.

The basic idea is that on Kurisu’s coronation day, some old woman named Dava captures Princess Anri, and we have to go save them. You can use the teams you built up during the first two games.

The stages are all gimmicky and have a lot of hidden items, but overall I didn’t find it very hard.

Stage 1

 
The first stage is in a graveyard, and additional zombies keep coming out of the graves in successive turns. The most dangerous enemies cast spells, but they can be easily taken down.

Stage 2

I forgot to get a screenshot of this one. You have a bunch of drunken dwarves and centaurs. More periodically wake up as the stage progresses, and eventually you have to fight the (easy) boss at the top of the screen.

Stage 3

This stage has a bunch of women ninjas; some of them cast nasty spells and they drop in unannounced.


There’s also a fake ninja sword but you can get the real one from the suit of armor there to the left of the 忍 sign.

Stage 4

Under construction! But that doesn’t really affect the stage much.

Stage 5

Here we fight our shadows. If you unequip the weapons before the stage then the shadows will have reduced strength, and the characters can re-equip them afterwards in the battle.

Stage 6

Final stage. This is the only one in this episode that really presents any challenge. Dava begins by using a laser attack that’s like the cannon from Shining Force 1; there’s nothing that can be done to dodge this. I sold all the equipment from the units I wasn’t using and bought as many of the Blessing Rain (heal all HP) as I could.

I took everyone up the left side. Dava begins to bring out mushrooms that can use confusion, which is nasty if they use it on your spellcasters (including heroes). They won’t use it if there’s only one person in the area though. Once you reach Dava, she summons all the bosses from the past stages. At first I tried to just go for Dava and ignore them, but this doesn’t work. I took out the close bosses and then set things up like this:

This ensures that Dava won’t use her spells, and the mushroom won’t use the confuse. The archer and axe user can both attack, and Bill can heal Arlong. With this setup Dava goes down easily.

Then it turns out the whole thing was just a test to see if Kurisu was a suitable Emperor, and he passed.

Now there is still one battle left; a “museum” where you fight all the past bosses. I decided not to do this stage — there are multiple videos of the stage on youtube if you want to see it.


Since this post was short I’ll just do the wrapup here. Overall I enjoyed this game possibly even more than the real Shining Force games. It’s certainly not as complex or lengthy, but the battles are fun and the interface is clean. The music is good off the CD.

The biggest omission is the world map and town exploration. Some SF fans may not like the game because of that. I don’t think it’s that big of a deal that it doesn’t exist, though.

I really don’t have anything else to say about this — it’s kind of an inoffensive, very playable game that doesn’t excel in any area but doesn’t fail in any area either.


Next up would be Langrisser 2. My usual practice is to play a remake as long as it’s released within a couple of years. I went back and forth on whether I should play Der Langrisser instead of Langrisser 2. For a while I thought I would do Langrisser 2 as the “light path” and then do one of the alternate paths for Der, but after asking on a Langrisser forum I decided that just doing Der is fine. However, I’m going to wait until Der actually comes up in the list in 1995 to play it. So next up will actually be Feda Emblem of Justice, which I will play in the Saturn remake.  (But let me know if you have any comments on the Langrisser 2 issue.)

SFC Game 40 – Monster Maker 3 (wrap-up)

This game has some pretty big flaws, but it’s not a terrible game. I do think that if you tried to play this on an actual console with no help it would be a frustrating and tedious experience. But if you use an emulator so that you can speed up the battles, and rely on the maps I linked in the first post when you get stuck, it’s definitely a playable old-school RPG.

The problems with the game really come from a combination of factors. The dungeons tend to be large, with a lot of passages and traps. This isn’t necessarily bad, but the ridiculous random encounter rate makes it more tedious than it needs to be. Even this wouldn’t be terrible, but the balance of the random encounters is not good. If the enemies have area effect spells, or use status effects like Sleep, Charm, Confuse, or Stun, it’s very hard to fight them. You can win the fight, but you’re opening yourself up to a chance of a game over. Given how long the dungeons take, this is not something you want to do. So you end up running from a lot of fights.

The story is acceptable for late 1993, but it’s mostly concentrated at the end. The beginning part, obviously inspired by Dragon Quest IV, works well. But after that there’s a long period where you have an overall goal but no short term goals, so you’re just going to whatever the next town or location is.

The graphics are not bad — the character models are large and detailed, and the animation in battles is decent.

Oh also, the reason it’s called Monster Maker is a pointer to the monster recruiting system, but this was also really badly implemented. One of the Megami Tensei developers worked on this and the recruitment system resembles MT. But in addition to the random and confusing system that matches MT, they made another really bad design decision. The only way you can use the monsters is by completely subbing out your human party for a monster party in battle. The human party can come back in later, but the humans and monsters can’t fight together. Also if a monster dies you have to go to a Monster Maker hut to revive them which is annoying. I also was never able to combine any monsters, but to be honest I mostly ignored this system except for getting a goblin. The goblin can find traps and also open up the Goblin Markets which have good equipment.

Overall I just think it’s a shame because this game has a lot of promise but a few bad development decisions made it probably not worth playing for most people.

Next up is Shin Momotaro Densetsu, the last game of 1993. It gets a lot of praise from the Japanese community so I’m looking forward to it.

SFC Game 40 – Monster Maker 3 (Finished)

Chapter 5 is the last one. I began by sailing around to some of the towers to boost Lufeea’s magic. I finally figured out what the yellow magic spells are — it means your level is not high enough to use them without a chance of failure.

A lot of what happens in this chapter is somewhat aimless; just proceeding to the next town without a clear goal. The main goal of this chapter is that now Lufeea’s sister has been kidnapped as well. This means that the enemies have both the master Monster Maker and the High Priest, which can’t be good.

A random dude has captured two of the side characters from the previous chapters, but we manage to save them pretty easily. There’s then a sequence where we need a kayak to access new areas, requiring trips through several more dungeons. They have the usual array of traps, switches, confusing passages, etc. I’m going to skip over this part and resume near the end of the game, crossing a mountain peak.

After beating some minions we have to deal with these three warrior women. It’s a bit tricky at first with all of them going for you but if you can beat one it makes it a lot easier. Lufeea’s area effect magic is good because most of them can cause various status effects like confuse and freeze.

After this, there’s a town where we help find a boy who ran out to get his dog. While we’re out of the town, a flying castle appears.

The castle obliterates the town, killing the boy’s mother.

Apparently this was an attempt to kill us, so that’s not good. The castle goes off to the desert.

Now we need to make it into the desert, but it’s too dangerous because of worms, so we need to have a Monster Maker combine some honeys together to make a spice so that we can control the worm (I guess the creators like Dune).

Once the worm is tamed, you can ride it around the desert. There’s a large dungeon that’s optional but gives Lufeea her most powerful spells. I never ended up using them much (partly because I never hit level 48) but going through the dungeon is also worth some extra treasures so I did it. This was one of the most annoying dungeons in terms of encounters because I had to run from almost every one.

A few more miscellaneous things — we save some women from a king’s castle, who captured them at the request of one of the villains, Dioshel. Next up is the Water Dragon Cave, which will lead the way to a castle where we may learn the truth about what’s going on.

Finally, here’s Kurisu, the character I named at the beginning. She was one of the heroes who defeated evil before, with the help of the white dragon Bran, which magicians and heroes created. It turns out that Lufeea is a reincarnation of Kurisu, and Bran has become the Black Dragon that the enemies are using. Gaiane hopes to use the power of the Black Dragon along with the captured High Priest and Monster Maker to revive the Evil God. We need to stop that, and of course Lufeea now wants to try to save Bran the dragon.

Lufeea also gets access to various shrines that have the best equipment for her — the Kurisu Robe, the Kurisu Hood, etc. This is a strange way to use the named character; I’m not sure I’ve seen another game where it’s not someone you actually control.

We get to the final dungeon with the help of Mito, the dragon that we saved early in the game. He’s now grown enough to get us there.

The final dungeon is very long, but there are multiple save points inside it and they provide ways for you to open shortcuts so it’s easy to leave. What’s also nice is that there are few encounters that you have to run away from so I was able to gain a fair amount of levels. Dioshel has been turned into a crow and trapped in a jail for some reason, but we save her on our way to the final battle.

Gaiane is in the final room, hoping to revive the Evil God. First we fight one of her warrior minions who isn’t hard, and then the Black Dragon. He isn’t as hard as I thought he would be. Now it’s the final fight. Gaiane fuses with the Black Dragon to reveal the final boss.

The head will revive the arms, and the arms protect the head. However, they can be frozen, so having Lufeea cast Death Freeze helps, as does the Dark Ball spell which stops all magic for a while. Once the arms and head are defeated, the torso is left.

The torso casts nasty area effect spells. I thought I might lose, but by casting Dark Ball every chance I got and using items to heal, I was able to eventually defeat it — at one point I was down to only one character with 70 HP left, so it was close.

After this, the Black Dragon turns back into Bran, and he disappears to turn back into the earth and air he was created from. The closing scene is mostly wordless as everyone goes back to their lives.

This game is very flawed but not the worst I’ve played, and I’ll discuss all of this more in the wrap-up post next week.

SFC Game 40 – Monster Maker 3 (Part 2)

I think this game would be very hard to play on a console, especially if you tried without the dungeon maps. Even with the battle setting on the highest speed the battles don’t go that quickly, and the encounter rate is extremely high, especially compared with the long dungeons.

The dungeons are relatively well designed, I think. They have a lot of traps, switches, alternate paths, and such, so that it’s not just wandering through a featureless dungeon finding treasure boxes. But I can also sympathize with the criticism of this game’s difficulty — one thing you have to do in pretty much every dungeon is figure out which encounters will kill you if you try to fight them. If you try to fight enemies that cast charm or sleep, or have area effect magic/attacks, you’re running the risk of a game over even if you enter the fight at full strength. Even if the risk is minor, it’s not worth it given that a game over sends you back to your last save, and the dungeons are so long. Fortunately running away is relatively easy, but I have gotten game overs even when I tried to run.

Chapter 3 introduces another character, princess Diane. Her brother is sick, and she thinks it’s because of the growing power of the monsters, and sets out to find the problem. Her father forces her to go take a magician along with her. Also she can pick up an “underling” Robber who can find traps and also fight in battle.

The magician is training in a forest, and his master sets up a trial to see if we’re really ready to go out adventuring. We pass. The magician characters are interesting because their regular attacks shoot magic out of their wands that does a decent amount of damage at a distance; this makes up somewhat for their low MP.

The rest of the chapter is pretty short. Diane has to save a statue maker who can make a goddess statue to ensure safe travel over the seas. Along the way she meets up with the heroes from the previous chapter.

Chapter 4 begins with Lufeea, who seems like the main character, but the person I named at the beginning is Kurisu, so I don’t know what’s going on there. Chapter 4 is quite long, and overall the time that elapses before you get this main character is much longer than in Dragon Quest IV. The main goal here is for Lufeea to travel around to various magicians and learn their magical powers as we still try to discover what’s going on with the increase in monster activity.

It also seems like she’s a prophecied person because everyone knows who she is; destined to become the most powerful magician in the world. Her sister is a high priest. After leaving her village she quickly meets up with the three characters from the former chapters, and this is the party for a long time (maybe the rest of the game?)  The first goal is Bolgard tower, where a mage puts Lufeea on a trial through various traps and tricks in his tower, and then teaches her magic.

After that, she heads off to meet Daruuan, but the shadowy villains of the game have captured him. As he’s being captured he throws Solomon’s Ring to Lufeea; with this we can now get monsters on our side. It’s similar to Megami Tensei (I think one of the MT developers worked on this game), but I haven’t used it much yet. Getting a Goblin or Robber is helpful because they can detect and disarm traps. But one of the complaints I’ve seen about this game is that the system is implemented in a way that makes it hard to use the monsters — you have to completely sub out your party for the monsters (temporarily) and they can only be revived at monster maker huts which aren’t necessarily in convenient locations.

The majority of this chapter is just finding the towers with the magicians in it, with no real developing story. A few important things do happen — we save the daughter of the King of Fetoland by going into her dream, and Fetoland’s brother has stolen a ring from the Elves that we return.

Near the end of the chapter we have to go to a volcano to stop the villains from doing some cliched ceremony, and also to stop the volcano from blocking access to other continents. This is the hardest dungeon so far because most of the encounters are game over chances. So it’s a lot of fleeing.

Eventually we meet up with a Black Dragon and one of the antagonists, Diosheryl. This is a hard fight but we just have to survive for 6 turns before an earthquake shakes the area. We get saved by the dragon from chapter 2, and the chapter ends with us being able to explore the southern continent.

I’m still not sure what’s up with that character I named at the beginning of the game. It almost makes me wonder if I hit the wrong button and went with the default name (Lufeea?) but I’m pretty sure that in the dream world there was a mention of Kurisu. We’ll see.

SFC Game 40 – Monster Maker 3

Monster Maker 3: Magician of Light (モンスターメーカー3 光の魔術師)
Released 12/24/1993, developed by Sofel

Monster Maker is a franchise that started out as a card game but grew to include a CCG, a tabletop RPG, manga, and such. There were a number of video games based on the franchise as well. The first couple of games used card mechanics and apparently were somewhat innovative, but after that they switched to a regular RPG format.

Monster Maker 3 seems to get a lot of criticism for its high encounter rate (even for 1993), unfair random encounters that can kill you quickly, and large dungeons with traps. This site has good maps for the game, which are useful. At least the fights give good rewards so that you level quickly.

The game begins in the manner of Dragon Quest IV — you name your hero but then have to go through some preliminary chapters that introduce other characters.

Chapter 1 begins with Alshark, a fighter who hopes to become a knight. He gets his chance when the king puts out a call for people to defeat a monster in a nearby castle, and save a foreign princess.


As I said before, the random encounter rate is very high. Another problem is that twice now the game has frozen during combats, so I will be using bsnes’ auto save state feature to deal with this. In combat, the characters move around the field and can only attack within their range. So it’s a little more than just the usual AMID battle system but it boils down to basically the same thing. Unfortunately it has another feature of older games in that the magic users’ MP is so low that you can’t really use their spells freely. 

Make sure you stay out of the forests because there are monsters in there that do “scream” attacks that hit everyone and do big damage.

Alshark has to go through a cave to get to the monster castle, both of which have a bunch of traps in them that you have to pull switches to disable. The castle fortunately has a save point in it. There are also strange notes here and there from the “captured princess” warning you of traps and pointing you to where keys are.

Eventually there’s a boss.


So far I haven’t found grinding to be an issue because the encounter rate is so high. Since it’s just Alshark there’s not much I can do except attack and heal.

It turns out that this “monster” was charmed by the elf princess Roryeen, who set up this whole scenario to find a strong fighter who could join her in figuring out what’s going on with all the increased monster activity. But the king is still happy and awards Alshark his knighthood, and a mission to go south to Kyubikku, which has been ravaged by kobolds.

Roryeen has a bow so she can sit at the back and shoot the enemies. Sometimes she gets 2 or 3 shots but I haven’t figured out exactly when this happens. The encounter above is a fixed encounter — in addition to random encounters there are occasionally fixed encounters you can see walking around. Typically these are harder, as in the above case. That thing at the back uses the scream attack for big damage, and the kobolds can try to block your access to it.


Eventually Alshark and Roryeen reach the kobold king and defeat him, upon which he wakes up from some sort of mind control and wonders what’s going on. Rather than solve that puzzle, our heroes move on to the next village, where a monster is demanding sacrificial victims from the people. Roryeen offers to be the next victim, hoping Alshark will save her, but this is where chapter 1 ends.

Chapter 2 moves to the elf kingdom, where Prince Ersais is wondering where Roryeen has gone, and he and Sarla go out to find her. After making their way out of the forest, they come to a mining town where an angry dragon is menacing the miners. The dragon is calling for her child, wondering what she did to humans to deserve this. So we go to a “monster maker” house nearby to find the small dragon locked in the basement along with other monsters.


The monster maker was asked to keep these monsters by this pink haired mysterious woman below, but the monster maker sacrifices himself to let us escape and take the small dragon back to the mother, who then lets us pass.


Now Ersais and Sarla are able to make it through the kobold cave to get to the same place as chapter 1, where Alshark is wondering how to save Roryeen. They manage to sneak in and confront the monster, and Roryeen who is annoyed that it took so long for us to get there.


The key to this fight is to keep casting the spell that seals magic, otherwise Barbara will use hit-all magic spells that do a lot of damage. Once we save Roryeen, a pegasus takes us back to the castle to hear the stock JRPG cliches — darkness is coming on the world and we need to find the girl who is the chosen warrior of light, etc. Chapter 2 then ends and we shift locations again.

I think that this game is OK, but if I were not using the dungeon maps and emulator speedup it would be a lot more frustrating to play. There’s also a no encounters cheat code which might be helpful. But the graphics are decent and the interface is fine, with one quirk. I don’t understand how the shop interface works in showing you the stats of the weapons compared to your equipped ones. The important thing is that if no numbers are shown that means the weapon or armor is better than what you have equipped, but that doesn’t really make sense.

SRPG Game 25 – Record of Lodoss War (Mega Drive CD)

Record of Lodoss War (ロドース島戦記:英雄戦争)
Release Date: 5/20/1994
System: Mega Drive CD
Developer: Group SNE
Publisher: Sega

Unlike my other blog, I haven’t made any strict rules for how long I have to play each game. Considering I have over 500 games on my SRPG list, I wanted to be flexible so that I could deal with bad games quickly, particularly bad games that are long or difficult. This game is a bad game; I’ve played a few hours of it, which is apparently about a third of the game, and I don’t think it’s going to get any better. It’s by far the worst game I’ve played so far.

In many ways it looks similar to the PC Engine Lodoss War, which I played on my other blog. I actually thought that game was fairly good, so I was hoping this one would be decent as well — alas.

To give a brief background, Lodoss War is a franchise that began as “replays”. These were written acocunts of RPG sessions (such as Dungeons and Dragons) that were published in magazines. These seem to have been quite popular in Japan, and I’ve seen several other series from the 90s that began this way. From there, the franchise expanded to novels, anime, games, and other properties.

The game opens with a vocal song and an intro, which is the typical “animated images” sequence that they used on this system and the PC Engine.

When the game actually starts, though, there’s a real full motion anime clip. I assume this is taken from the OVA series although it’s been so long since I’ve seen it I don’t remember.

But I think this also shows why companies were reluctant to try full motion video on the PCE and Sega CD. The Genesis was rather limited in the number of colors it could display, and the anime clips look pretty bad in consequence. Perhaps it seemed impressive at the time since most systems (PCs included) were not really capable of doing FMV at the time.

Afterwards Parn and Eito, the beginning characters, head out to deal with some zombies appearing in the town cemetery. In the town you just choose the location you want to go to.

This may be the first game where the direction you’re facing makes a difference. But the interface is a mess; you can’t view the whole map or see the enemy information. Spellcasters can’t use spells after they move, which makes it really hard to use some of the magic. The healing is weak enough as it is, and it makes it even weaker to restrict it to pre-move 1-range. You can’t move past your own guys, and the narrow corridors in many battles (such as the above) make it too easy to get trapped when you get 6 characters in the party. If the spellcasters are blocking the way they have to waste a turn moving (where they can’t cast spells). In stores you can’t see who can equip anything, the stats of the equipment, or even what the items cost. This is completely unacceptable for 1994.

The story is pretty simplistic; it’s following the OVA (I guess) but there’s only a few lines of dialogue at a time.

So this game is bad, but it also gets very difficult after the first few battles. You can train in an arena in one of the towns, but only the person who makes the kill gets XP. There’s really no reason to play this game, which may explain why it was so hard to find even basic information or videos. I did finally come across one small walkthrough but that person said the game was bad also. The contemporary Famitsu reviews were 6,5,4,4  which is pretty bad too.

Next up will be the small concluding scenario of Shining Force CD.

PCE Game 26 – Ys IV: Dawn of Ys

Ys IV: The Dawn of Ys (イースフォー ザドーンオブイース)
Released 12/22/1993, developed by Hudsonsoft


The Ys series has a strange history. The first three games came out for computers, and then were ported to many different consoles. Up until very recently, Falcom did not employ any console programmers, so they always outsourced their console ports to other developers.

Ys IV is an interesting case because there are actually three versions of the game. In 1993 Falcom did not make a computer Ys IV, but instead outsourced the development to two different companies. Tonkin House brought out Mask of the Sun for the Super Famicom, and Hudson brought out a completely different game Dawn of Ys for the PC Engine. Both games were confusingly labelled “Ys IV”. Almost 20 years later, Falcom developed Ys: Memories of Celceta, which was a completely new game in the same setting that is now considered the canonical Ys IV.

Back to 1993, Dawn of Ys is superior to Mask of the Sun in every way. It’s a followup to Ys I&II, going back to the traditional “run into enemies” gameplay and involving a lot of voiced dialogue and a few cutscenes (more of both than Ys I&II had).

This is also unusual among PC Engine CD games in that it actually has a full patch. As I’ve said before, fan translators have a tough time with PCE CD games because, a least in all the games I’ve played so far, they have a lot of voiced dialogue with no subtitles. But for Ys IV someone actually made a full fan dub of the game, plus a translation patch for the rest of the text. So this will be more of an overall review than a step-by-step account of the game.

I’ve wanted to play this game for a long time. I remember somehow knowing about this game when I was a kid, even though it never came out in the US. It must have appeared in some magazine as a possible upcoming game?

The game opens with Adol and Dogi returning to Esteria, where Ys I took place. But he’s only there briefly before he sets out for Celceta where a new adventure awaits. The opening cinematic sequence is like all the PC Engine games; a combination of voice, still pictures, and slightly animated pictures. Some baddies are trying to revive an evil demon of some sort — a familiar sight in RPGs. They fail, of course. Adol arrives in Esteria and soon meets several important NPCs, including Karna.

The battle system, as I said, is the same “run into enemies” as before.

I feel like the screen is a little bit squished; I feel like they could have reduced the size of the border and the HUD at the bottom while still allowing it to be within the PCE’s processing power, but maybe I’m wrong.

If you’ve played Ys I&II you will be in very familiar territory in thise game. I think that after Ys III, Hudson wanted to repeat the success of I&II by making basically the same game in a different setting. The graphics are somewhat better but the game is the same length as I&II, roughly.

At times another character (usually Karna or Dogi) will accompany you. They can kill enemies often in one or two hits, which is somewhat helpful, but it also means they’re stealing your XP.

Because this game has a full translation patch I don’t want to give away too much. The story is run-of-the mill, but the voice adds some memorableness to the villains.

In the first section of the game, Adol is solving various small problems that pop up while trying to figure out what’s going on in Celceta. Eventually the main villains are revealed — the “Clan of Darkness”, who is working with a winged being to revive a lost castle.

At the same time, Adol gains control over the ancient magics of Celceta while learning the backstory of what happened to the land. There’s a neat part where you get to return to Esteria and even go to Darm Tower again, complete with the music from Ys I (fortunately you find a secret passage so it’s nowhere near as long a dungeon).

In contrast to Ys I&II, many of the bosses require you to use the fire or freeze magic to shoot at them. Otherwise as always you have to figure out the attack patterns of the bosses, and when and where you can hit them. Of course, being at the proper level helps as well. There’s a very useful item you can get later in the game that slows your movement but every non-boss enemy dies in one hit. With this item, grinding is much more manageable.

 Overall the playing experience was very smooth. There was only one part that really annoyed me — I didn’t get a screenshot, but you have to make it through an area where jets of flame come up periodically, and if you touch even a pixel of the flames, you die. What makes it worse is that Dogi is following you, and if any pixel touches him then you get a game over as well. So you not only have to learn the pattern but make sure you move so that Dogi doesn’t lag behind and get caught up in the flames. I probably died 25-30 times trying to get through this…and you have to do it twice! Fortunately the second time is without Dogi, but come on.

If you are a fan of the older Ys games, or retro action RPGs, there is no reason not to play this. It’s one of the best from this era.

Ys will appear one more time on this blog, with Ys V for the Super Famicom in 1995.

SRPG Game 24 – Super Robot Taisen EX (SFC)

As with the previous Super Robot Taisen games, this is a collection of message board posts from over 10 years ago when I played this game. They are somewhat sparse because I found it hard to say much about this game — the story is virtually nonexistent and until you get to Shu’s route (the third one) the game is brain-dead easy. Apparently this was an intentional choice by the designers to get kids interested who didn’t remember the old 70s anime series that the previous games were largely based on.

Eight months after SRW 3, the next game, called SRW EX, came out. EX is an oddball in the franchise — although the focus is on the original characters and the whole thing takes place in La Gias, there are licensed characters in the game as well. It’s the first time the idea of the original main character appeared (even though the main characters had all been in SRW 3).

This is somewhat speculative, but from what I’ve seen on Japanese sites, it looks like the early SRW games did not sell particularly well. Apparently the games were seen as being mostly for adults that remembered the Super Robot anime from the 70’s — this also explains the major focus on Gundam that is seen in the early games. Supposedly SRW EX was an attempt to reach out to younger players who were not familiar with the old robot anime.

All the series from 3 return, minus Daitarn 3, Combattler V, and Raideen. New series appearing are Goshogun and Aura Battler Dunbine.

The system is based on SRW 3 but takes more steps towards the modern SRW engine. The changes I know of are:
– Once you see the hit percentages, you can now hit B to take the attack back.
– You can now upgrade weapons.
– The numbers have been scaled up a lot (i.e. Cosmo Nova was 2000 in SRW 3, and 6800 in EX).
– If a robot has multiple pilots, they can now all use seishin rather than just the main pilot.
– In SRW 3, all range 1 (and only range 1) weapons were post-move; EX adds the “P” designation that later SRWs have to show that a weapon is post range (and it’s not just all range 1s).
– The animations in EX are a little more dynamic — weapons now appear on the sprites, and the sprites can move in all directions (not just left and right).
– You still can’t decide on the fly whether to dodge, block, or counter. But now you can decide between “always dodge/block”, “always counter”, etc. on a per-unit basis rather than having to just select one option for your whole team.
– MAP attacks now have animations

There are three different routes in the game; I will be starting with Masaki’s.

Stage M1 – Disturbance in Langran

Compare this stage to the first stage of SRW 3, and you can see that they were going for an easier fight. 1 vs. 5 here, and SRW 3’s first fight is 9 vs. 18 (including the reinforcements). You can win this fight in one turn with Cyflash.

Kuro and Shiro, Masaki’s familiars, make their first appearance here. They have never been mentioned before (unless they were in Hero Senki?) [2019 Kurisu: They are not in Hero Senki]

Surprisingly, they did not reuse the SRW 3 sprites:
[2019 Kurisu: Sorry for the photobucket watermarks; it would take too long to get the original images and fix that]
user posted image
Stage M2 – The Summoning

In SRW 3, this stage would have been hard. You fight Jerid, Kakricon, the three Black Stars, and some grunts, and your only decent units are Goshogun and Cybuster. But here it’s pretty easy. Even the named units go down easily.

Goshogun makes its debut here, although from what I understand, the robot never actually joins you properly during EX.

There is a lot more dialogue in this game than there was in SRW 3.

Stage M3 – Attack at Imortal

Mio appears in the Diablo here.
user posted image

Kouji and Sayaka also show up here. Here’s the Mazinger comparison so far:
user posted image

But this is kind of interesting; jumping the gun a little bit but look at the SRW 4 Mazinger:

user posted image

It looks like they went back to the SRW 3 sprites after EX.

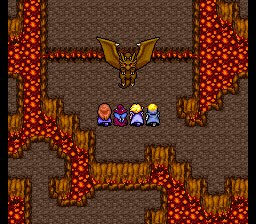
Stage M4 – Aura Battlers

Aura Battler Dunbine enters SRW with Shou in the Bilvine and Marvel Frozen in the Dunbine:
user posted image

This stage is the first one to represent a very slight challenge; the floating fortress has a lot of HP and can do some decent damage. But really just smack him around with Mazinger and you’ll be fine. Unfortunately you still can’t see how much damage you’re doing if the guy has over 10,000 HP. I hope they fix this by 4.

Stage M5 – Holy Girl
Stage M6 – Solatis Temple
Stage M7 – Demon Hack

These stages are pretty repetitive; just fighting one type of enemy (mostly demon golems) on each one. Stage 5 actually presents the first real challenge of the game; you have Ruozor who gets double move, but you can’t kill him. So you just have to hope he doesn’t kill anybody before you get the demon golems.

Stage M8 – Coral Canyon
Stage M9 – Coral Canyon again

Stage 8 is just a story sequence; basically the idea of these two stages is that Leena was kidnapped so you fight ZZ and F91 for a few turns until she gets saved. Tytti also appears (her name is often spelled Tootie or Tutie but Tytti is a real scandinavian name).

Now a little digression on why this game is boring. It’s very similar to SRW 3 in that the story is pretty thin — it’s basically just “Now we’re going to place X, uh-oh, more enemies.” The Shutedonias Army is basically the Divine Crusaders with a couple of new mechs. The main difference is that the named characters lack the background that the source anime give them. Jog and the woman from this stage are completely unmemorable because they have no backgrounds and no personalities.

M10-M16

I really don’t have much to say about these stages because they are almost the same. The maps are so easy that there’s no individuality to the boards (you just use MAP attacks and everything dies, including the bosses). The story is still lacking but Shuu has come in so I guess it might get a bit more interesting. I’m looking forward to 4, though.

Ryuune 1-3

Ryuune’s route so far is similar to Masaki’s, but with fewer MAP attacks. The enemy groups are the same, though. For this route I get Getter G, Zeta, and Nu Gundam, all welcome sights.

Stage 4-7 (Ryuune)

This route takes place at the same time as Masaki’s, but shows another side of the story (with Kirkus’ armies). Kind of an interesting idea, but the plot is just too thin for it to be interesting. So far Ryuune’s route is a little harder than Masaki’s, but not a whole lot. There’s a lot of good terrain to sit on with EN regeneration.

(Sorry these updates are short; EX is pretty boring so I’m not that motivated to make longer updates or post screenshots.)

Still snoring along, up to Ryuune 12 now. Hathaway Noah is a character in this game; he’s a rare character in SRW. Other than that, Ryuune’s route is pretty much the same as Masaki’s route so I don’t have much more comment.

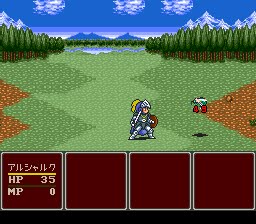
Stage R13 – Protect Zeb Temple

This stage was actually fairly hard. You have to kill all the enemies in 9 turns. I was able to make almost 200,000 from Luck plus the good enemies, but I finished the stage with almost the last attack on stage 9.

Ryuune agrees to a date with Zash (Kirkus’ son); I guess Masaki has a rival now. Maybe this will be continued in MK part 2.

I finished Ryuune’s route; the final stage is semi-hard, against 2 Valsion Kais and the Eurid. It wasn’t too bad, though. The key to the game, like most of the early SRWs, is to update all your most powerful non-beam attacks. You can kill a Valsion Kai each round until they’re dead, then go after Eurid. Put your battleship out in front because the enemies like to attack it; 5 or 6 guys should have Love seishin, which is enough to keep your HP up.

Here are pictures of the two bosses so far (the Draxil and the Eurid):

user posted image

[2019: This is in a response to the usefulness of the Dunbine units in the SNES version compared to the Playstation remake] Raising them to 130 morale in the original version is too hard, because they have no defensive seishin, and there just aren’t enough enemies. You would basically have to kill one enemy, end turn, kill a second enemy, end turn, etc. until you kill 5 or 6. You can’t really use counterattacks, since you can’t pick counter or dodge on a per-attack basis (also you can’t upgrade mobility and there’s no items, so the famed 0% of AB units is not in this game). In Masaki’s route it’s much faster just to use Breast Fire and Thunder Break to kill the Vorkruss parts. I agree with mediocrity that they are almost certainly better in the CB version.

I played through Shu 7. His route is kind of fun, because Shu is neat, but the gameplay is still mostly the same maps as before. This was a LOL:
user posted image
Safine: Watch very carefully, so that Monica doesn’t get her hands on Shu!
Chika: You don’t have to worry about that, Safine. My master has so little interest in women that I sometimes wonder if he’s gay.

(Maybe that’s only funny because they made Shu’s voice actor Koyasu Takehito.)

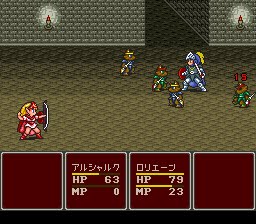
Shu’s route is the hardest in the original game. In Stage 9 you can get the Sazabi and a Doven Wolf but you have to beat all the enemies in 6 turns, without Granzon. It’s tough, but you can do it if you have Safine focus on the Quin Mantha, and take out the Dai with a hot blood MAP attack from Quattro.
Beat the game. Shu’s route is definitely better than the other two, although it is harder. What you want to do is get all the optional units and characters. Fully upgrade Granzon’s Black Hole Cluster, Solgadi’s most powerful attack, Terius’ mech’s most powerful attack, and Sazabi’s fin funnels. For the final stage vs. True Vorkruss you can set up all your guys outside of his attack range (one person has to be in his range, though, or he’ll move) and kill him in 2 or 3 turns:
user posted image

Safine will be an enemy in the last stage if her level is 30 or lower. After the battle, Monica says this:
user posted image
Monica: Safine…she was vulgar, domineering, sadistic, masochistic, a nymphomaniac, a bad person, and there was nothing you could do about it…even so…

This is her quote in the character database of Alpha Gaiden; I always wondered what the context was. (It always sounded to me like she was saying this to Safine, and I wondered what came after the “so…”, which turns out to be “she didn’t deserve to die like that”) However, I think having Safine die is not canon because she’s in 4.

Finally I’m done with EX. As I said in earlier posts, this is not a very good game. It’s definitely the worst SRW I have played so far. Shu’s route was kind of fun, but that’s about it.