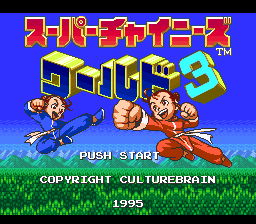
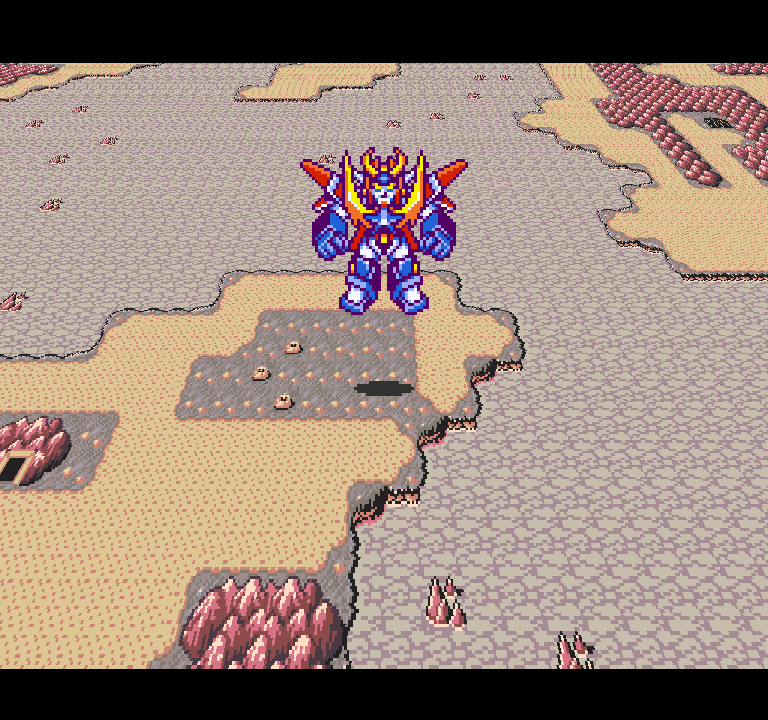
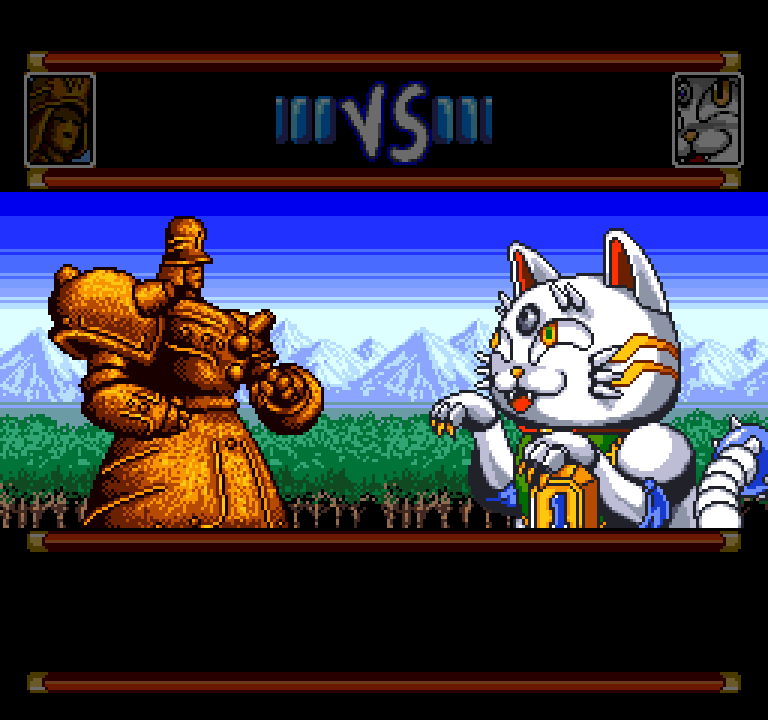
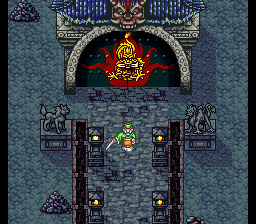
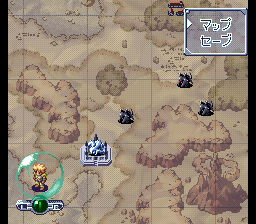
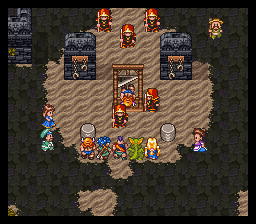
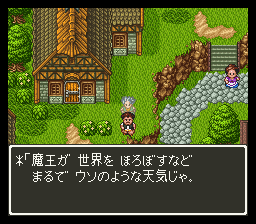
Super Chinese World 3 (スーパーチャイニーズワールド3 超次元大作戦), released 12/22/1995, developed by Culture Brain
The last SFC game of 1995 is also the last of Culture Brain’s “Super Chinese” RPGs — there are a couple of games after this with the Super Chinese title but they are remakes or not RPGs. Unfortunately the series ends with basically a whimper; this is clearly a rushed product that was shoveled out the door with relatively little effort. The game is only 12 megabits instead of 16 like the last game.
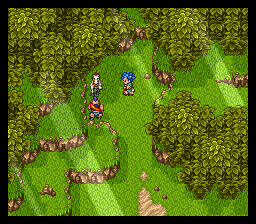
The cornerstone of the series had been its mix of Action RPG and turn-based RPG styles. For World 2, they completely removed the turn based aspect and made it only ARPG. For 3, they have two options — you can play either the ARPG mode or the Turn Based mode. The two modes have slightly different story developments so I think the intent was that you would play both modes, although from what I can tell there’s no bonus if you finish both.
I initially tried the ARPG mode but I’m just no good at this kind of combat; I found people saying the ARPG mode was braindead easy and you could just mash buttons, but I got so many game overs in the early parts that I went back to the turn based.
The saving is still done with passwords rather than battery backed memory.
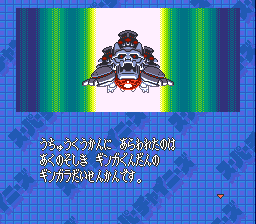
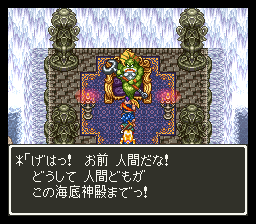
The story setup is essentially the same as before. Gingaramao is back again, trying to revive Dimetron to take over the worlds. Jack and Ryu, the kung fu brothers, initially don’t know anything about this. The storyline basically involves just trying to get to “Beautiful World” to stop Gingaramao, but there’s only one other world between the start one and that (Dino World). It’s a pretty short game; one route takes about 6 hours or so to beat. It does provide a sort of conclusion to the Super Chinese story if you care about that at all.
There are a lot of evidences of the laziness — buying weapons and armor buys them for all members of your team, for instance. In battle each character has their own HP but out of battle they all share the main character.
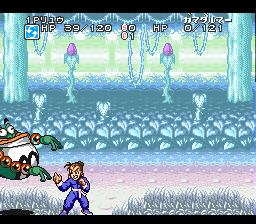
The ARPG system is the same as Super Chinese World 2, and it’s just as annoying — you fight random enemies until the game decides the fight is over. There are various moves you can do but they require Street Fighter-like combinations. Also as in SCW2, they have platforming stages.
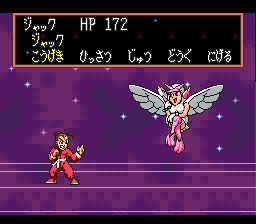
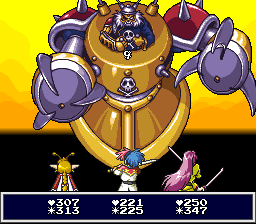
The turn based system usually has Jack and Ryu, but you can use a spell to switch between Linlin (a new character) and Shubabarn, who was an enemy in the last game but promises he’s not going to join the enemies again. You have a basic attack, and then hissatsu and jitsu (roughly techs and spells). Each one can be used a certain number of times until you rest at an inn. Bosses for some reason are 1-on-1.
Levelling is fast and there are few challenges in the game (on the turn based side at least). The final boss is the one exception; he gets 5 attacks per turn and you have to be at a decent level just to survive his attacks. I found that I had levelled up so quickly just from playing the game that I was strong enough to beat him, but this was the only boss that provided any true difficulty.
Honestly I don’t really want to write any more about this — it’s a boring game, but at least it was short. There’s a translation patch so you can try it out for yourself.
Next up is the last 1995 game, the PC Engine game Seiya Monogatari: Anearth Fantasy Stories, which I’m about 2/3 done with. It’s a genuinely good game — probably in the top 5 I’ve played for the SFC/PCE games. So we’ll have at least part 1 of that post next week.
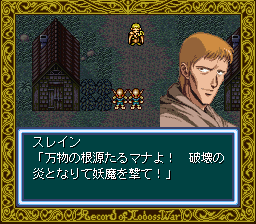
We’re continuing chapter 4, which is Parn’s adventure. I recognize plot elements from the PC Engine Lodoss game and the story seems to cover the first 8 episodes of the anime, although some of the details are different.
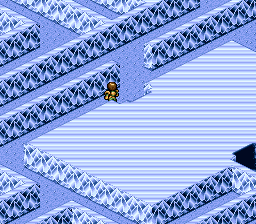
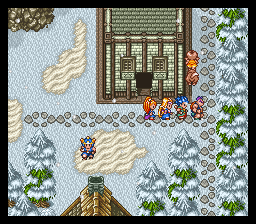
In order to find the priest who will heal the village, we have to go to an ice cavern where he has gone.
The best way to deal with the dungeons is to use Slayn’s Vision spell, take a screenshot, and then open that screenshot up alongside your emulation window. The map doesn’t show where you are, but as long as you know where you came in the dungeon is should be useful. The world map, by contrast, is completely useless because it’s hard to relate anything on the map to what’s in the actual game and there is no indication of where you are.
The most efficient way to fight the battles is to identify the leader and then without doing too much damage to him, try to knock him into the pit for the x2 EXP (you can’t kill him though, or it doesn’t count). This is easier to do once you get spells that can freeze the enemy — casting Quick on Parn helps as well to get more turns. It’s not always possible, though.
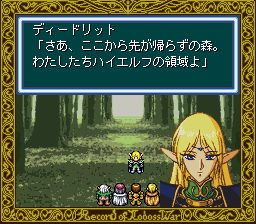
In the dungeon, the dwarf Ghim joins, and we find Neese, the healer who helps with the village. Now we hear about a plot to assassinate the king, and join up with Woodchuck the thief so that we can sneak through the sewers and get into the castle. After this, we get sent out to save the king’s daughter, get captured, escape, and finally have our full party of six (with Deedlit joining).
Now the king wants us to be messengers to two nearby castles to see if they will join us in opposing Beld. This is probably the most frustrating part because of how useless the world map is, and also there are no teleport spells (there’s one that takes you out of a dungeon, but not town to town). After this, the war starts.
After the war, we have the final event — Neese had told us that it will be possible to kill Karla if we can get the circlet from her just as she’s dying, before she has the chance to move into another body. If we do this successfully, the body she has now (Layla) could be freed, but this is a dangerous thing that might not work. Of course, first we have to get to Karla through some long dungeons.
This is the same dungeon from chapter 1 but there are no chests anymore. Coming out on the other side, we can finally reach Karla’s tower and the final dungeon.
Something went wrong for me in this dungeon. If you look closely at the map, there are two possible ways to go. One way is “rely on magic” and the other is “rely on sword”. You are supposed to choose one of the directions and then get two keys, which will unlock the bottom door. I could not get the second key, though — the treasure chest just opened and closed without giving me the item. I saw someone complaining about this on GameFAQs as well with no answer. I tried watching a video and also beating the room boss without using any magic, but none of that worked. In the end I just used a cheat code to give myself the key, but I really don’t know what I was doing wrong. All of the chests once you pass the double locked door wouldn’t open either.
The final fight is against Karla. She’s quite difficult; her companion golems block your way to her and barely take any damage. She can be silenced and frozen (by Deed’s Ice Pole spell). I did have to do a bit of grinding but I think the key is just to get lucky enough with your freeze/silence spells that she can’t cast too many damaging spells. I buffed with Slayn, healed with Eto, and attacked with Parn and Woodchuck (Ghim could never reach her).
Woodchuck then steals the circlet, but he then runs away and it seems like he is possessed by Karla. I’m not sure why they stopped the story here — I don’t know enough about the Lodoss franchise to know what story this is covering. From what I can tell from Wikipedia, Woodchuck doesn’t appear again in the anime after episode 8, so there’s no continuation to this story at least in that medium.
In any case, this is not a bad game. It has some quirks and annoyances that you do have to get used to, but the battle system is reasonably fun, the characters are clearly differentiated and have a lot of spells that are actually worth using. It does have a translation patch so it’s worth a try. There is also an optional boss against an ancient red dragon, which I didn’t attempt.
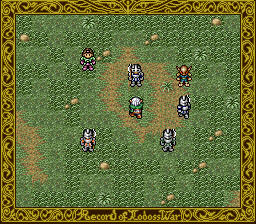
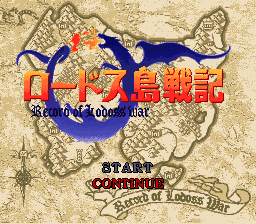
Record of Lodoss War (ロードス島戦記), released 12/22/1995, developed by Hummingbird Soft
This is yet another game based on Lodoss War; the Wikipedia article has background information on the series. But in short it started out as records of a D&D campaign and developed into a multimedia franchise. This is the fourth Lodoss War game I’ve played on this blog.
The game is divided into four chapters. The fourth chapter has the familiar Lodoss characters (Deedlit, Parn, etc) and seems to cover a story similar to the anime series and the first novels. The first three chapters are essentially prologues that cover some backstory of characters that appear in the final chapter — despite their prologue status they make up about 40% of the game.
The opening scene shows the Six Heroes battling the Demon King 30 years prior to the main storyline. They defeat him, but one hero dies and a mysterious helmeted woman helps them out.
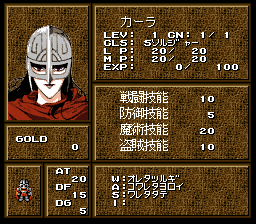
Chapter 1 follows the mysterious woman, who turns out to be Karla, a 500 year old sorceress dedicated to preserving a neutral balance between factions of the world. She has a circlet with her consciousness in it, and if she is ever killed, her consciousness inhabits a nearby person.
She starts out with no memory but quickly gets back some memories and also levels up and gains spells as she possesses other people. The basic plot of her story is to hunt down one of the remaining minions of the Demon Lord who escaped the final battle.
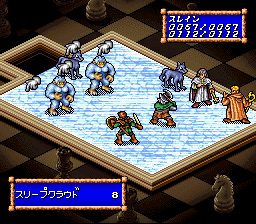
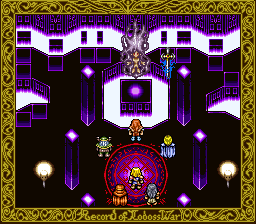
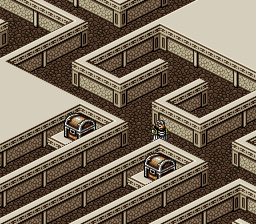
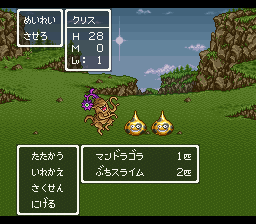
The battles take place on a small grid. Each battle has a leader, and if you finish off the leader the rest of the enemies will flee (and you’ll get XP as if you beat them). You uncover the leader usually by hitting them, and then a crown will appear on their head. Also, if you can knock the leader into the pit at the back, you’ll see CHECK MATE and get double the XP for winning the fight. You can also flee by going off the bottom of the map. The system is OK but as usual the random encounter rate is pretty high. You also get a lot of XP for battles and level very quickly.
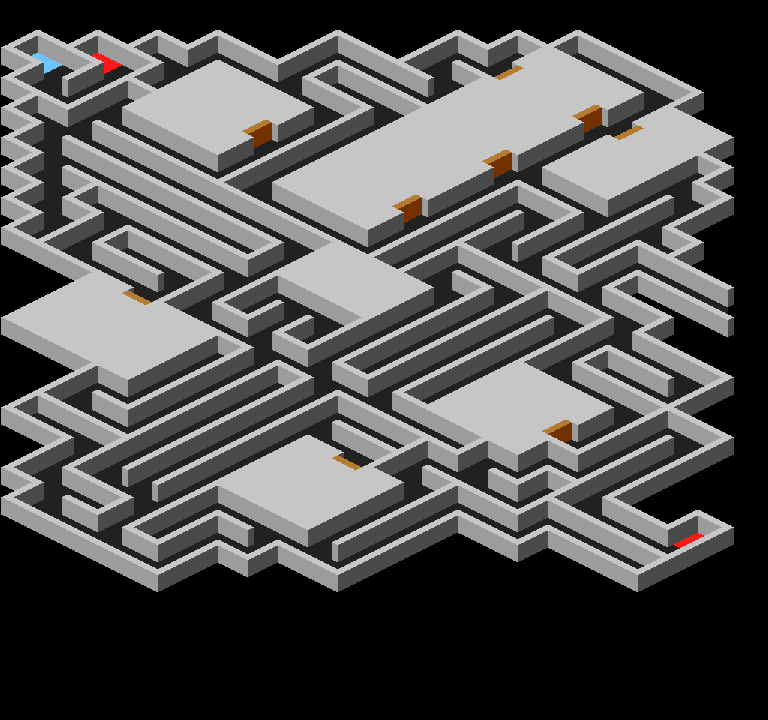
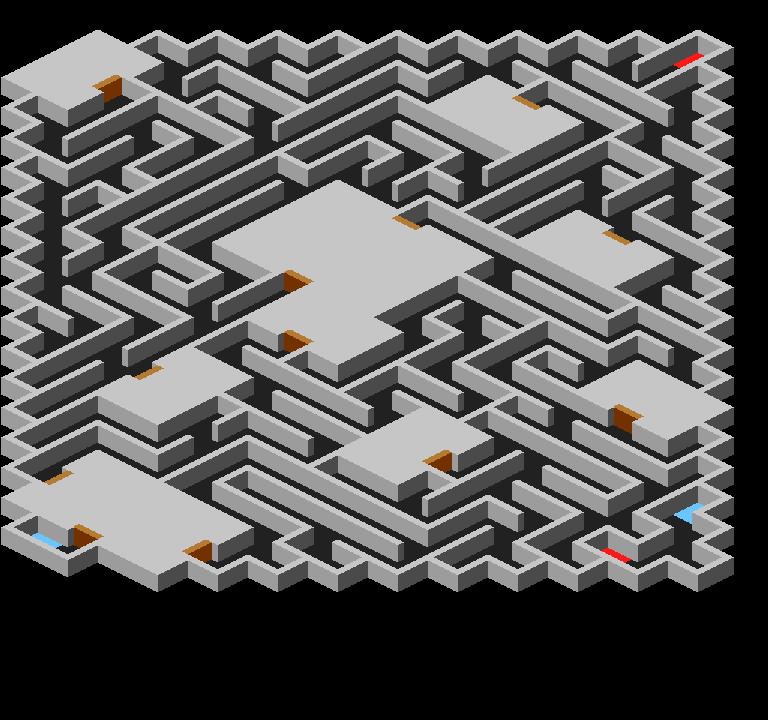
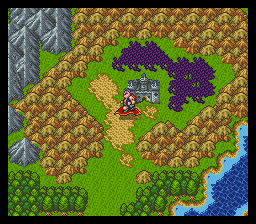
This is what the dungeons are like. At first I couldn’t figure out how the movement worked and I kept turning backwards and going ways I didn’t want to go — eventually I figured out that you are supposed to press diagonally to move, something I haven’t seen in any of these isometric view games before.
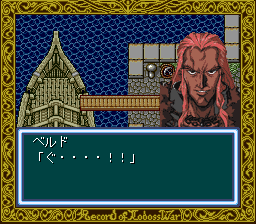
Chapter 2 is about Beld, who has a cursed sword and armor. His LP deplete every few steps and he can’t recover at Inns, but he regains all LP when the leader of a battle is beaten.
At first he’s trying to find someone to break the curse on his sword, but after that fails he decides to unify Marmo Island, by gaining the trust of the various factions on the island.
Chapter 3 concerns Fahn, another one of the Six Heroes. He uncovers a plot in Valis to take over the kingdom, but uncovers it and becomes the King of Valis himself. One of his underlings is Parn’s father.
After those prologues we reach Chapter 4. Beld has unified Mormo Island and is now attacking the mainland, with the help of Karla (who I guess feels this is necessary for neutrality). Fahn, now the King of Valis, is trying to oppose him. Parn is our main character here, the son of one of Fahn’s knights who was branded a traitor.
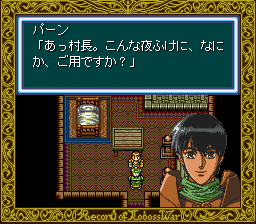
Goblins attack a girl in the woods. Parn fights them off with the help of Etoh (priest), but then the townspeople are mad that they’ve provoked the goblins who will now attack the town. This does happen at night, but they fight off the goblins with the help of Slayn the magician.
The trio go to a nearby cave to eliminate the goblins before they can attack anymore, but there are only a handful of goblins there. Heading back to the town they find that the goblins have attacked while they’re gone and hurt a lot of people, but the trio fights them off. Since Etoh’s healing power is not enough to heal everyone, the party decides to go find Neese, one of the Six Heroes, who should be able to help. They also learn about Karla and Beld’s attack on the mainland — Parn decides that after they help the villagers he’ll head to the capital to meet King Fahn.
That’s where I’ll stop here, hopefully I’ll have the game finished next weekend.
I did finish the game this week. After the Fire Bear Nation, you essentially go through the other five nations sequentially with a similar pattern — go to the nation, learn what is happening to it, and then make your way to the boss and defeat it.
The most annoying thing about all this is the very high random encounter rate. These aren’t encounters you can just hold down attack to beat — it’s appreciated that you should be using elemental attacks and such, but when there are so many of them it becomes quite tedious.
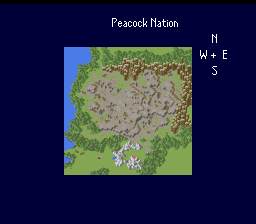
Peacock Nation
Blood is raining from the sky here, making everyone get sick. But to get to the tower with the boss we need a flying machine. This guy named Akamaru tries to trick you into giving him the key to the machine, but it turns out he’s the villain of this land. Fortunately Subaru, your second companion, shows up to help you out.
Some of her skills involve this egg/animal raising minigame, but it can’t be done if the clock is not working so I didn’t get any of those skills.
Once we get the ship we go to the bloodshed tower and finish off Akamaru.
Crane Nation
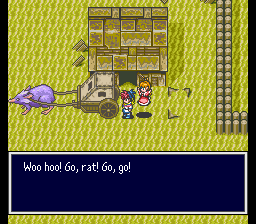
This land has suffered a severe drought that has turned everything into desert. You walk slowly through the desert but can hire a Sand Rat Cart to help out.
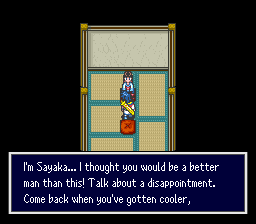
The boss here is Sara, the third of Ninigi’s underlings. We also get our third companion, Tenjin, who was one of the fire clan 600 years ago. He was in love with one of the Hell people Mizuki, but was cursed to have Mizuki inside him. He and Mizuki can switch who is in the real world but they can never meet.
Once Sara is beaten, the next person Juri absorbs Sara inside herself and then goes to the next world.
Turtle Nation
Juri has caused everything to be overgrown with forest. She’s a weird person who leads you through the world, putting up a lot of games, quizzes, signposts, and such.
Eventually though, she’s forced to fight — you fight her twice, once in the main form and then she combines with Sara and you have to fight her again.
Canine Nation
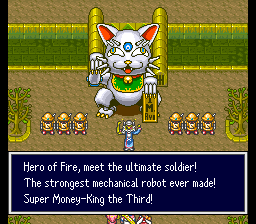
Here, some scientist has taken over and everyone has turned greedy, going after gold.
The first task is to deal with his big cat giant robot…this involves mining some gold ourselves and doing some other tasks to revive an ancient robot.
After a minigame we can get into the main castle, and beat the boss.
There’s a minigame in this nation that gives you a 1 in 3 chance to double your money, so you can save a few times and easily have several million gold which is enough to buy anything in the game.
Dragon Nation
We now have freed five of the six divine gods, the final one is the dragon in dragon nation. In a break from the past nations, we actually revive the Dragon as the first task. But this is also the land where the Gates of Hell is, so we’ll have to deal with that too.
The Dragon tells us that to beat Ninigi we’ll need Agni’s sword, which was what originally sealed him. It’s beyond the gates of Hell, and using the six stones of the divine gods we can open Ninigi’s barrier long enough to recover the Agni Sword. Higan has to do this on his own, but after going through a few tricks and traps he recovers it.
Now we go take on Ninigi in the Dragon Castle, but despite the Agni sword he wipes the floor with us and breaks the sword. So what do we do now? The Dragon tells us our only option is to go to Takamagahara in the heavens and ask Agni directly to help us. We need to use Ark’s Mirror to activate the divine ark that will take us to the heavens.
In Tamagahara, Agni is pissed off that we came to the heavens and brought conflict with us — she never liked the fact that the Fire Clan and the six nation gods rebelled against the heavens. She’ll help us if we show our strength by dealing with some of Ninigi’s monsters that have come to the heavens.
This just involves going around the heavens and beating three bosses in various towns. Higan’s “Dragon Strike” attack is helpful. The random enemies get much harder at this point.
Back at Agni’s place, one of Ninigi’s minions, the Atramentous Alabaster, is trying to break in, but we drive him off.
Higan has to go through another solo dungeon to get the Fire of Agni in his sword, and then Agni also gives the other two their ultimate weapons. Now it’s time to take on Ninigi.
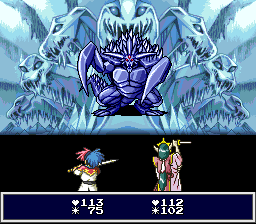
I thought this was a tough fight. Higan needs a lot of health to use his Dragon Strike, and my basic strategy was to have Subaru and Tenjin mostly healing and buffing (Tenjin gets a skill at level 50 that lets him use any spell), but I kept getting Higan’s turn right after Ninigi’s — some speed manipulation helped here.
But the game still is not over, we have to go to the Dragon Palace and fight Ninigi one more time.
This was an easier battle, I thought, but the same strategy.
Once Ninigi is beaten and sealed, Higan can choose to become the new king. I chose to become king, which seemed like a good idea.
In the end this isn’t a bad game, but it’s really hampered by two things — the ridiculous random encounter rate, and the inability to do any of the clock-based events on an emulator (which is not the fault of the original game). There are a lot of other minigames and random stuff that I didn’t cover in the post. It of course suffers with comparison to the PC Engine games with the lack of speech and CD-quality music, but it’s a decent late-SFC period game.
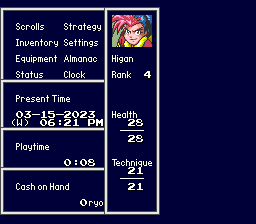
Tengai Makyo Zero (天外魔境ZERO), released 12/22/1995, published by Hudson
This is the fourth RPG in the Tengai Makyo series. The first three games were for the PC Engine, and I covered them all earlier, although I didn’t finish any of them. (See the posts on Tengai Makyo, Tengai Makyo II, and Tengai Makyo Kabuki-Den.) One of the big draws for the PC Engine games were the voice, CD-quality music, and cutscenes, which can’t really be carried over to the Super Famicom. Instead, they added a real-time clock chip that keeps track of the date and time, allowing for special events based on either the time of day or even the season of the year. The game is also one of the largest games on the SFC, using a special compression chip to allow for 72 megabits of data.
Unfortunately the clock chip creates a problem for emulation that I’m not sure can be fixed. The game of course had no way of knowing what the actual time and date was since the Super Famicom had no internal clock. Instead you set the clock/date on your first play and the chip will continue to update it even when the game is off (apparently this drained the save battery faster than other games). But in an emulator the clock can’t advance while the emulator is closed, so unless you’re willing to leave the game running when you’re not playing it, you’ll finish the game before 2 or at most 3 days have passed. I googled to see if anyone had a solution for this; the fact that I couldn’t even find many complaints about it make me wonder if there is a way people got around this. (EDIT: I think this is simply my own ignorance of how to get the clock working — other people have reported that it worked for them.)
I decided to go against my usual practice and play the English patch. Byuu/near, who developed the bsnes emulator that I’ve been using for this whole process, counted this as one of their favorite games. I don’t know exactly what involvement byuu had in this patch — it may just be that they were able to create an emulator that would actually run the game, but they may have also contributed some hacking to the patch as well. In any case, it’s interesting to play in English once in a while.
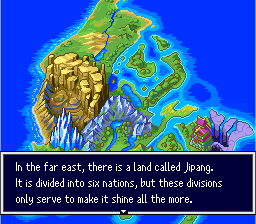
As you can see above, this once again takes place in Jipang, but in a time many centuries before the other TM games. Here the Eternal Flame has chosen a new king for the Fire Bear Nation, which turns out to be the younger brother. The older brother is so upset that he unseals the Hell Door to seek power from Ninigi who is trapped there. It’s interesting that Ninigi is the villain since in Japanese history, Ninigi is the god who becomes the great-grandfather of the first Emperor (Jimmu) and thus the ancestor of the Imperial line.
In any case, this causes the demons to come forth from Hell, and one of the underlings of Ninigi goes to each of the six countries and causes problems there. The main character Higan is a 12-year old person from Fire Shadow Village. His grandfather was a hero who fought against evil, and now he’s trying to prove himself as well.
Higan is trying to beat the “Coal Hermit” at the bottom of a nearby mine, but he’s been defeated a few times.
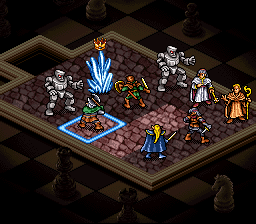
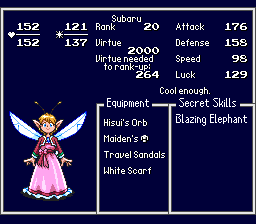
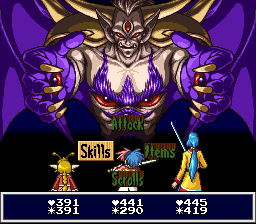
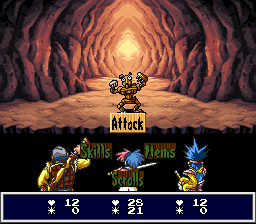
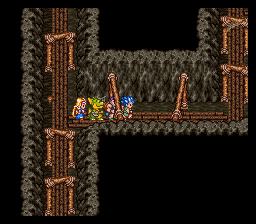
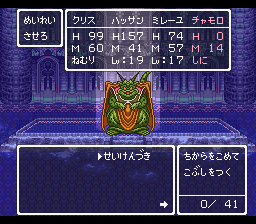
The battle system is pretty standard. “Scrolls” are the spells you get from hermits, just like in the other games. This time you don’t equip scrolls to specific people, but there are certain spells that can only be used by certain characters. The “skills” are also acquired by various events; these are specific to each character. Some are free to use, others cost tech points or HP. The game lets you set 4 “plans” that autobattle with specific commands for each person. (The two other people in the above screenshot are Higan’s friends who don’t stick around for long).
Once Higan beats the Coal Hermit and gets the Blaze Cutter skill, he heads back to the village and finds that the first of Ninigi’s underlings, Zettai Reido (“Absolute Zero”) has frozen the town and kills his grandfather. But since the Eternal Flame has now chosen Higan as the Hero of Fire, he’s able to fight off Zettai Reido, who retreats to his castle.
The basic gameplay is to visit each of the 6 areas and solve the problems that Ninigi’s underlings are causing there. Then there’s a final area (I assume) where you beat Ninigi? We’ll see.
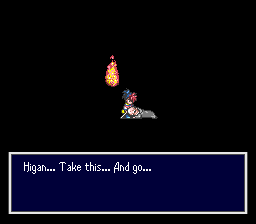
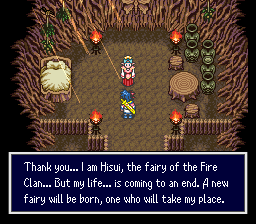
In the Fire Bear Kingdom you have to free the Fire Bear god, who has been frozen by Zettai Reido. This involves first having Hisui forge your rusty sword back into the Fire Bear Sword, and then going to the Ice Castle.
He’s pretty easy; you can just cast Singe over and over again and have Hisui heal. After this, Hisui puts the rest of her life force into the next fairy that will be born (named Subaru), but she won’t join you yet. Now with things unfrozen you can move on to the next land.
One major sidequest I haven’t been doing at all is the Tea House events. I think these are based on the Yoshiwara (red light) district in Edo, which was commonly depicted in literature. Basically you can talk to different women in the tea houses and try to get in their good graces by bringing them gifts and other things. They’ll repay you with various things — good items, or love scenes where you get your HP/MP restored, they can write you love letters, and such.
This is an interesting sidequest but the main character is 12! Why would they include this event with such a young main character? In any case a lot of the events depend on the clock also, so unless I can figure out how to get the clock to match the real world clock I wouldn’t be able to do a significant chunk of these events anyway.
I’ll end here; this is basically as far as I had gotten because it took me so long to finish Mouri Motonari. It seems like a pretty short game so I’ll probably have the finishing post up next week.
Seiju Maden Beasts and Blades (聖獣魔伝ビースト&ブレイド), released 12/15/1995, developed by BPS
This game began as a reader participation game in a magazine. These were very popular in the 80s and 90s although I don’t fully understand how they worked even after reading up on them. You sent in a postcard each “turn” to participate and then somehow things were handled through magazine articles. I know that Play by Mail games were popular here too in the pre-Internet era (I remember them being advertised in Dragon Magazine); maybe they worked in a similar way. I vaguely recall that a previous game I played also began as one of these reader participation games but I can’t find the details.
In any case, the Super Famicom game was based on the franchise; some places say the game came out December 1996 but I think the 1995 date given by other sources is probably correct.
The basic underlying story is that the world is repeatedly fighting battles between the Light and Dark Goddesses. Each time a war starts, one of the races will be chosen to split into two sides and fight for control of the world. The purpose of these wars is unknown; there is a legend that the Goddesses are fighting to become the wife of the supreme God, but why the war would have to be repeated if that is the case is unclear. The reader participation game was planned to have 5 total segments, but it ended after the first 4, so if there was going to be an answer to why the wars were actually being fought, it was never revealed. Both the magazine game and the SFC game start at the beginning of the Fifth War, when humans are the chosen race.
The game is a curious mix of strategy and RPG elements that I think some people would classify as an SRPG — it’s right on the dividing line of my criteria; I think that it may technically qualify as an SRPG under my rules but since I’m playing it either way, it’s not that important. More importantly, I feel like the game is not fully implemented, which I’ll say more about as we go along.
The game begins actually before the war has started. The main character wants to be a “beast master”; the beasts in the title refer to monsters that can be controlled by the characters. You can get beasts from a shop in town, some characters come with beasts, and the Beast Kings get their own special beasts. Over time beasts will become upset and you either have to take them to the shop to fix them (which never worked for me), or use an item that increases their friendliness. (The Beast King special beasts always stay at max friendliness).
This is an area of the game I found confusing. Every character I recruited either came with a beast that could not be changed, or couldn’t control beasts. I never bought a beast from the store or used the services because it never seemed to be allowed — I read the instruction manual but don’t see anything I was doing wrong.
The way you get companions is by using the “friend” command in town until you find someone who can join. You can’t see what type of character they are before you get them on your team which is frustrating. Each character only differs in the type of weapon they use, and whether they can have a beast or not. Weapons can be bought at the shop and also refined into better versions. I believe that each weapon has a fixed maximum it can be levelled when you buy it (maybe randomly chosen?) and if you exceed that it breaks. If you can get a level 4 weapon you can sell it for an enormous sum that will fund all your purchases for the rest of the game. I got one by luck very early in the game so after that I had no money issues.
The game doesn’t really have a strongly developing story. There are a lot of events you can activate — some of them are optional, and some you have multiple choices for which event to do in order to get the next one to open. There’s no real feeling of story progression. Some reviews I saw in Japanese complained that it was difficult to figure out what to do next (I used a walkthrough for this), and I can see that being an issue.
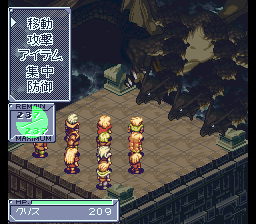
Kurisu accepts a request to go to the west cave to save a little girl. You move on an Ogre Battle like map where you send your guy in real time across the map. The “food” goes down as you move but is very easy to replenish in town. There are random encounters as you go, but most can be easily escaped from.
Battles are done on an SRPG-style grid. Each character starts their turn with a number of points, and each action takes a certain number. You can do as much as you want until you lack the points to do anything else, then that’s the end of your turn.
Inside caves and dungeons, you explore on an isometric style map. The battles in here are fixed (which is why I said that it may technically qualify as an SRPG by my rules).
As Kurisu does the first few events, he meets some of the Dark Kings who recognize that Kurisu is one of the light kings (even though he doesn’t yet) — because the war hasn’t officially started they can’t oppose Kurisu directly, though.
After doing a few of these events, Kurisu eventually learns that he is the First King of Light and heads out to Meishilva Castle to join the other Kings as the war officially starts.
The game now changes once the war starts. You can send out multiple parties at once, each headed by one of the 11 Kings (you don’t have them all at the beginning). In addition, Dark parties will appear on the world map as well and head towards towns or towards the hero parties. The game’s text indicates you should be sending out the parties to protect the towns around the world, and by selecting a town you can see how closely associated the town is with the Dark or the Light. Each town also has a defense rating.
So this seems like it should add some strategy aspects to it, but from what I can tell the system was not actually implemented. From what I saw, any time a dark unit reaches a town the town’s defense always repels it. If heroes are defeated they return to Melshiva castle and the dark unit disappears — this even happens if the hero is already on Melshiva castle. There seems to be no difference between entering a town that is aligned with the Dark or the Light. The only thing that changes is that sometimes when you go to a town you’ll have to join the defense force to fight an attacking unit before you can enter.
So for the most part there is no real purpose in using any unit but the main character, except for one story required event where you have to be using a female unit for it to activate. There are some optional events involving the individual heroes, though.
At this point your goal is simply to go around to places in the world activating various events. As I said earlier there is no feeling of any kind of forward story progression, and the dungeon that basically acts as the “final dungeon” has no feel of finality at all, it just seems like another dungeon. Once you finish that everyone goes back to Melshiva castle, and the castle itself becomes a floating palace to take on the stronghold of the Dark Kings.
This part is annoying because they take away your companions and stick you with two specific Light Kings and give you no opportunity to equip them. Even so this succession of battles was not very hard. If you have the beast masters use the “beast” command they strengthen the beasts who can then use moves that hit all enemies on screen. If you lose these fights for the first time in the game you actually get a game over (in this case I guess an ending where the Dark Goddess wins the war).
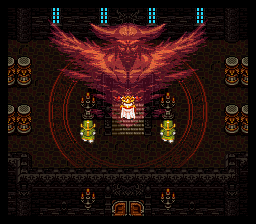
At this point the heroes go to a gate where the Light Goddess says it’s time to send the Light Dragon into the world to cleanse it of all the dark people and win the war for Light. If you accept this it apparently leads to another bad ending, so you should refuse. The main God himself then thinks this is interesting and you fight a three headed dragon.
You use all the Kings here but without their beasts. This was kind of a long fight and I lost about half the (unlevelled) Kings but in the end I won. The God decides that the people of the world can now decide their fate for themselves, and that (perhaps) the wars won’t happen again.
As far as I know there isn’t a B&B II
I don’t know about this game. It has a lot of interesting components but the actual implementation of them is kind of a mess. If you were playing this just to mess around and send out your people to various towns without worrying about making a lot of progress you might enjoy it, but it’s hard to feel that there’s any kind of story development or whether you’re doing anything productive or not. And as I said earlier, it’s hard to avoid the feeling that the designers had bigger plans for the game that they were not able to implement for whatever reason.
Game 100! Although if you include the SRPGs I played it’s actually game 128. Also, last week was 6 years since I started the blog. I have approximately 30 games left so probably it will take another 2 years or so to finish the Super Famicom games.
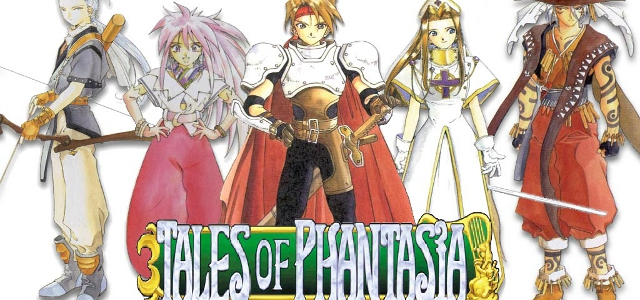
Today’s game is one that I played some years back. Since I did everything in the game I won’t play it again, but I wanted to mention it because it’s such an important game. It was developed by Wolf Team, which made Hiouden, a game I played before. I noted at the time that many of the spells in that game reappear in Tales of Phantasia.
This is, of course, the first game in the long running and popular “Tales of” series. I’ve played all of the games through Vesperia. I tend to like the 2D ones better — my favorite entries in what I have played are Destiny 2 (the Japanese one) and the DS version of Hearts.
The game pushed the limits of what the Super Famicom was capable of, with a 48 megabit cart. This is one of the largest carts of any SFC game, beaten or tied by only a few other games (Tengai Makyo Zero and Star Ocean are two of them, which I will be playing). This space was used for things like the vocal opening song and voice clips for the characters using their various moves and a few lines of dialogue. The music was done by Motoi Sakuraba, who had done Hiouden’s music.
The character designs were done by Fujishima Kosuke, a popular manga artist who also did designs for the Sakura Taisen series and would go on to design characters for some of the other Tales Of games.
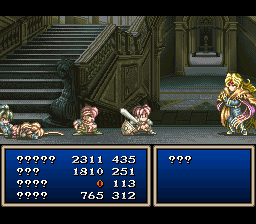
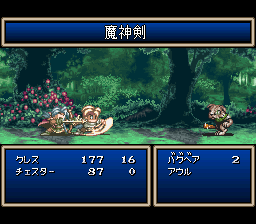
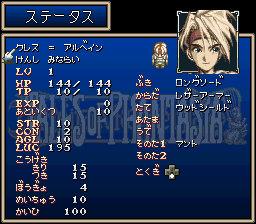
The battle system is action-ish, but in a way it’s more of a real-time command entering system than a true action game. When you make an attack, Cless (the only character you can control) runs forward to attack an enemy. As you level you will learn new moves that can be used either close to the enemy or far away (you equip different types for each). When you use a move enough you master it, and by mastering multiple abilities you learn combination “ougi” moves as well. All of these abilities take TP.
You will get other characters who essentially stand behind Cless and either cast spells or shoot a bow. You can order them to cast spells through a command menu. I found that a lot of the game was spent in the menus queuing up the spells; you have to be fast and aggressive because if you let the enemies get too far on your side, they will start attacking the defenseless magic users and you’re in trouble.
One common complaint is the very high random encounter rate. You can buy holy bottles to cut the rate which helps a lot (even if you use a holy bottle all the time, you will still fight more than enough enemies).
The story involves a group of heroes who sealed away a powerful sorceror called Dhaos, who can time travel. The descendants of those heroes have to team up to once again defeat Dhaos and restore peace to the world.
Here’s a video I made when I played it (14 years ago!) of the final battle, with my Moria-beefed party. I was playing on an actual Super Famicom thus the video quality. The SFC later got donated to byuu/near.
The game has been remade many times — the Playstation and GBA versions were basically enhanced ports but the two PSP versions were full remakes. I played the first PSP version and didn’t like it as much because it seemed like there were way too many pincer and back attacks, which doesn’t work well with this system where Cless is the only one who can really fight.
All in all this game is fine, but the later Tales games are much better; playing this one (especially in the SFC version) is probably mostly interesting to people who are big fans of the series or who just like the Super Famicom.
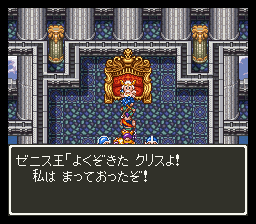
At the end of the last post I had restored the Hero’s memories as well as the Zenith Castle, so it’s time to visit the Zenethian King.
Here we learn that Deathtamoor is in the “hazama no sekai”, which means something like “In-between world” but is apparently “Dark World” in the official translations. To get there, though, we have to revive the Pegasus. The Pegasus is in a tower guarded by some of Deathtamoor’s monsters, but the boss fight was fairly easy — the spirit enemy here can use a multi-hit death spell that could be bad but I killed him before he used it.
Now with the Pegasus, we can go anywhere in the world as well as to the Between World.
We get locked into the Between world, and everyone’s HP is set to 1 and MP to 0. This cannot be healed or cured by any means (even if you leave the between world). This is because you’ve fallen into the despair of Despair Town, the first destination. Everyone there just lies around doing nothing. There is a man Clarke Ende, who came from the town of Zaxon in the real world. He once forged good armor but he’s too depressed now — however, he gives us his pipe to show his wife and child if we ever find them.
We can return to the real world from a spring to the west of the town, and show the pipe; his wife gives us Ende’s tools. When we show Ende the tools he knows we can actually travel between the worlds and this perks him up enough to forge him some armor. This also restores the spirits of the other townspeople and allows us to heal our HP/MP.
Next up is Greed Town, where everyone tries to selfishly cheat, and they’re all obsessed with this treasure that’s supposedly in the mine. All we find in the mine is a note saying that a rich man in town knows where the treasure is — he tells us it’s in a nearby lake. A bunch of townspeople gather there and start fighting over the chest, but we open it and reveal that it’s empty, the townspeople realize they were fighting over nothing and the greed of the town vanishes. It also turns out that the rich man was serving Deathtamoor.
The last of the towns here is the Prison Town, where we have to do a lot of sneaking around in soldier costumes — eventually there’s a revolt from the prisoners and we manage to take out Akbar. Akbar himself is somewhat difficult, but Hustle Dance from the hero helps a lot in healing, as does Mireyu’s Bikilt spell.
Solving this area also releases Krimut and Masarl, two magicians who are able to open the way to Deathtamoor’s Castle, the final dungeon.
The castle itself has a lot of difficult enemies, but with Hustle Dance I was able to keep up my HP. When I reached Deathtamoor, the main character still was on level 7 Superstar so I had not even unlocked the Hero job yet. I was around level 30-31, and Deathtamoor kicked my butt.
I decided to master Battlemaster for Hassan and switch him to a Dragon, then try again (originally I was going to master Dragon but that takes way too many battles). Actually Hassan’s job didn’t help very much; it was the general levels and being able to get some Hero levels that really helped.
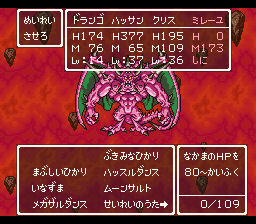
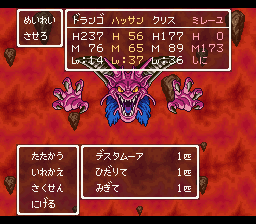
Deathtamoor has three forms. My basic strategy for all of them was the same — attack with Drango (dragon) and Hassan, use Hustle Dance or Gigaslash with Kurisu, and have Mireyu use Bikilt on Drango/Hassan if they need it (since Deathtamoor frequently eliminates our buffs), heal if necessary, and just guard if neither of those are needed. The second form uses def+ a lot so I used Kurisu’s hero ability that removes the buffs. Sometimes I used Drango’s breath attack but in general I found just attacking with both was more effective. I also had World Tree Leafs on each person in case someone needed to be revived.
For the third form, the Left Hand has to be taken out first since it can revive the others (in the DS version they made both hands revive). I swapped in Barbara here so that she could use Madante which did 650 damage to each part. From there the same basic technique as the other bosses worked, and he went down faster than I expected. I probably overlevelled.
After Deathtamoor dies, the Between World vanishes, and there’s a long ending scene where everyone goes back to their lives. I was a little confused because I thought they said the Dream World was disappearing and Barbara does vanish, but then there’s a later scene where she’s still there. Maybe Kurisu’s ability to go to the Dream World was just removed.
If I load my clear save, I can go get the Hagure Metal job book and then fight about 150 battles to unlock the bonus dungeon but I’m not going to do that. If you can beat the boss in the bonus dungeon in 20 turns you can wish for something that will change the ending, but I wasn’t able to find any description of what it actually changes (perhaps Barbara doesn’t disappear)?
In the end this is definitely a strong game and one of the best I’ve played so far, but it’s not as good as DQ5. The job system is fun but I think the battle numbers are too high, and they had to create a lot of abilities to fill out the jobs, most of which seem fairly useless. I also never recruited a single monster even though I had a maxed Monster Tamer in my party for a good chunk of the game. The dungeon design is inferior to 5 and I really liked 5’s storytelling.
DQ will show up one more time near the end, with the SNES remake of DQ3.
This game is taking me a while; partly because it’s a long game, but also because I’m actually doing things like talking to all the villagers, and there’s more to explore in this game compared to others where it’s mostly linear.
At the end of the last post I had defeated Mudo; I think the first section is intentionally playing up the stereotypical “beat the demon king” part. This unlocks Dharma Temple where you can get jobs — I feel like they delayed the job part too much (I felt the same about DQ7). Also in comparison to FF5 or other similar games, it’s a hassle to have to go back to Dharma to change jobs because if you master a job while you’re in a dungeon, you don’t want the next battles to go to waste so you warp out.
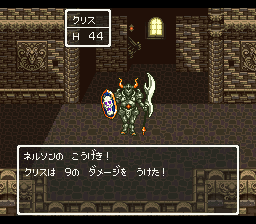
This is the way my jobs have progressed by the end of this post:
Kurisu: Goof-off -> Martial Artist (lv 2) -> Dancer -> Superstar (will then go to Hero)
Hassan: Martial Artist -> Soldier -> Battlemaster
Mireyu: Priest -> Magician -> Sage
Chamoro: Magician -> Soldier -> Magic Fighter
Barbara: Monster Master -> Magician -> Priest (will go to Sage)
Amos: Thief -> Merchant -> Monster Master (will go to Ranger)
Amos is not a very good character with this setup; I’m not sure why I’m trying to cover all the jobs: there’s a bonus dungeon where you have to have all jobs at level 5 or 6 to unlock, but that includes a hidden job that you can’t get until after you beat the game. So to unlock the dungeon you have to fight around 100 battles after you beat the game (minimum). Even then the bonus boss is very difficult unless you either do a ton of grinding, or plan in advance for it by saving stat up items and getting the right summoned monsters and jobs; I don’t plan to do the bonus dungeon at all.
Despite having Barbara in my party as a Monster Master quite a bit I have yet to recruit any monsters. I’m not a big fan of systems like this which were also in Dragon Quest V and the Monster Maker games, where everything is so opaque and difficult to acquire. It looks like getting a Heal Slime is good, but I’ve fought tons of heal slimes and haven’t recruited any of them — maybe I don’t fully understand the way the system works.
After beating Mudo, the long middle section has very little direct or plot development. Most of the time you’re not given any explicit indication of where you can go next — at times there really is just one place you can go and you have to find it, other times you’ve opened up a bunch of different areas you can try to visit. The only real overall direction you have is that (a) the Queen of Reidock told Kurisu that he needs to find the other aspect of himself to reveal his true nature, and (b) It’s clear that despite Mudo’s defeat there’s still something going on behind the scenes with the monsters.
I think this game will not appeal to people who want a lot of strong character development and plot — I know that in the US this game has often been compared unfavorably with Final Fantasy VI. Someone asked in a previous post how DQ6 was viewed in Japan. Of course sales were through the roof (3.2 million, making it the top game of 1995), although some of this is that late 1995 was a bit of an uncertain time for game makers because many of them were abandoning the SFC, but the relatively new Saturn and Playstation were not yet established as big selling consoles. It seems like DQ6 was well reviewed at the time, but I’m not sure in retrospect where Japanese RPG fans place this in their memories.
We now have access to the ship in the real world, so we can explore the NE area of the map (shoals block the way to other areas). The first town is Monstro, where someone named Amos has been changing into a monster at night. If you tell him his true identity he leaves the village and you can’t get him to join — instead you have to get a seed from a nearby mountain to make a cure for him.
Next up is Arcbolt, where the King is looking for people to defeat a monster in the nearby tunnel. After proving our worth we set out to defeat the monster, but a guy named Terry beats us to it. Terry reoccurs throughout the game (I read somewhere he was initially intended to be the main character so they could have a different style of main from previous DQ games but in the end they went with the silent protagonist instead).
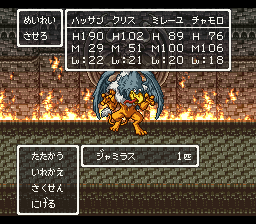
Next up is Calcado in the Dream World, where a monster named Jamiras is bewitching the people by supposedly leading them to paradise. We also take the floating island to “paradise” but instead we have to fight Jamiras to free everyone. He was tough at level 22 with still underdeveloped jobs; the strategy change that worked was to have Hassan be the main damage dealer and have everyone else focus on healing if needed. After Jaramis is beaten we get the island for ourselves to sail around in the dream world, and the Medal King’s Castle returns.
The Medal King is similar to DQ4 and 5, where you find Small Medals around the world and give them to the King for rewards. The big change here is that you no longer buy the prizes with medals, instead the prizes are just rewards for reaching certain numbers of medals. Also the Thief job has an ability that tells you how many treasures are in an area, which is a big help if you want to try to find them all without a walkthrough.
There are various small places you can visit with the island, but the next major destination is a stairway that takes you back to the real world to Holstock Castle.
The goal here is to help 15-year old Prince Holse undergo baptism in a nearby cave, but he’s too weak to fight the monsters on his own. He keeps running away and you have to track him down…I also had to leave a lot to switch people to their 2nd jobs. The reward for this part is the Magic Key, which lets us open red doors. One of them provides a way back to the dream world in a new area, where we visit the town of Clear Vale. We hear about a boy that came through on a flying bed, but he hasn’t been seen in a while. Switching to the real world we figure out it’s because the kid died. His parents tell us that a wanderer was going to give him a Badge of Courage carved from a Courage Rock nearby, but never came back.
So we head out there to give him a grave marker. This dungeon is more interesting than some of the others as you have to fall down in certain areas to advance. Once we get the rock fragment, his parents are thankful and allow us to sleep in his bed(!?) Of course we enter the dream world and it becomes the flying bed, allowing us to fly around the dream world (but we can’t pass forest, hills, or mountains).
That’s certainly a unique method of transport. In any case this once again allows a bunch of small places to visit for things like small medals or clues, but the next major destination is Foan Castle back in the real world.
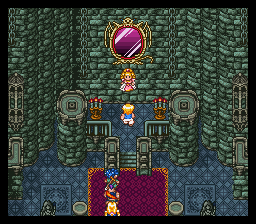
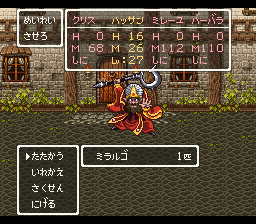
The prince here has fallen in love with a girl in a mirror, but she seems to be held captive by some unknown person. Even the Mirror of Ra doesn’t show what’s really going on, but we learn from the King that a magician called Miralgo in a tower may have something to do with it (the tower is actually back in the dream world)
He’s pretty challenging! The crucial hint to beating him I got from Ian Kelley’s very old walkthrough — Miralgo prioritizes keeping up an anti-magic shield which breaks after one spell, so if you keep casting a weak spell on him to break it, he’ll waste a lot of turns. I still had to try it several times to get some luck out of the AI (if he just keeps summoning monsters and casting Begirama it’s hard to win even with that tactic). Beating Miralgo frees the lady from the mirror to marry the prince, and he opens a watergate for us that allows us to sail into the south of the real world.
Next main destination is Pescani, where we encounter a man that is in love with a mermaid that got separated from her tribe.
We return her to her mermaid tribe and they give us the Mermaid Harp which allows us to go underwater. There are a number of things to find here — an Inn (I don’t understand how they make money), the goddess from the beginning of the game (who doesn’t really do anything), a sunken ship with the Final Key (allowing us to go back for treasures to previous areas), and Poseidon’s cave (he tells us to kill Glacos). We can also access the Slime Arena (a minigame with monster fighting) and the Style Contest.
The Style Contest is pretty annoying. Ever since the beginning of the game, you can see that every piece of equipment has a “coolness” rating associated with it. The main application of this is the style minigame, where you have to beat other contestants. You have to clear level 3 (220 style points) to get the flying carpet to win the game; this is not particularly easy. I eventually did it with several pieces of platinum equipment for the hero, a couple of Beauty Grasses, and some other accessories. But the contest takes forever to do even with speedup and I wish they had just kept it an entirely optional game. You can keep doing it up to level 8 if you want.
Anyway, Glacos’ lair requires you to push buttons to raise and lower water levels to advance. I had to leave many times here because everyone was reaching their 3rd jobs. Glacos is a relatively tough boss; I had been using Barbara because of her monster master skills but I switched in Chamoro because she had learned Bikilt (doubling damage). With this cast on Hassan, he could build power and use the Seikenzuki which would do about 400 damage. This allowed everyone else to focus on healing if necessary and just contribute damage if they could.
Glacos’ defeat restores the town of Calberona. It turns out this is where Barbara was from, and the people there teach her the Medante spell and also restore the flying carpet.
At this point there is no real indication of what you should do. Here and there we’ve been hearing about four pieces of “legendary equipment”, and now with the flying carpet we can get them all and bring this section of the game to a close.
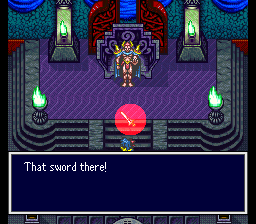
The Sword of Ramias is on Mt. Snow. Terry actually beats us to it but when he sees it’s just a rusty piece of junk he lets us have it. Someone in the nearby town gives us a pass to enter the city of Longadeso to find a legendary smith who can repair it.
Next, the armor is in Castle Grace, which can be accessed with the flying carpet. The castle is in ruins, but a well takes us to the dream world where we see the last days of the castle — the king tried to summon Deathtamoor in the hope of controlling him, but of course Deathtamoor just killed everyone instead. While evacuating the people, the guards chief hid the armor. Back in the real world we can search the place where the armor was hidden and find it.
The shield is in a cave north of a place called Gandino; to find it you need the help of a number of clues that you may have collected up to now (only one of them is really necessary, the one you get from Gandino — the other ones just make it so you don’t have to wander around the dungeon as much).
Finally, to get the helm it’s time to go to Lifecod (the starting village) in the real world. There we meet the real world Kurisu, who came here recently without his memory. When the town is attacked, the real Kurisu reluctantly agrees to merge with the dream Kurisu, and we learn what actually happened. As was clear from early on in the game, Kurisu is the prince of Reidock who went out to fight Mudo to help his parents. In the opening scene, Mudo split Kurisu into two parts, with one going to each world.
Now that the Kurisus have merged into one, we can go back to Reidock to tell the king and queen. Kurisu still doesn’t have a complete memory of himself, but that night he goes around to various places in the castle to see flashbacks of his early life.
The King then gives Kurisu the legendary helm, and the smith has finished the Legendary Sword, so we have them all. Now we have to go to a shrine west of Gandino to use all of the equipment.
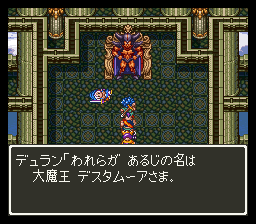
This causes the Cloud Castle (the Zenethian Castle from DQ4 and 5) to come down; unfortunately it has monsters in it, including Duran. He sends a number of his underlings at us, including Terry, and then fights us himself. At this point I had people with Bikilt — Kurisu’s Hustle Dance (restore HP to all) would have helped, but I learned it right after the battle. But Hassan with Bikilt can almost do the battle by himself, leaving everyone else to heal.
Afterwards, Duran says that Deathtamoor is still remaining, who is much greater than Mudo, Juramis, and himself. Terry also joins the party, and we now enter the final part of the game. Which hopefully I will have finished next week.
Dragon Quest VI (ドラゴンクエストVI 幻の大地), released 12/9/1995, developed by Heartbeat, published by Enix
It’s been quite a long time, but we’re back to Dragon Quest. DQ5 was one of the earliest games I played for the blog and it’s still one of the best. 3 years was the longest gap between DQ games (although the space between 6 and 7 would be longer).
The basic gameplay is familiar; as usual DQ continues with the same general feel, familiar sound effects, Toriyama’s monster designs, and such. There are a number of interface improvements (like the Bag that stores extra items), but the big gameplay change is the new class system. DQ3 had a class system that was fairly rudimentary — you chose a class at the beginning of the game for each character (except the Hero) and could change that class at Dharma Temple upon reaching level 20. There was a hidden Sage class that could only be accessed by a “Goof-off” or with a hidden item.
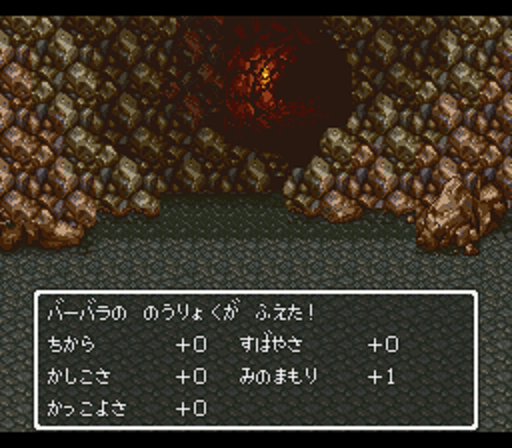
In DQ6, about a third of the way through the game you revive Dharma Temple and can then choose classes for characters. Each class has 8 levels, and the levelling is based on fighting a certain number of battles. There are second-tier classes that you unlock by mastering two basic classes, and there is a Hero class that can be accessed by mastering one second-tier class for the main character, or all four second-tier classes by anyone else. Finally there are two hidden classes that can only be accessed by using items, one of which can only be found in the post-game content. (This system would be repeated in DQ7 with some modifications).
This brings a large number of new skills and abilities to the game. In battle there are many more options that do not cost MP, leading to something of an imbalance (the classes are inherently imbalanced at any rate).
The game begins with a dream sequence where the main character (Kurisu) and some companions are taking on the demon lord Mudo. But, it turns out this is a dream sequence, and Kurisu wakes up in his home village Lifecod.
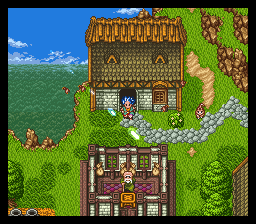
The graphics are much improved from 5 and another good example of late-SFC era pixel art. Kurisu has been chosen to go down the mountain to sell some town goods and buy a tiara for his sister, who will be the priestess of this year’s spirit festival.
Rather than the usual blue slime to start off, they give us mottled slimes. This mountain path is actually one of the harder dungeons in the game because it’s just weak Kurisu and you have no Return/Escape spell. It takes some grinding or just exploring before you can make it down. However, I appreciate as always that if you die, DQ sends you back to the previous place you saved with any items/XP intact but half your gold. This game adds a bank you can store money in that will not be affected if you die.
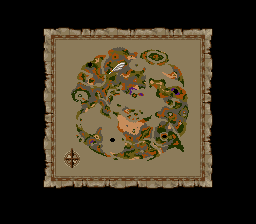
Anyway, Kurisu makes it to Sienna at a beefed up level 4. This town has a bunch of bazaars and other things. You can buy a world map and a thief’s key (I think the World Map is not so useful despite what walkthroughs way; you do want it eventually but you can come back here later and buy it). I spent all my money on those things rather than equipment.
Turns out the tiara maker left down to the west and hasn’t come back, so Kurisu hunts him down hanging by a thread on the edge of a huge hole. Kurisu saves him but falls down the hole instead, and finds himself in some kind of parallel world where nobody can see him.
Apparently this world is having trouble with Mudo as well. In any case there’s not much to do here except take the well back to the surface and head back to Sienna — the tiara maker is so grateful that we saved his life that he gives the tiara for free. Kurisu heads back to Lifecod to do the spirit ceremony.
During the ceremony, the spirits come and tell Kurisu that it’s his destiny to go beyond the village and fight the darkness that’s threatening to world. So Kurisu gets a letter from the elder so that he can pass the barrier gate, and heads to Reidock Castle where the king is looking for warriors to fight against Mudo.
In Reidock, Kurisu meets Hassan and goes out to compete against other people to recover an item from the Trial Tower.
This is one of the few dungeons in the game that has a good construction — one of my biggest disappointments about this game compared to 5 is the dungeons. 5’s dungeons had a lot of individuality and were more than just tunnels and treasures. I always appreciate games that do this (Breath of Fire 1 was another good one for this). DQ6 trends much more towards the “tunnels and treasures” style that is a staple of lower budget games and old NES-era stuff.
Now that Kurisu passes the test, he’s given the mission to find the Mirror of Ra so that they can expose what’s going on with Mudo. Hassan wants to go to, but they decide first to tame a wild horse that will give us the cart (enabling us to have a bigger party).
Nobody really knows where the Mirror of Ra is so we set out without much of a goal, only to happen on yet another one of those holes to the other world.
We do find someone here in San Marino that can see us — Mireyu, who along with Hassan was the party in Kurisu’s dream at the beginning of the game. Apparently she was also transparent at one point but an old woman helped her. Said old woman can make us visible if we bring her a Dream-seeing drop (the name here seems to be a clue to later revelations). This does in fact work, and now that we’re visible we can take a ship to the Reidock Castle in this world.
In Reidock, it seems that the King and Queen have been sick for a year, and that Kurisu is mistaken for the prince of the kingdom (if you buy the Noble Clothes at the store). Although they quickly figure out that Kurisu isn’t actually the prince and ban him from the castle.
At this point we do a little story that switches between the two worlds, and starts to hint at what’s really going on — we switch to the starting world after sleeping and recover a ring for an old woman who says she dreamed of us. But then we get the key for the Mirror Tower and it’s time to get the Ra Mirror.
The tower gives us our fourth party member, Barbara, another ghostly person (who we can turn solid with another Dream Drop) — she had come to the tower hoping that the Ra Mirror could tell her what was wrong. In any case, we recover the Mirror and it’s time to go back to Reidock Castle (in our world, since they still won’t let us into the castle in the other world).
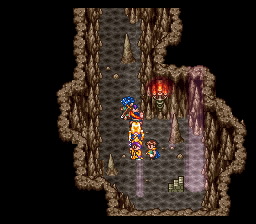
But the mirror reveals a strange truth — the “King” is actually the Queen, who says that the real King is apparently Mudo somehow. So we need to go Mudo and reveal his true form with the mirror. Mudo’s castle is far to the SE and requires going through a pretty long and involved cave — fortunately once you get through there you can use Rura (the town warp spell) to get back to the castle.
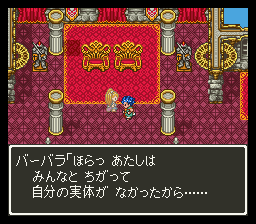
Barbara’s well known bad stat growths
Mudo himself is somewhat challenging but I was able to beat him at level 16. The Mirror of Ra reveals him to be the King of Reidock…the King from the alternate world. Although this is where the truth of the worlds is revealed: the world you begin the game in is the Dream World, and the “alternate world” is the real world. And back in the real world, we have to deal with the real Mudo.
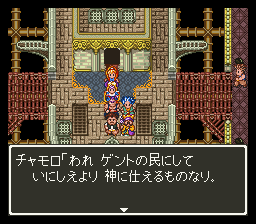
This requires getting the God Ship from the Gent people; you also get the 5th party member Chamoro here, as well as the Gent Staff which is very very useful (casts Behoimi when used as an item). Now it’s off to Mudo, which requires another long cave and castle. In the castle, Hassan comes across a statue that he merges with to become his true form (presumably the statue is the stone figure from the opening).
When the party reaches Mudo, the same thing happens at the very beginning of the game — he turns them all to stone and Kurisu wakes up in his bed in Lifecod. I think the suggestion here is that what happened in the opening was not actually a dream, but was (perhaps?) the Prince of Reidock taking on Mudo for real. But I’m not sure. In any case the Ra Mirror reveals the truth and Mudo himself fights us.
This is a very difficult fight. Mudo has two forms, the first one he appears with two other monsters (who he’ll summon again if you beat) and the second can attack twice. It helps a lot to have Skult (the party def up spell) for Mireyu, and Zaoral (the revive spell) with Chamoro. I was at level 18 when I beat him.
Afterwards, the Queen of Reidock tells Kurisu that he is actually the Prince but needs to find his true form (presumably the statue, just like Hassan did) and sends us out with the Gent ship. Darma Temple has also revived (in the dream world) so we can use classes. This is what I chose:
Kurisu: Goof-off (I should have done Martial Artist 2 levels first to get the spin kick move, I did this after mastering Goof-off)
Hassan: Martial Artist
Mireyu: Priest
Chamoro: Magician
Barbara: Monster user
I’m not sure that monsters are especially useful but I decided to make one anyway.
This is how far I got when I played this game many years ago when the English patch first came out. At this point the game opens up a lot and there’s more freedom, but this is a good place to end this post.